Family Emergency Plan: How to Make One That Actually Works
Most families have talked about having a plan. Very few have actually made one. There is a big difference between “we know what to do” and “we have written it down, practiced it, and everyone knows their role.” When something goes wrong, and stress is high, and time is short, the second kind of plan is the only kind that works.
This guide walks through every part of a real family emergency plan. Not the vague “have a plan” advice you find on government websites. The actual steps, the specific decisions, and the tools that make a plan stick when things get hard.
Why Trust This Guide?
This article was researched and reviewed by contributors with hands-on experience in emergency preparedness. They have tested gear, built real systems, and lived through situations where these skills actually mattered.


Why Most Family Plans Fail
The most common emergency plan sounds like this: “We would meet at the corner” or “We would call each other.” That is not a plan. That is a hope.
Real emergencies knock out cell service. They send kids to a school lockdown before parents can leave work. They force a choice between two evacuation routes when one is blocked by fire or flooding. They hit elderly relatives who cannot move fast. They affect pets that nobody thought to include.
A working plan answers all of those situations before they happen. It lives on paper (because phones die), it gets practiced (because panic erases memory), and every family member knows their part.
The good news: building this plan takes a few hours, not days. Once it exists, it mostly runs on autopilot. You update it once a year and run a drill every few months. That is the whole commitment.
Step One: Understand the Two Main Scenarios
Every emergency falls into one of two categories. Your plan needs to cover both.
Scenario 1: Shelter-in-Place
Sheltering in place means staying home and protecting yourself inside your house. This is the right call for:
- Air quality emergencies (wildfire smoke, chemical spills)
- Severe weather events (tornadoes, blizzards)
- Civil unrest or public safety events
- Pandemics or disease outbreaks
- Short-term power outages where roads are unsafe
When you shelter in place, your home becomes your base of operations. You need supplies on hand, a way to monitor news and alerts, and a plan for what to do if conditions inside the home become dangerous.
Key shelter-in-place decisions to make in advance:
- Which room is the safest for different threats? A basement for tornadoes, an interior room for chemical events, a room you can seal with plastic and tape for air quality emergencies.
- How much water and food do you have at home right now?
- Do you have a battery-powered or hand-crank radio to get emergency alerts without power?
A good alert radio makes a real difference here. The Midland ER310 emergency radio runs on batteries, hand crank, and solar, and it receives NOAA weather alerts. It gives you information even when the power and internet are both out.
Scenario 2: Evacuation
Evacuation means leaving your home and getting somewhere safer. This is the right call for:
- Wildfires, flooding, or hurricanes with advance warning
- Gas leaks or structural damage to your home
- Mandatory evacuation orders from authorities
- Situations where staying puts you in more danger than leaving
Evacuation requires pre-made decisions about where you will go, which route you will take, and what you will bring. Making those decisions under pressure is hard. Making them ahead of time is easy.
Key evacuation decisions to make in advance:
- What is your primary destination? A relative’s house, a friend in another city, a hotel?
- What is your secondary destination if the primary is unavailable?
- Which routes will you use? Know at least two.
- What goes in the car? (More on the emergency binder later.)
- How much fuel do you keep in your car? The rule most preppers follow: never let it drop below half a tank.
Step Two: Pick Your Meeting Spots
Your family needs two meeting spots: one in the neighborhood and one out of the area. These are places where anyone in the family can go if you get separated and cannot reach each other by phone.
Neighborhood Meeting Spot
This is for emergencies that happen close to home, like a house fire. It needs to be:
- Within walking distance of your home
- Easy for kids to find on their own
- Not inside your home or directly next to it (if your house is the problem)
Good options: a neighbor’s house you trust, the corner of a specific intersection, a park, a church or community center. Pick something specific. “Down the street” is not specific enough. “The stop sign at Oak and 5th” is.
Write it down. Put it on the communication card your kids carry in their backpacks.
Out-of-Area Meeting Spot
This is for larger emergencies where your whole neighborhood is affected, like a wildfire or flood that forces everyone out. Choose:
- A location at least 20 to 30 miles away
- Somewhere everyone can get to independently
- A public landmark or address that is easy to find
Good options: a relative’s house in another city, a specific hotel that everyone knows, a library or community center in a nearby town. Make sure everyone knows the physical address, not just “Grandma’s house.”
Step Three: The Out-of-State Contact Strategy
Here is something most people do not know: after a regional disaster, it is often easier to call someone out of state than to call someone across town.
Local cell networks get overloaded fast when a disaster hits. Everyone in the affected area is trying to call at once. Lines clog. Calls fail. But a call routed through a different cell region, to an out-of-state number, often goes through more reliably.
Pick one person outside your state to serve as the family’s central communication hub. This person should:
- Be someone all family members already know and can remember
- Be reachable by phone, text, and if possible, by email
- Know their role and agree to play it
- Have contact information for every family member
The way it works: if your family gets separated and local calls are failing, everyone calls or texts the out-of-state contact. That person passes messages between family members. “Mom called, she is at the school. She will be there until 5 PM.” “Dad is sheltering at the Riverside Community Center.”
Write this person’s name and number on every communication card in your plan. Make sure even your youngest kids can recite it or read it.
Step Four: Build Your Communication Plan
A communication plan answers one question: how does your family reach each other and coordinate when everything is going wrong?
When Cell Service Is Down
Do not depend on cell phones as your only communication tool. Here is what works when networks fail:
Text before calling. Text messages use less bandwidth than voice calls and often get through when calls cannot. If the network is congested, a text may arrive when a call cannot connect.
Use landlines if available. Traditional landlines run on separate infrastructure from cell networks and often survive when cell towers are overloaded or knocked out.
Have a physical meeting plan. If all communication fails, your pre-decided meeting spots take over. You do not need to reach each other if everyone already knows where to go.
Two-way radios for short range. Within a neighborhood or between cars in a convoy, two-way radios work when phones do not. The Midland T71VP3 two-way radios are a solid choice for families. They are waterproof, have a range of up to 35 miles in ideal conditions, and include a weather alert feature.
NOAA radio for incoming information. Your emergency radio does not just help you communicate outward. It lets you receive official emergency broadcasts and alerts when the internet is down.
The Family Communication Card
Every family member should carry a laminated card with key contact information. Laminated card holders keep these cards from getting destroyed in a wallet or backpack.
Here is a template you can fill in for your family:
Print one card per family member. Laminate them. Put one in every backpack, wallet, and glovebox. Kids should also memorize the out-of-state contact number, even if they cannot remember anything else.
Step Five: The Kids at School Protocol
One of the scariest scenarios for parents is an emergency that happens while kids are at school. The good news is that schools have protocols. The challenge is making sure your family’s plan meshes with the school’s plan.
What to Do Before an Emergency Happens
- Learn your school’s emergency and lockdown procedures. Most schools will share these on their website or at the start of the school year.
- Make sure the school has your current contact information, including cell, work, and backup contacts.
- Designate at least two trusted adults who are authorized to pick up your child if you cannot. Register them with the school.
- Know where the school’s reunification site is. In some emergencies, students are not released at the school. They are bused to a designated reunification location.
- Ask the school how they will communicate with parents during an emergency. Text alert? Automated call? Website update?
What to Do During an Emergency
- Do not rush to the school. In a lockdown, parents arriving at the school can complicate the response and may be turned away.
- Monitor the school’s official communication channels.
- Go to the reunification site if one is announced.
- Have your ID ready. Schools require identification to release children.
- If you cannot get there, make sure your designated backup adult is on their way.
For Younger Kids
Make sure younger children know their full name, their parents’ full names, and at least one phone number they can give to a trusted adult. Even a five-year-old can memorize one phone number with a little practice.
Some families add a small personal alarm to their child’s backpack. These small devices emit a loud alarm that can attract attention if a child is scared or lost. They are simple, cheap, and give kids a sense of having a tool they can use.
Step Six: Special Needs Family Members
Every family has members who need extra consideration in an emergency. Older adults, family members with disabilities, or anyone who takes regular medication requires specific planning.
For Older Adults or Family Members with Mobility Issues
- Can they evacuate quickly on their own? If not, who in the family is responsible for helping them?
- Do they live separately? Make sure they are included in your communication plan and know where to go.
- Know the locations of any medical equipment they depend on, like oxygen concentrators or dialysis machines. These require power or have limited supply.
- Register with your local utility company if they are on life-sustaining equipment. Some utilities have priority restoration programs.
- Talk to their doctor about what to do in an extended emergency with limited access to medical care.
For Family Members with Disabilities
- Include their specific needs in your written plan.
- If they use a wheelchair, power chair, or other mobility device, know how to transport it.
- If communication is a challenge, develop a non-verbal signal system for emergencies.
- Pack extra adaptive equipment, supplies, or comfort items in your emergency kit.
For Everyone Who Takes Medication
- Keep a list of all medications, dosages, and prescribing doctors in your emergency binder (more on this below).
- Try to keep a small extra supply of critical medications. Talk to your pharmacist about how to build a small emergency reserve.
- Know the generic name of every medication in case you need to get a refill at an unfamiliar pharmacy.
Step Seven: Pets
Pets are family. They need to be in the plan.
The biggest problem with pets and emergencies: many emergency shelters do not accept animals. If you wait until the last minute to evacuate, you may face an impossible choice. Planning ahead avoids that situation.
Before an Emergency
- Identify pet-friendly hotels along your evacuation routes. Keep a printed list. Apps and websites go down.
- Know which friends or family members outside your area could shelter your pets.
- Look into pet-friendly emergency shelters in your county. Some areas have them. Many do not.
- Make sure your pets are microchipped and their registration is current with your current address.
- Keep a photo of each pet with you so you can identify them if separated.
Emergency Kit for Pets
Pack a small bag or add to your family kit:
- Three to seven days of pet food in a waterproof container
- Water and a collapsible bowl
- Any medications your pet takes
- Copies of vaccination records (shelters and boarding facilities may require these)
- A leash, carrier, or crate
- A comfort item like a toy or blanket
During an Evacuation
- Load pets early. A scared pet can escape, hide, or become difficult to handle when the pressure is on.
- Never leave pets behind if you can help it. Animals left in disasters often do not survive.
- If you truly cannot bring a pet with you, leave extra food and water, leave an interior door open so they can move through the house, and post a notice on your door for rescue workers.
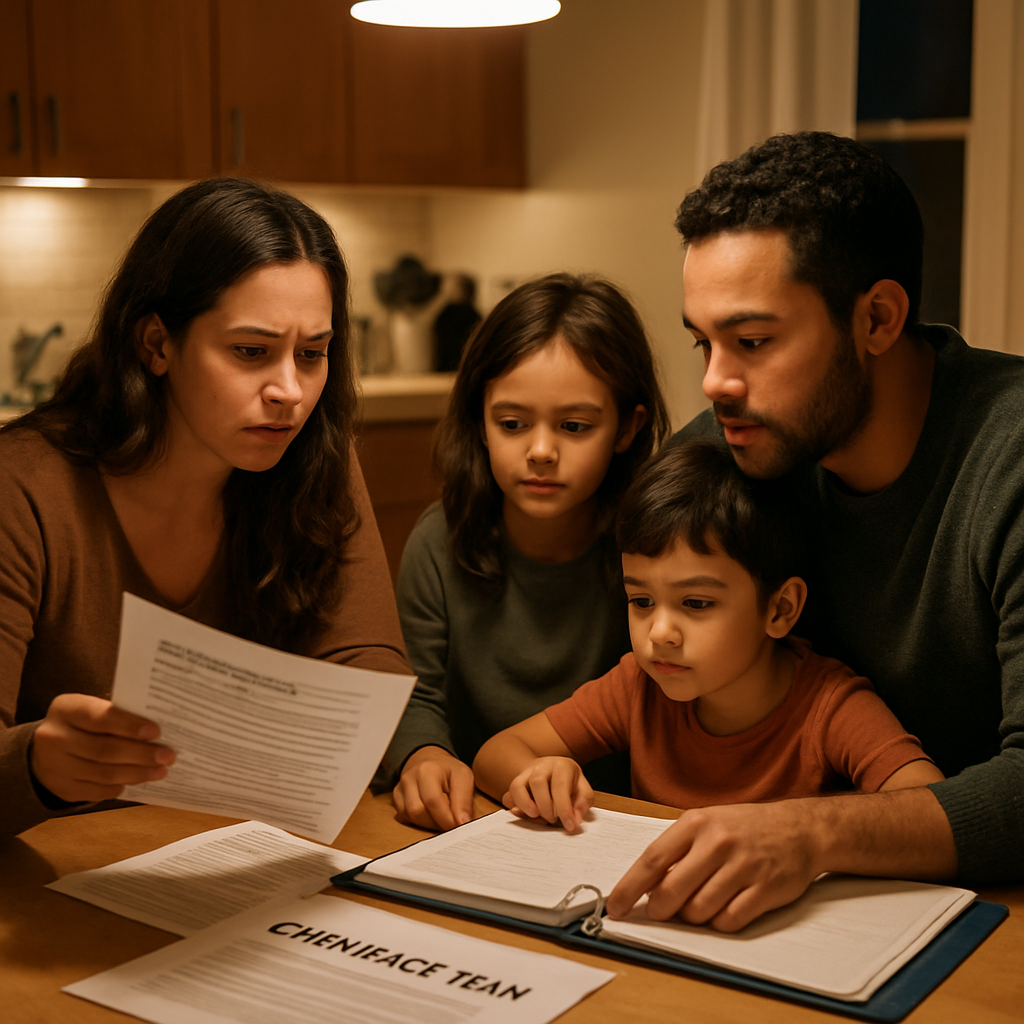
Step Eight: Build Your Family Emergency Binder
The emergency binder is the physical backbone of your plan. It keeps every critical document in one place, organized and protected, ready to grab in under two minutes.
A good family emergency binder is structured, labeled, and kept somewhere everyone in the family knows. Pair it with a waterproof document organizer for protection against flooding, rain, or any wet disaster scenario.
What Goes in the Binder
Section 1: Contacts and Plan
- Your family communication card (one per member, plus extras)
- Out-of-state contact information
- Neighborhood and out-of-area meeting spots with addresses and maps
- Evacuation routes (at least two, with written instructions)
- Local emergency numbers (police non-emergency, fire non-emergency, utility companies)
Section 2: Identity Documents
- Copies of all birth certificates
- Copies of all passports
- Copies of Social Security cards
- Marriage certificate (if applicable)
- Copies of driver’s licenses and state IDs
- Immigration documents (if applicable)
Section 3: Financial Documents
- Bank account information (account numbers and routing numbers)
- Insurance policies (home, auto, health, life) with policy numbers and company contact info
- Mortgage or lease information
- A small amount of emergency cash (ATMs and card readers stop working when power is out)
Section 4: Medical Information
- Health insurance cards (copies)
- Medication list for every family member (name, dosage, prescribing doctor, pharmacy)
- Medical history for any family member with chronic conditions
- Vaccination records for children
- Doctor and specialist contact information
Section 5: Property and Vehicle
- Home deed or rental agreement
- Vehicle titles and registration
- Photos of your home’s contents for insurance purposes
- Vehicle insurance cards
Section 6: Pet Records
- Vaccination records
- Microchip numbers
- Vet contact information
- Photos of each pet
Keep originals in a fireproof safe at home. Keep copies in the emergency binder. Keep a digital backup somewhere that is not in your house.
Step Nine: Digital Backup of Documents
Paper burns, gets wet, and gets left behind in a panic. Digital backups are your insurance against losing the binder.
Scan or photograph every document in your binder. Store the files in at least two of these places:
On a USB drive. A small USB drive kept in your binder or emergency bag gives you access to your files on any computer. Use a reliable brand and replace it every few years. Keep the files in a simple folder structure you can navigate without internet.
In secure cloud storage. Google Drive, iCloud, or a similar service lets you access your documents from any device with an internet connection. Use a strong password and two-factor authentication.
With your out-of-state contact. Email them an encrypted zip file of your key documents. If you lose everything, they have your records.
At a trusted family member’s home. A second physical copy at a relative’s house in another city is a simple, reliable backup.
Update your digital backup every time you update the physical binder. Put it in your calendar as an annual task.
Step Ten: First Aid for Your Family
No emergency plan is complete without basic first aid supplies and the knowledge to use them.
The Adventure Medical Kits family first aid kit is a solid choice. It covers a wide range of needs and comes in an organized, waterproof case with instruction booklet.
Beyond the kit, every adult in the family should know:
- How to stop bleeding with direct pressure
- Basic wound cleaning and bandaging
- How to recognize and respond to shock
- How to help a choking person
- Basic CPR (take a class, not just a video)
If you have children, consider a Pediatric First Aid and CPR class. Many hospitals, fire departments, and community centers offer them at low or no cost.
Know the location of the nearest emergency room before you need it. Write it in your binder.
Step Eleven: Practice Drills
A plan that has never been practiced is a plan that will fail. Drills feel awkward. Do them anyway.
The goal is not to scare anyone. The goal is to make the plan automatic so that under real stress, your family moves without having to think.
How to Do Drills Without Scaring Kids
Frame it as a skill, not a threat. “We are going to practice being a great team in an emergency” lands differently than “What would we do if there was a fire?”
Make it age-appropriate. A three-year-old practices walking to the front door and waiting for a grown-up. A twelve-year-old practices the full evacuation route and knows how to call the out-of-state contact.
Debrief afterward. Ask what went well, what was confusing, and what you want to do differently next time. Kids often notice things adults miss.
Keep early drills low-key. Start with a daytime walkthrough. As your family gets comfortable, add more realistic elements.
Use positive reinforcement. Celebrate what went well. Focus on improvement, not failure.
Drill Schedule
Putting It All Together: Your Action Checklist
Here is everything you need to do to build your plan. Work through this list over a few weekends and you will have a complete, working family emergency plan.
Week 1: Make the decisions.
- Choose your neighborhood meeting spot. Write down the exact address or intersection.
- Choose your out-of-area meeting spot. Write down the full address.
- Choose your out-of-state contact. Call them and tell them their role.
- Identify your two evacuation routes. Write them out in step-by-step directions.
- Decide your safe room for shelter-in-place scenarios.
Week 2: Build the binder.
- Get a family emergency binder and organize it into sections.
- Gather and copy all the documents listed above.
- Put the binder in a waterproof document organizer.
- Fill out a communication card for every family member. Print and laminate them using laminated card holders.
- Create a digital backup on a USB drive and in the cloud.
Week 3: Gather equipment and supplies.
- Check your emergency radio. If you do not have one, get a Midland ER310.
- Get a set of Midland T71VP3 two-way radios for communication when phones fail.
- Check your first aid kit. If it is incomplete, get the Adventure Medical Kits family first aid kit.
- Add a personal alarm to each child’s backpack.
- Check your water and food supplies. Aim for at least 72 hours, ideally two weeks.
Week 4: Practice and communicate.
- Call a family meeting and walk through the plan with everyone.
- Practice the neighborhood meeting spot walkthrough.
- Let kids hold the communication cards and read them out loud.
- Contact the school and confirm their emergency protocols.
- Schedule your first full drill.
One More Thing: Keep It Updated
A plan is only as good as its most recent update. People move. Kids get older. Phone numbers change. Medical needs change. Pets come and go.
Set a recurring reminder once a year to review your plan. The best times are when clocks change (spring and fall) or on a birthday that is easy to remember. It takes less than an hour once the plan exists. A small investment to keep something that could matter enormously.
The families that come through emergencies well are not the ones who got lucky. They are the ones who made a plan, practiced it, and kept it current. You can be that family.
Reviewed by Dale M. (Army infantry veteran, homesteader) and Priya K. (urban preparedness organizer, neighborhood emergency response).
ReadyGuidance is reader-supported. When you buy through our links, we may earn an affiliate commission at no extra cost to you. We only recommend products we believe in. See our affiliate disclosure for details.