Ready
Fortress My House on a Budget: A Three-Tier Home Prep Plan at $100, $300, and $1,000 (2026)
When a storm knocks out power or a flood closes your roads, the safest choice is often to stay put. Your home has shelter, familiar supplies, and a locked door. Leaving can put you on dangerous roads with everyone else. So for many disruptions, staying home for a few days is the smart plan.
Here is the hard part. You may think you can borrow from a neighbor if you run short. But most households do not keep extra. They have a few days of food and little more. In a real event, everyone needs the same things at the same time. There is no spare bottle of water next door. What you have is what you get.
That is why you prepare now, while shelves are full and prices are calm. You do not need to spend a lot all at once. This guide breaks home prep into three simple spending tiers: $100, $300, and $1,000. Each tier builds on the one before it.
Every tier covers the same five basics your household needs to ride out a multi-day disruption:
- Water
- Food
- Light and radio
- Power
- Sanitation
You can start small and build steady over time. If you want a gentle guide to stocking up slowly, this book walks you through it.

Let’s start with how the tiers work.
- Build your home prep in three stages so you never feel overwhelmed. Start small, then add more over time.
- Tier 1 covers the basics: clean water, light, and a few days of food. Aim for 3 days of supplies per person at first.
- Tier 2 grows your kit to a 2 week supply, including backup power and better water treatment.
- Tier 3 rounds out your plan with a reliable power station and a deep pantry that can last a month or more.
- Store water, know how to purify it, and keep a plan written down so your whole family knows what to do.
One practical preparedness move each week. No fear-mongering, ever.



Reviewed by Marcus T., Dale M. & Elena V. — contributors with hands-on preparedness experience. How we test
Want your home ready for whatever comes? Grab the gear below, then read on to see how each piece fits your plan.
Build Your Prep Slowly Guide
This guide shows you how to add supplies step by step without rushing. It keeps your home prep simple and easy to follow.
Check Price on Amazon
Aquatabs Water Purification Tablets
These tablets make questionable water safe to drink by killing bacteria, viruses, and cysts. They are a must for any home emergency kit when the tap stops working.
Check Price on Amazon
Portable Power Station Guide
This guide helps you pick the right backup power for your home and your needs. It makes sure you can keep key devices running when the power goes out.
Check Price on AmazonIn this guide
Why Trust This Guide?
This article was researched and reviewed by contributors with hands-on experience in emergency preparedness. They have tested gear, built real systems, and lived through situations where these skills actually mattered.
How the Three Tiers Work (and Why Order Matters)
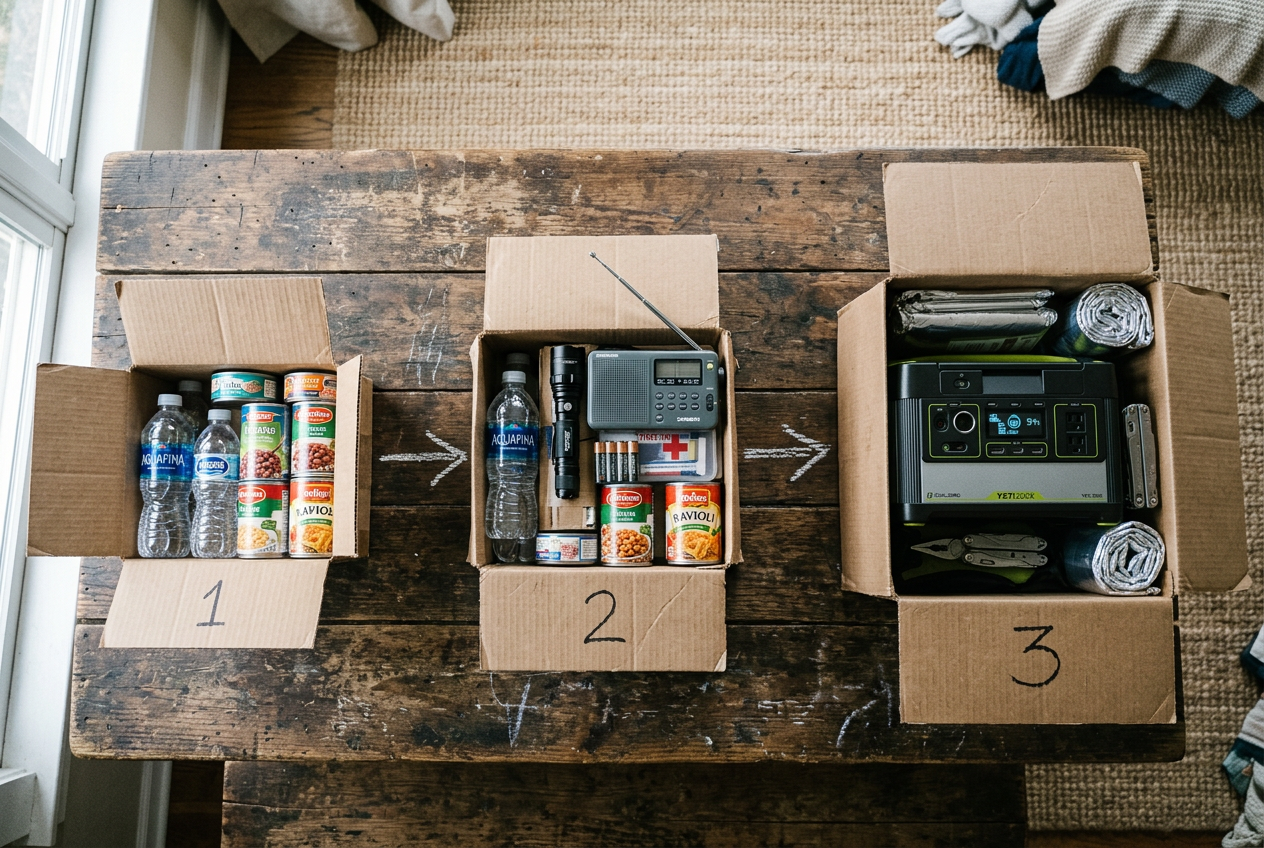
This plan has three budget levels. Think of them as steps, not separate kits. The $100 tier is your foundation. The $300 tier adds to it. The $1,000 tier builds on both. A higher tier never replaces the one below it. It stacks on top. So your $300 kit includes everything from the $100 kit, plus more. Your $1,000 kit includes it all.
Why build in steps? Because most people cannot spend a lot at once. You can start small this month. Then add more later when you have the cash. This slow approach is a smart way to prepare without overspending. If you want a deeper look at building supplies over time, this short guide walks through it.
Buy in the Right Order
The order matters as much as the money. Some things keep you alive. Some things just make life easier. You buy the life-saving things first.
Here is the order this plan follows:
- Water first. You cannot go long without it. Experts suggest one gallon per person per day for at least three days. Clean water comes before almost everything else.
- Food next. Shelf-stable food that needs little or no cooking. You want calories your household can eat right away.
- Light and radio. When the power goes out, you need to see and to get alerts. A flashlight and a way to hear emergency information come next.
- Sanitation. A way to stay clean and deal with waste keeps your home safe and healthy. This is easy to forget, but it matters a lot.
- Power last. Backup power is useful, but it is the most costly piece. It comes after your basic needs are covered.
Notice that power is last, not first. A big battery feels exciting. But a battery will not feed you or give you clean water. Cover the basics first. Then add power when your budget grows.
Why You Should Start Now
Here is the hard truth. When a disruption hits, your neighbors may not have extra supplies. Many households keep almost no food or water on hand. Store shelves empty fast. If everyone shops at the same moment, there is not enough to go around.
That is why you buy before you need it, not during the rush. You are not hoarding. You are simply getting ready a little early. A calm, prepared home does not add to the panic. It helps.
So pick your starting tier based on what you can spend today. Follow the order inside each tier. Water, then food, then light, then sanitation, then power. Build steady. Each small step makes your home more ready than it was last week.
Tier 1 - The $100 Foundation
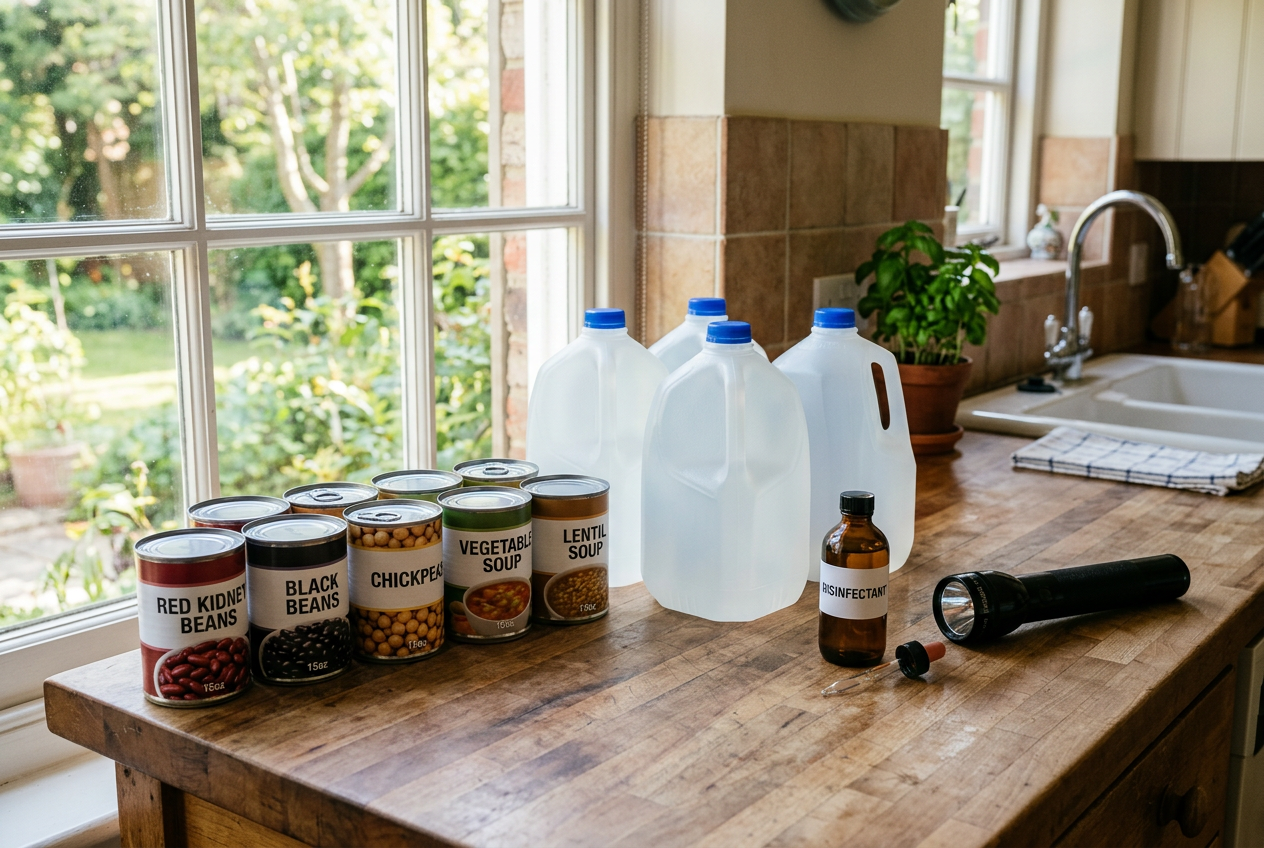
The first tier is about covering the basics. You want water, food, and light for a few days at home. You do not need fancy gear. You just need the right simple things in place before you need them.
Start with water. It is your top priority. The common guidance is one gallon of water per person per day. Plan for at least three days. That means a family of four needs at least 12 gallons. Some of that water is for drinking. Some is for cooking and cleaning.
You can do a lot here with no money. Fill clean containers you already own. Clean soda bottles or juice jugs work well. Wash them out first. Fill them with tap water. Cap them tight and store them in a cool, dark place. Label each one with the date. This is a free way to build a real water supply fast.
Tap water will not last forever in storage. It can also get knocked out in a disaster. So you want a backup way to make questionable water safe. Water purification tablets are a smart, cheap choice. They are small, they last a long time on the shelf, and they are easy to use.
These tablets treat water you are not sure about. They kill most bacteria, viruses, and cysts like Giardia. One pack treats many gallons. You just drop a tablet in, wait, and your water is much safer to drink. Keep a pack with your stored water. Read the directions on the package and follow them.
Next comes food. Pick shelf-stable food that needs little or no cooking. Think canned beans, canned vegetables, canned fish, peanut butter, crackers, and dry cereal. Pick foods your family already eats. That way nothing goes to waste. Buy a few extra cans each shopping trip. Your stock grows without a big hit to your budget.
Do not forget a manual can opener. An electric one is useless if the power is out. A cheap handheld opener solves that. Also keep some paper plates and plastic utensils so you can eat without running water.
Last comes light. When the power goes out, you need to see. A couple of flashlights and a pack of extra batteries will do the job for Tier 1. Keep one flashlight in a spot everyone knows. Battery candles are another safe option. Avoid real candles if you can, since open flames are a fire risk.
Here is what the $100 foundation covers.
This tier is your base. Build it first, then move up.
Tier 2 - The $300 Upgrade
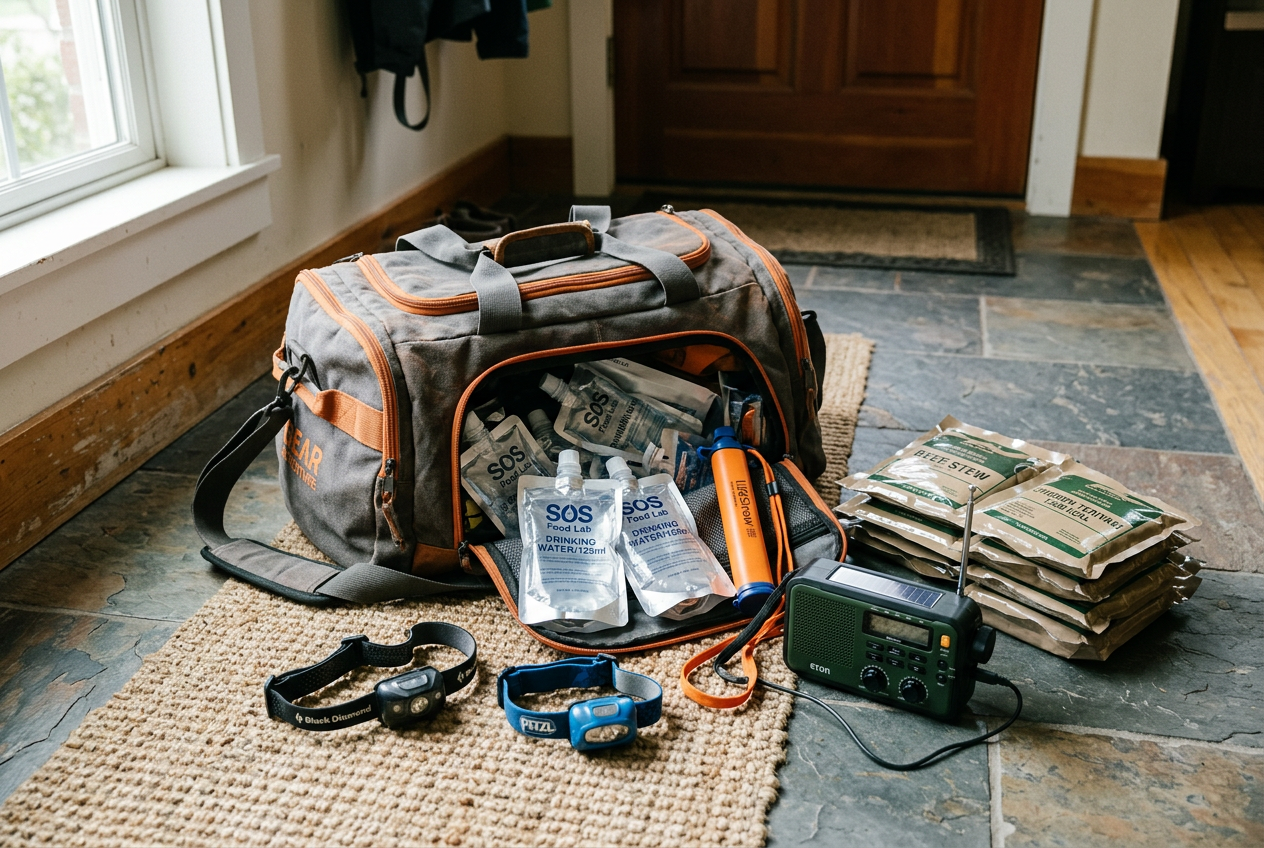
Tier 1 gets you through the first day or two. Tier 2 stretches your coverage further. This level adds longer-lasting water options, a full family kit, and better light and radio. You are no longer just scraping by. You are building real backup.
Longer-lasting water
Stored water runs out. A filter lets you make more water safe to drink. One good option is a set of reusable filter straws.

These straws are light and easy to use. Each one removes over 99.99% of waterborne bacteria like E. coli. They also remove over 99.99% of parasites like Giardia and Cryptosporidium. They filter down to 0.1 micron, small enough to catch microplastics. A 5-pack means each family member can have one.
Here is what a filter does not do. It cleans out germs and tiny solids. It does not remove chemicals, salt, or heavy metals. So do not use it on pool water, flood water full of fuel, or salt water. Use it on water from a stream, lake, or a questionable tap. When in doubt, clear water is better than murky water. Let dirty water settle first, then filter the clear part off the top.
A complete grab-and-go family kit
Building a kit piece by piece takes time. Many households want the gaps filled fast. A prepackaged family kit does that in one step.

This kit is built for 4 people and 72 hours. It comes in a backpack, so you can grab it and go if you must leave. But it works just as well sitting in a closet at home. Inside you get 4 food bars at 2,400 calories each. The food is shelf-stable for 5 years. You also get 24 packs of emergency drinking water.
The kit includes a LifeStraw Go filter. Like the straws above, it removes nearly all waterborne bacteria and parasites. So you can refill from a tap, lake, or other water source when your packed water is gone. The same filter limits apply. It handles germs, not chemicals or salt.
There is a 125-piece first aid kit too. You can treat cuts, burns, sprains, and small injuries. That covers a real gap most homes have.
Better light and radio
Tier 1 gave you one light and one radio. Tier 2 spreads that out. Add a light for each room you use. Keep a backup radio in a second spot. Stock more batteries in the right sizes. A hand-crank or solar radio means you are not stuck when batteries die.
Why buy first
Many neighbors have nothing extra. During a disruption, stores empty fast. Buying your water, food, and light now means you are set before the rush. You are not borrowing. You are not waiting in line. You are home and ready.
Tier 3 - The $1,000 Resilience Build
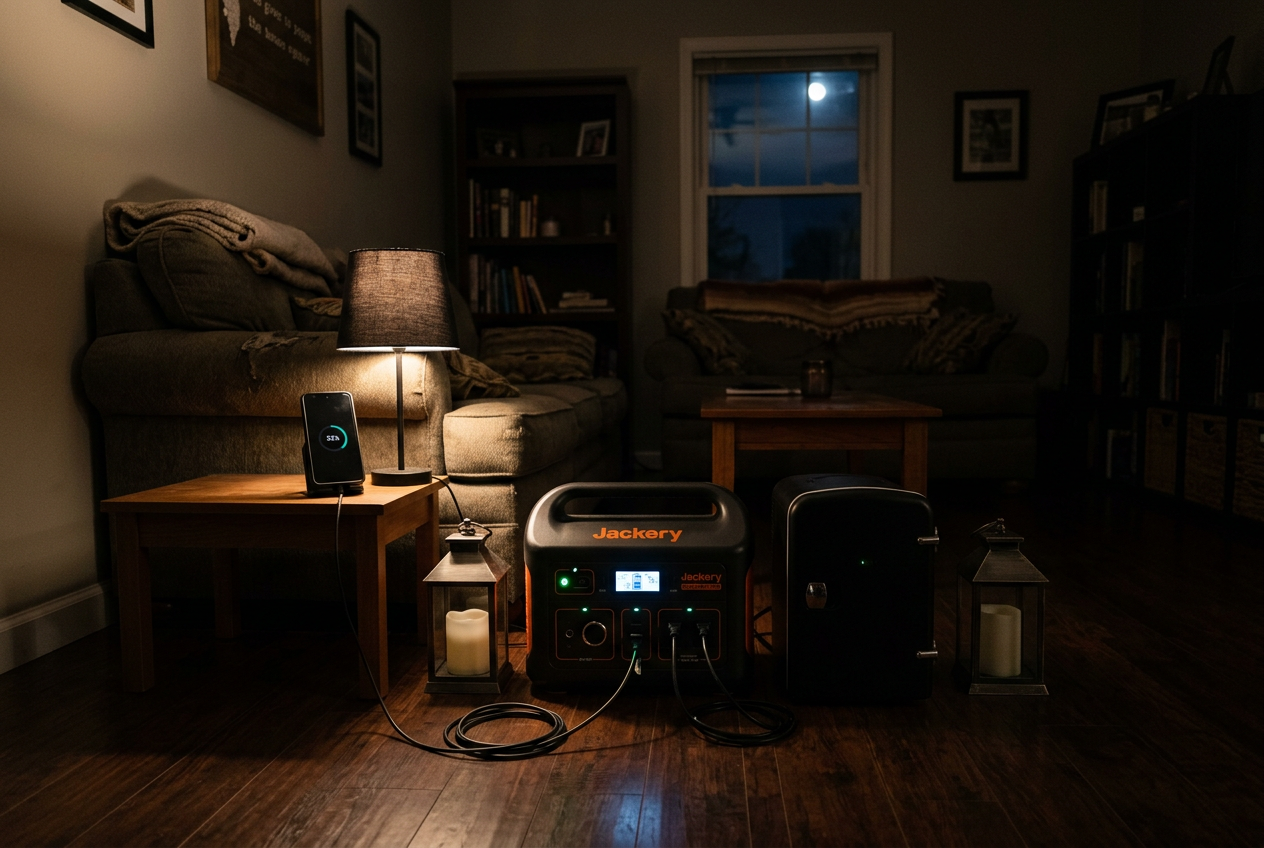
By now you have water, food, light, and basic sanitation. Tier 3 adds something new. It adds backup power. When the lights go out for days, you want a safe way to keep phones charged and run small devices. This is where a portable power station comes in.
What Is a Portable Power Station?
A portable power station is a big battery in a box. You charge it ahead of time. Then it stores power until you need it. You can plug phones, lamps, and small appliances right into it. Many come with wall plug outlets, USB ports, and a car port.
The key number to look at is watt-hours, written as Wh. Watt-hours tell you how much power the battery holds. More watt-hours means longer run time. Here is a simple way to think about it. A small device that uses a few watts can run a long time. A big device that uses many watts drains the battery fast.
To know your real run time, look at how many watts your device uses. Then compare that to the station’s watt-hours. A buying guide can walk you through this math step by step.
Why a Battery Beats a Fuel Generator Indoors
A fuel generator makes power by burning gasoline. That creates fumes you cannot always smell. You must never run a fuel generator inside your home or garage. The fumes can make you very sick or worse.
A portable power station is different. It does not burn fuel. It makes no fumes. That means you can use it indoors in a safe spot. This is a big safety advantage during a multi-day outage. You stay warm inside and keep your power running without the danger.
A Station Built for Home Backup
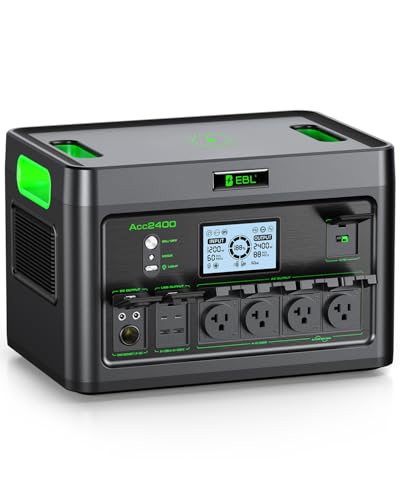
One option to consider is a high-capacity station with a large battery and strong output. It can charge many devices at once. It can also handle higher-wattage gear like a kettle or small appliance, within its limits.
Match Capacity to Your Real Needs
Do not guess what size you need. Make a list of what you want to power. Add up the watts. Then pick a station that fits. A phone and a lamp need very little. A fridge or kettle needs much more. Start with the buying guide above. It helps you match capacity to your real needs so you do not overspend or come up short.
This tier is the biggest step. Build it only after Tiers 1 and 2 are done.
Don’t Forget Sanitation and Hygiene
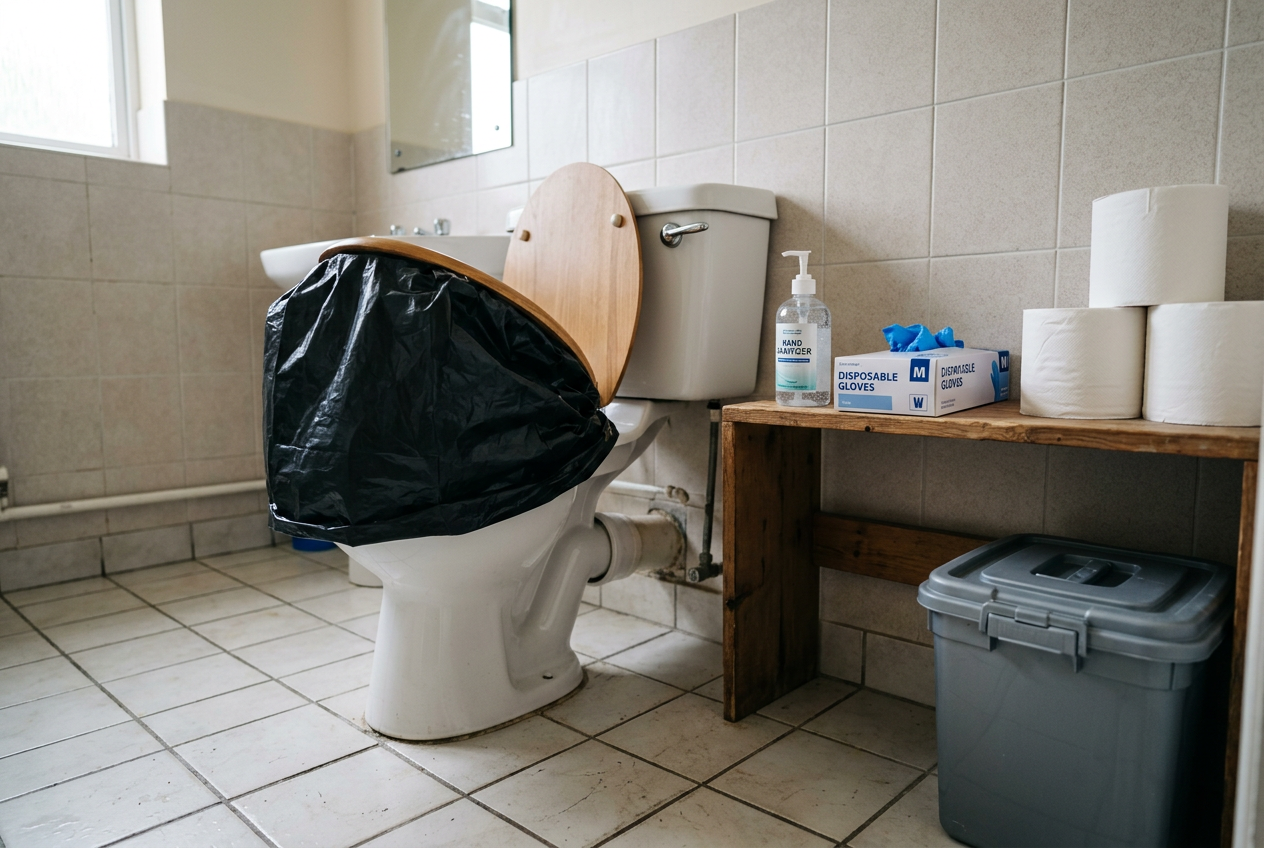
Most people plan for water, food, and light. They forget about waste. But if the water or sewer stops working, your toilet stops working too. This is one of the most skipped parts of home prep. Getting it right keeps your family from getting sick.
Why This Matters
When the sewer is out, waste has nowhere to go. If you flush anyway, it can back up into your home. Human waste carries germs. If it is not handled well, people can get sick fast. Illness during a disruption makes a hard time much worse. The good news is that the basics are cheap. Some cost nothing at all.
Set Up a Backup Toilet
You do not need to buy a special toilet. You can use the one you have. Here is a simple method.
First, stop using the toilet for flushing. Turn off the water supply to it if you can. Then line the bowl with a heavy-duty trash bag. A thick contractor bag works best because it is less likely to tear. Open the bag over the bowl so the inside catches the waste.
After each use, add a scoop of something dry to cut down smell. Kitty litter works well. So does sawdust or even plain dirt. Tie the bag closed when it gets about half full. Do not overfill it, or it may rip when you lift it out.
Keep Trash Contained
Used bags need a safe spot. Put them in a second bag, then in a lidded container or can. Keep this outside the living space if you can. A sealed lid keeps away flies and bugs. It also cuts down the smell. Pests and waste both spread germs, so keeping trash closed off protects your health.
Stock Hand Cleaners and Gloves
Clean hands matter most when water is short. Keep a few bottles of hand sanitizer on hand. Pick one with alcohol so it kills germs. Use it after any contact with waste or trash.
Gloves are the other key item. Disposable gloves protect your hands when you handle bags or clean up messes. One guide suggests keeping a large supply, like 100 pairs, for a month-long event. You can start smaller and build up over time. Keep them near your backup toilet so they are easy to grab.
A Few No-Cost Habits
You can do a lot without buying a thing. Save old newspapers and plastic bags now. Both are useful for cleanup and lining. Fill a few jugs with water just for washing hands and flushing. Keep soap stocked, since you likely already have it.
Sanitation is not fancy. It is just planning for the part everyone forgets. A few bags, some gloves, and a little hand cleaner go a long way. Set these aside before you need them.
Comparison Table: What Each Tier Covers
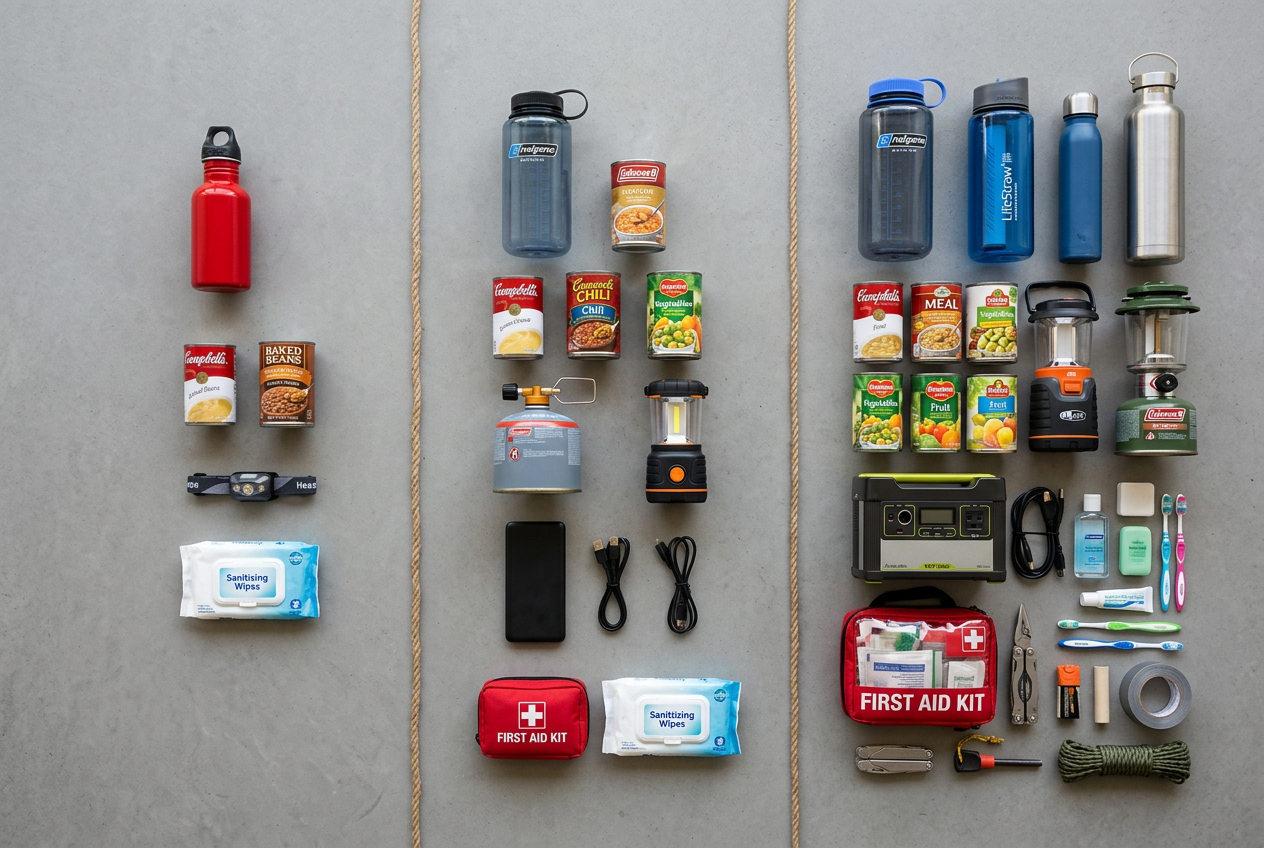
Here is a quick way to see all three tiers side by side. Each tier builds on the one before it. So the $300 tier includes what you bought at $100, plus more. The $1,000 tier includes it all.
The table below covers the five basics: water, food, light and radio, power, and sanitation. It also shows rough days of coverage and who each tier suits best. Use it to spot gaps and plan your next step.
How to Read the Table
Days of coverage are rough estimates. Your real numbers depend on how many people live in your home. A big family burns through supplies faster. A single person stretches them longer. Count heads and adjust.
Water is the hardest basic to stretch. You need about one gallon per person per day for drinking and basic use. That is a lot of jugs for a month. This is why the higher tiers lean on filters, not just stored water. A filter lets you clean more water from other sources. Tablets like the Aquatabs purification tablets and straws like these reusable filter straws help you treat water you find or store.
What You Gain by Moving Up
Each tier adds more days and more comfort. The $100 tier covers a short power outage or storm. It gets you through a few days. The $300 tier doubles or triples that. You gain a bucket toilet, a water filter, and some backup power for your phone.
The $1,000 tier is the big jump. A portable power station can run small devices for days. That means you can keep a radio, phone, or small light going without worry. You also move from days of food to weeks.
Why Start Where You Are
You do not need to reach the top tier right away. Most households are fine at the $300 level. It covers the most common disruptions. Start with the $100 foundation. Then add pieces as your budget allows. Each step makes your home a little more ready. Neighbors may not have extra supplies, so having your own basics in place matters most.
Frequently Asked Questions
How much water should I store?
Store at least one gallon of water per person each day. Plan for at least three days to start. If you have room, build up to more. One gallon covers both drinking and basic cleaning.
Do not forget pets. They need water too. Count them when you plan.
Water is heavy, so storage can get hard fast. A good backup is a way to clean water you already have. Purification tablets are small and easy to keep on hand. The Aquatabs water purification tablets treat water fast and store well. A filter straw like the Practical Survival filter straws lets you drink from a tap or other source during an outage. These give you more water without storing more jugs.
How long should my food supply last?
Start with at least three days of food. This matches the basic kit many guides suggest. As your budget grows, build up to a week or more.
Pick foods your family already eats. Choose items that need little or no cooking. Canned goods, peanut butter, and shelf-stable meals all work. Rotate them so nothing goes to waste. Eat the oldest items first and replace them.
If you want a ready-made option, a kit like the First My Family 4-Person kit packs shelf-stable food and water for four people for 72 hours. It gives you a quick starting point while you build up your own stock.
Should I buy a generator or a power station?
For most households, a portable power station is the easier choice. It runs clean and quiet. You can use it indoors. There is no fuel to store in your home.
A gas generator makes more power for a longer time. But it needs fuel, and fuel storage comes with rules. Use approved containers only. Never store fuel in your living space. Keep it away from heat, flames, and children. Let the engine cool before you refill it. Never siphon fuel by mouth. Use a gasoline-rated pump and follow the maker’s directions and your local fire rules.
If you are new to this, start with a power station. Something like the EBL 2400W power station can run small devices and switch on fast during a blackout. To learn how to match a unit to your needs, the Portable Power Station Buying Guide walks you through it.
Is it okay to build my kit slowly?
Yes. Building over several paychecks is smart and normal. You do not need to buy everything at once.
Buy the most important things first. Start with water, then food, then light and power. Add a little each payday. This keeps your budget calm and steady.
Leave your emergency savings alone while you shop. Use your regular budget instead. If you want a simple plan to pace your buying, the guide Emergency Preparedness on a Budget shows how to stock up slowly without overspending. Small steps add up fast.
Your Action Checklist

Here is a simple list to work through. You do not need to buy everything at once. Start with the free steps. Then move through each tier at your own pace. You can print this page and check off each item as you go.
Free First Steps (Do These Today)
These cost nothing and matter most. Many neighbors will not have done them.
- Fill clean containers with tap water. Aim for one gallon per person per day.
- Write down a simple family plan. Note how you will get alerts and where you will meet.
- List emergency contacts on paper. Phones may die.
- Set aside a small cash buffer in small bills. Card readers may not work.
- Find your water shutoff and gas shutoff. Know how they work.
- Check what food and supplies you already own.
Tier 1: The $100 Foundation
Build the basics for a few days at home.
- Store drinking water for three days per person.
- Add water treatment like Aquatabs purification tablets or a filter straw.
- Stock shelf-stable food you already eat.
- Get a flashlight or headlamp with spare batteries.
- Get a battery or hand-crank radio for alerts.
- Start a small first aid kit.
- Set aside basic sanitation items. See the sanitation section.
Tier 2: The $300 Upgrade
Add comfort and longer coverage.
- Extend food and water to a week or more.
- Consider a ready-made kit like the First My Family 4-Person kit.
- Add more lights for each room or person.
- Add extra batteries and a way to charge phones.
- Build out your first aid and medicine supply.
- Add hygiene items for the whole household.
Tier 3: The $1,000 Resilience Build
Add backup power and deeper supplies.
- Research power options with the power station buying guide.
- Add a portable power station like the EBL 2400W LiFePO4.
- Extend food storage further.
- Expand sanitation for longer outages.
- Keep a larger cash buffer.
Keep Learning and Keep Steady
Preparedness is a habit, not a one-time shop. The book Emergency Preparedness on a Budget shows how to build supplies slowly without overspending.
Review your supplies a few times a year. Rotate food and water so nothing goes stale. Test your flashlight and radio. Refill your water containers. Update your family plan when things change.
Work from the top of this list down. Each small step makes your home more ready. You do not have to do it all today. Start small. Build steady.
Next Steps: Start Small, Build Steady
You do not need to buy everything today. The best plan is the one you actually start. Pick a small goal for this week. Then build from there, month by month.
Here is why this matters. When a storm or outage hits, many stores sell out fast. Your neighbors may not have extra supplies. That means you cannot count on borrowing from them, and they cannot count on borrowing from you. The people who prepared ahead of time are the ones who stay calm. You want to be one of those people. The good news is that any preparation beats none. Even a little puts you ahead.
This Week: Finish Tier 1
Start with the $100 Foundation. This is your base. It covers your most basic needs for a few days at home.
Focus on water first. Store clean drinking water now. Plan for one gallon per person per day. A water purification product gives you a backup if your stored water runs low. The Aquatabs Water Purification Tablets treat water you collect later. Keep a few filter straws on hand too, like these reusable emergency water filter straws.
Next, add some shelf-stable food. Then light and a battery radio. These are small steps. You can do them in one trip or one online order. Check your list off as you go.
If you want a simple guide to building supplies slowly, this short book can help: Emergency Preparedness on a Budget.
Over the Coming Months: Tier 2 and Tier 3
Once Tier 1 is done, put the next tiers on your calendar. Treat them like any other household goal. You do not have to rush.
Give yourself one to three months for the $300 Upgrade. This fills gaps and adds comfort. Then look at the $1,000 Resilience Build when your budget allows. That is when power becomes a bigger focus. A portable power station keeps phones, lights, and small devices running during an outage. If you are not sure which size fits your home, start with this buying guide: Portable Power Station Buying Guide.
Keep It Simple
Write your plan down. Set a reminder for each tier. Share the plan with everyone in your home so they know where supplies are. Then print this page so you have the full checklist in hand.
Preparation is not a one-time job. It is a habit. You add a little, check your supplies, and keep going. Small steps add up fast.
Want to go deeper on two key areas? Read our guides on water storage and on getting through a power outage. They build right on top of this plan. Start small this week. Build steady from here. Your future self will thank you.
Sources and Further Reading
- It is time to revisit your emergency preparedness plan. …
- Prepare Your House For Floods Tips Strategies And Long …
- Home disaster plan includes 3 key steps
- How to get your home emergency-ready and be prepared, …
- Home Resilience Budget Worksheet: Repairs vs Gear
- Top 11 Budgeting Tips for Emergency Preparedness
- Since September is National Preparedness Month, …
- Tips For Prepping For Survival On A Budget
- It is time to revisit your emergency preparedness plan. …
- Preventive expenses to reduce emergency costs