Ready
How to Winterize Your House: A Room-by-Room Checklist Before the Cold Hits (2026)
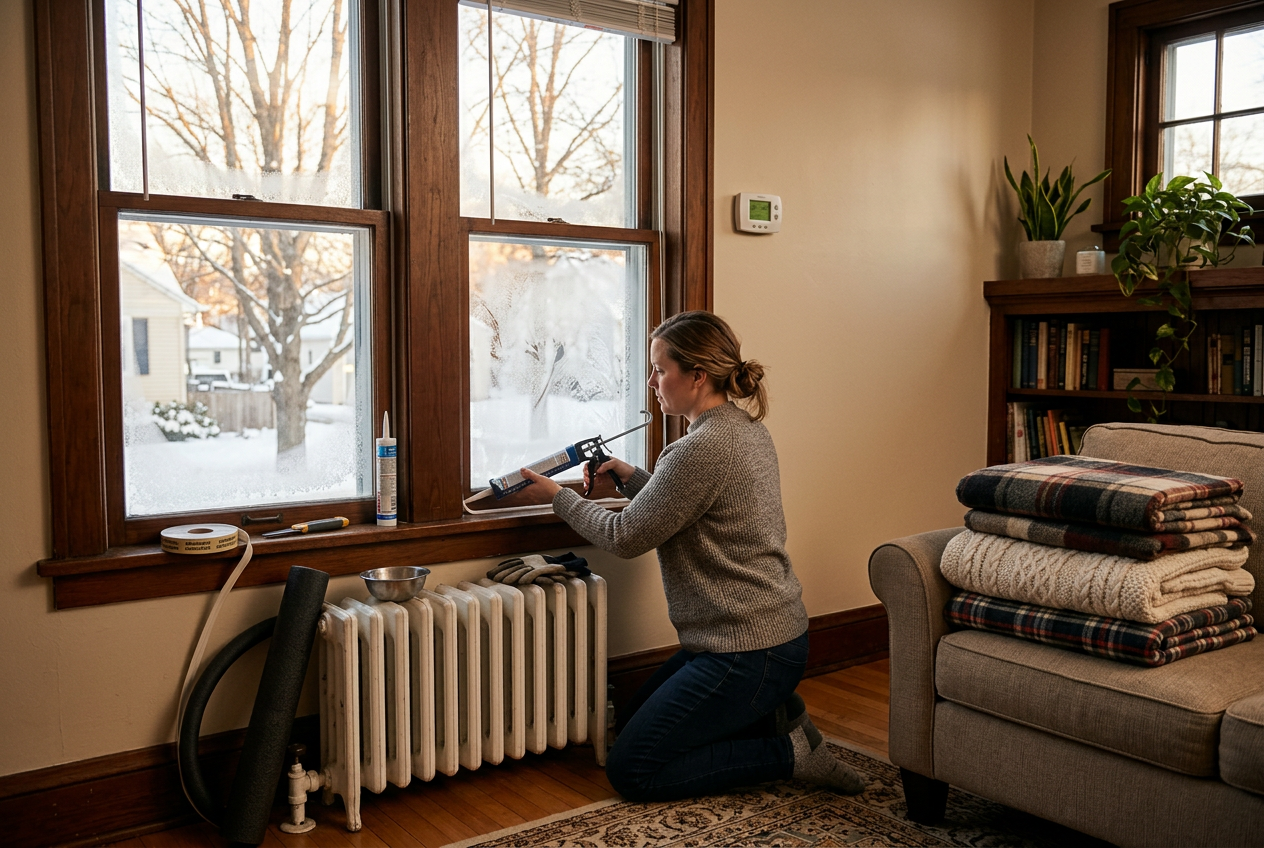
Cold air finds a way in. It slips under doors, around windows, and through small gaps you may not even notice. When winter hits, that cold air makes your home harder to heat. Your heating system works harder. Your bills go up. And if the temperature drops far enough, your pipes can freeze and burst.
Winterizing your house means getting ahead of all that before the first freeze. It is not complicated. At its core, winterizing comes down to three things. You seal drafts so warm air stays inside. You protect your pipes so they do not freeze. And you check your heating system so it runs safely all season.
Here is the good news. Most of these steps cost little or nothing. Many are things you can do yourself in a single weekend. You do not need special skills or a big budget. You just need a plan and a few simple supplies.
This guide walks you through that plan room by room. You will start with a quick walk-through to find your worst drafts. Then you will tackle windows, doors, pipes, and your heating system. We will also cover outdoor tasks like gutters and outdoor faucets. Along the way, you will find simple product picks to make the work easier.
Let’s get your home ready before the cold hits.
- Seal windows with shrink film to stop drafts; one kit can cover up to 10 windows.
- Add weather stripping around doors and window gaps to block cold air leaks.
- Wrap exposed water pipes with foam covers to help prevent freezing and bursts.
- Check every room from attic to basement, fixing gaps where heat escapes.
- Do this work before the first hard freeze so you are not scrambling in the cold.
One practical preparedness move each week. No fear-mongering, ever.



Reviewed by Marcus T., Ryan C. & Elena V. — contributors with hands-on preparedness experience. How we test
Getting your home ready for winter is easier when you have the right supplies on hand before the cold arrives. Grab these items now, and read on to see exactly where each one fits in your room-by-room plan.

Window Insulation Shrink Film Kit
This film creates an airtight seal over your windows to keep drafts out and warm air in. One roll covers up to 10 windows, making it a fast way to lock down a major source of heat loss.
Check Price on Amazon
Foam Door Weather Stripping
This self-stick foam tape fills the gaps around door frames and windows where cold air sneaks in. With 33 feet in the roll, you can seal several leaky spots throughout the house.
Check Price on Amazon
Foam Pipe Covers
These pre-slit foam tubes slide over exposed hot and cold water pipes to help stop them from freezing. Insulating pipes now protects you from burst lines and water damage when temperatures drop.
Check Price on AmazonIn this guide
Why Trust This Guide?
This article was researched and reviewed by contributors with hands-on experience in emergency preparedness. They have tested gear, built real systems, and lived through situations where these skills actually mattered.
Start With a Walk-Through: Find Your Drafts First
Before you buy anything, walk through your home and look for air leaks. This is the single best first step. Sealing drafts is cheap. Most of it costs nothing at all. And it gives you the biggest comfort gain for the least money.
Cold air sneaks in through small gaps you cannot always see. Warm air you paid to heat leaks right back out through those same gaps. If you seal the leaks first, your heating system works less. Your rooms feel warmer. You save on energy costs. That is why this walk-through comes before any shopping.
Pick a cold, windy day
Drafts are easiest to find when it is cold and windy outside. The bigger the difference between indoor and outdoor air, the more you will feel the leaks. So plan your walk-through for a chilly, breezy day if you can.
Start at the windows and doors. These are the most common leak spots in any home. Then check other places where air can get in, like where pipes or wires enter a wall.
Use your hand to feel for leaks
Your hand is a simple draft detector. Move it slowly along the edges of each window. Go around the whole frame. Then do the same around each door. Feel along the sides, the top, and the bottom. If you feel cool air moving across your skin, you found a leak.
Pay close attention to the bottom of exterior doors. That is a very common spot for cold air to slip in. Also check where a window meets its frame and where the frame meets the wall.
Use a candle to see the air move
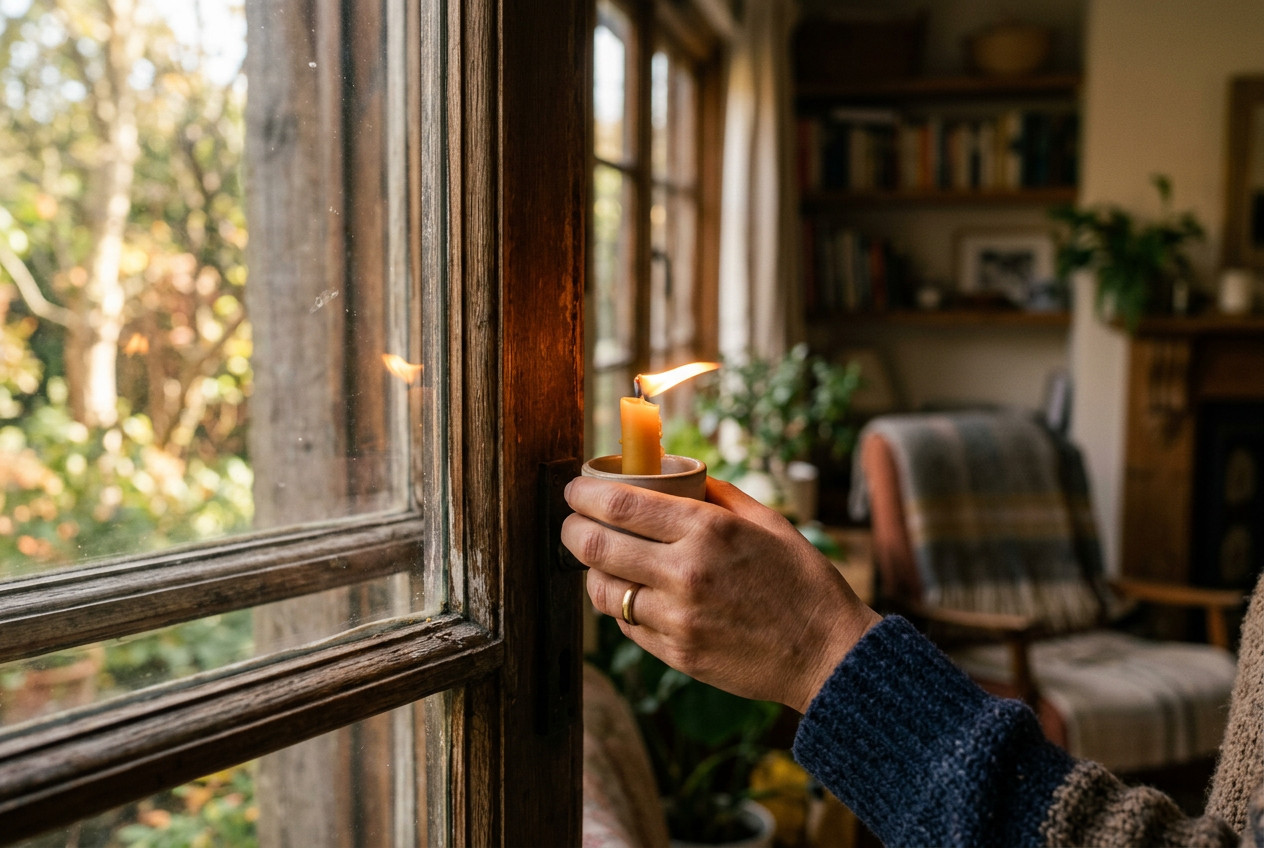
A lit candle makes leaks easy to spot. Light the candle and hold it near the edges of a window or door. Keep it a few inches away from the frame. Watch the flame. If the flame flickers, dances, or bends to one side, air is moving through a gap right there.
Move the candle slowly along the whole edge. Mark each spot where the flame reacts. A small piece of painter’s tape works well as a marker.
Be careful with an open flame. Keep it away from curtains, paper, and anything that can catch fire. Keep it away from children. If you do not want to use a candle, a lit incense stick works the same way. You watch the smoke drift instead of the flame.
Make a list as you go
Write down every leak you find and where it is. Note the windows, the doors, and any other gaps. This list becomes your shopping guide. Now you know exactly what to seal and what to buy. You spend money only where it will actually help.
Windows: Seal Drafts and Add an Insulating Film Layer
Windows are one of the biggest sources of cold air in a home. Cold slips in through tiny gaps around the frame. It also passes right through the glass itself. The good news is that you can fix both problems with simple, low-cost steps. You do not need to be handy.
Step 1: Seal the Gaps Around the Frame
Start by finding the drafts. On a cold day, run your hand slowly around the edges of each window. Feel for moving air. You can also hold a lit candle or a thin strip of tissue near the frame. If the flame or tissue moves, you have a draft.
Seal those gaps with weatherstripping or caulk. Weatherstripping is a strip of foam or rubber that you press into place. It works well on parts of the window that open and close. Caulk works better for cracks that stay fixed, like the seam where the frame meets the wall. Both are easy to find at any hardware store.
Step 2: Add an Insulating Film Layer
Sealing the gaps stops air from sneaking in. But heat still escapes through the glass. This is where a window insulation film kit helps. The film creates a thin pocket of still air over the window. That trapped air acts like a blanket and blocks the cold.
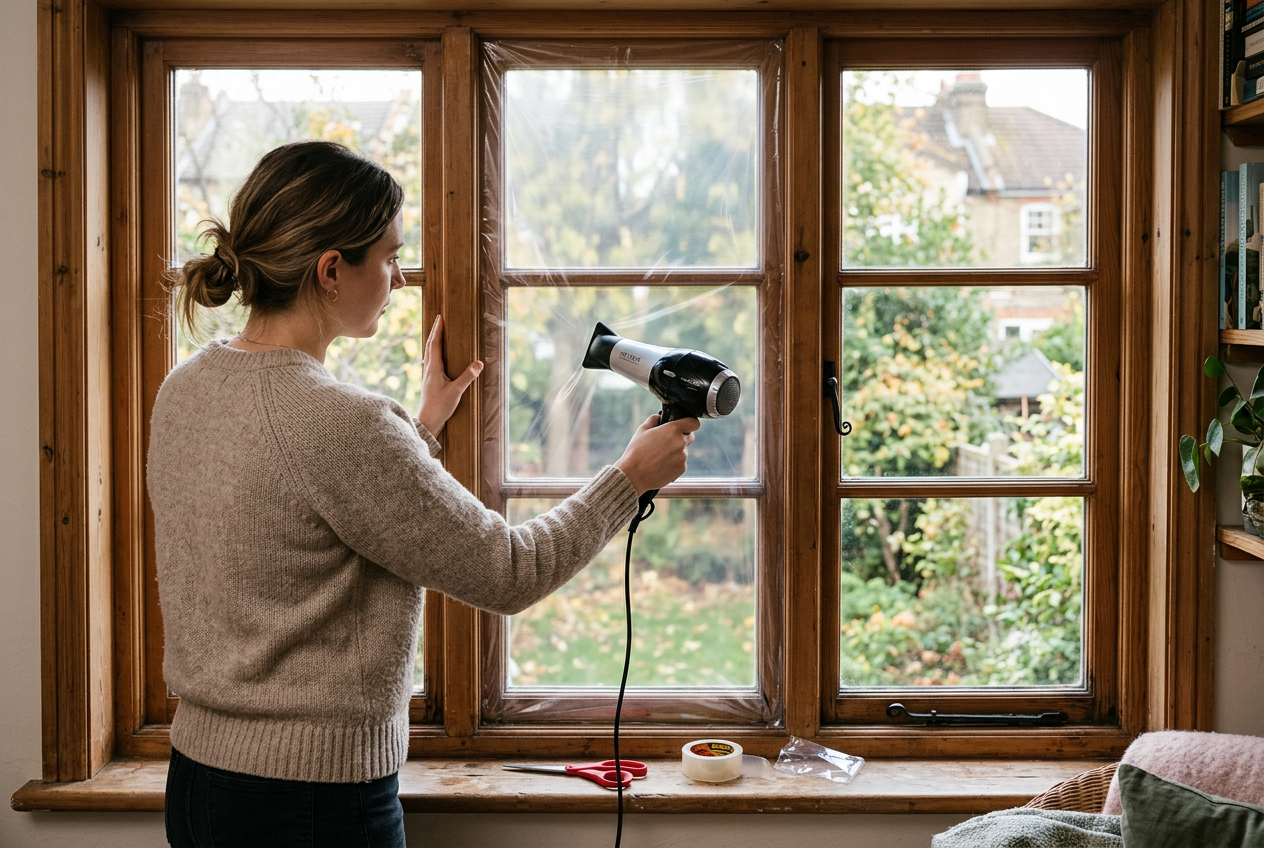
The install is simple. You apply double-sided tape around the window frame. Then you press the plastic film onto the tape. You use a hair dryer to shrink the film. The heat pulls it tight and clear, so it almost disappears. The only tools you need are scissors and a hair dryer.
The Duck Brand kit comes as a rolled sheet. You do not have to measure before you cut. You apply it, then trim the extra film to size. It is built for cold weather months and works on painted or finished wood, aluminum, or vinyl frames. For best results, apply it indoors on a clean, dry surface.
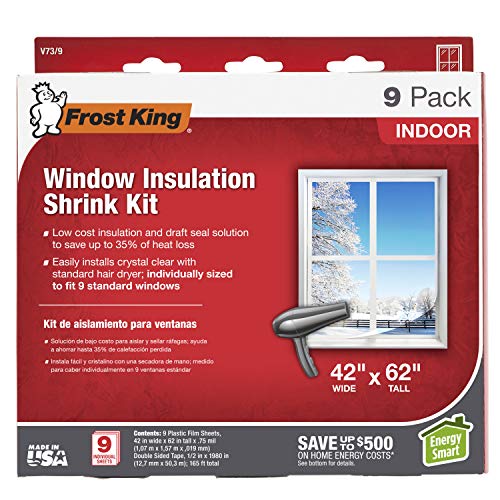
The Frost King kit is another easy-to-use indoor option. It covers a window up to 42 by 62 inches. Like the Duck Brand kit, it uses the same tape-and-shrink method with a hair dryer.
Why This Works for Renters
This is a renter-friendly fix. The film is meant to be removed in spring. When warm weather returns, you peel it off and pull up the tape. It leaves no holes and no permanent damage. That makes it a safe choice if you cannot change the windows themselves.
One tip: apply the film on a dry day and clean the frame first. Dust and moisture keep the tape from sticking. A clean, dry start means the film stays up all winter.
Doors: Stop the Cold Air Coming In Under and Around Them
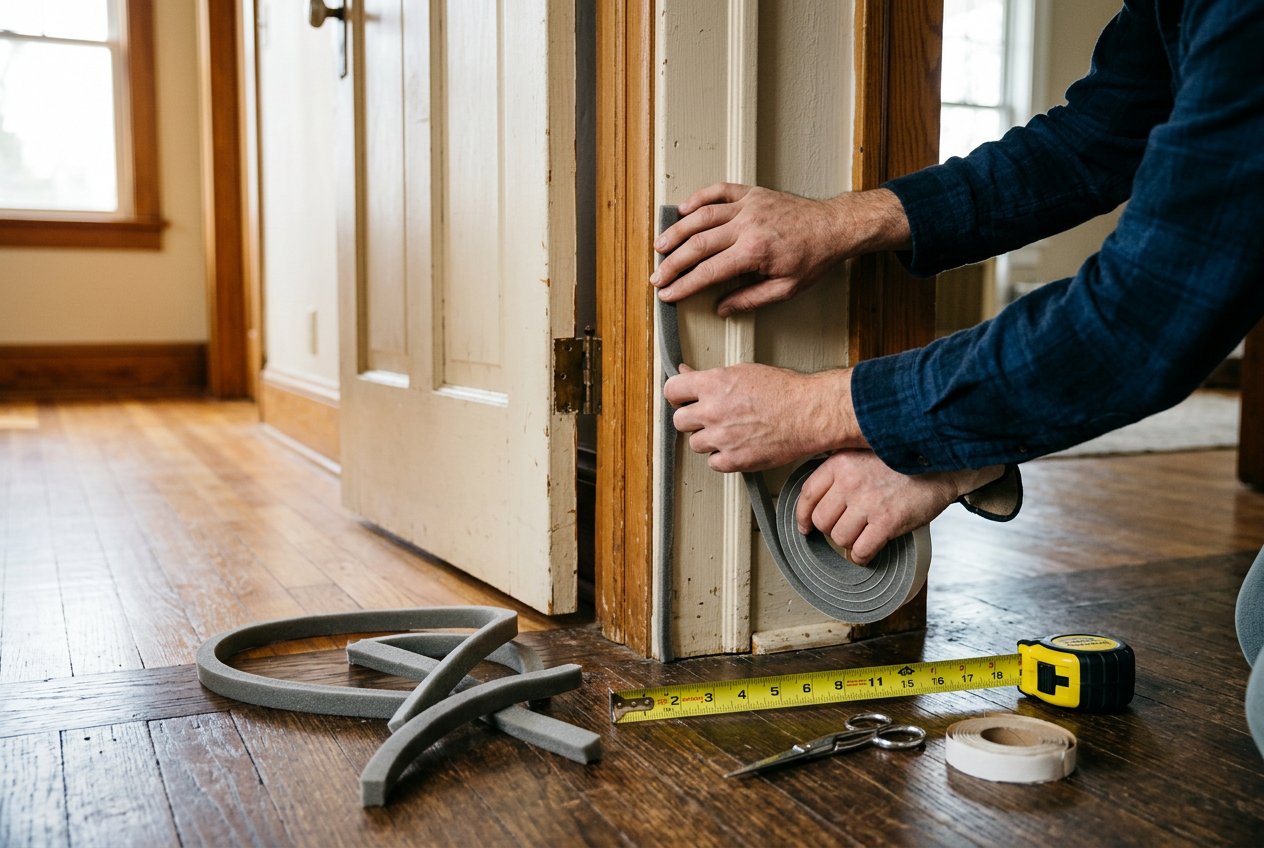
Doors are a top spot for heat loss. Cold air sneaks in two ways. It slips around the sides and top of the door frame. It also pours in through the gap under the door. The good news is that both leaks are easy to fix. You do not need a pro. You just need some weather stripping and a few minutes.
Seal the Gaps Around the Frame
Run your hand around the edges of a closed door. Feel for cold air. If you feel a draft, you have a gap. Adhesive foam weather stripping is the simple fix. You stick it along the door frame so the door presses against it when it closes. This fills the gap and blocks the cold air.
Before you stick anything, clean the surface. Wipe the frame with a dry cloth to remove dust and grime. The adhesive will not hold on a dirty surface. Let it dry fully.
Next, measure the gap. Some gaps are small. Some are wide. Pick a strip thick enough to fill the space without stopping the door from closing. Soft foam works well here because it squishes to fit uneven gaps.
Measure each side of the frame. Cut your strips to length with scissors. Peel the backing a little at a time as you press the strip into place. Push down firmly so it sticks. Then test the door. It should still close easily.
Block the Gap Under the Door
The gap under the door is where most cold air gets in. You can feel it if you hold your hand near the floor. A door bottom seal fixes this. It attaches to the bottom edge of the door or seals the gap just under it.
A clear, flexible seal strip is one option. It sticks to the bottom of the door and flattens the gap. The clear design is not easy to see, so it keeps the look clean.
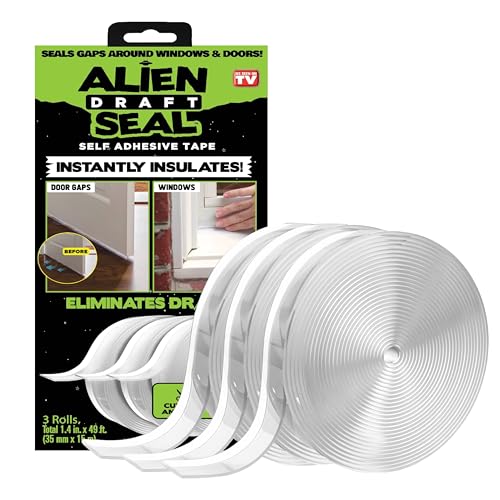
Another option is a flexible strip made for gaps up to about 1.2 inches wide. It bends to fit uneven floors and door frames. You measure, cut to length, peel the backing, and press it onto a clean surface.

Measure your gap before you buy. Hold a ruler at the bottom of the closed door. Note how wide the gap is. Then pick a seal that covers that size. A strip that is too thin will leave a gap. One that is too thick may drag on the floor.
Quick Tips That Make the Seal Last
- Always clean and dry the surface first. This is the number one reason strips fall off.
- Cut strips to the exact length. Do not stretch them to fit.
- Press firmly along the whole strip. Give the adhesive time to grip.
- Check the seal again in a few weeks and press down any loose spots.
Seal your most-used exterior doors first. Then move to doors that lead to cold rooms, like a garage or basement.
Pipes: Insulate to Prevent Freezing and Bursts
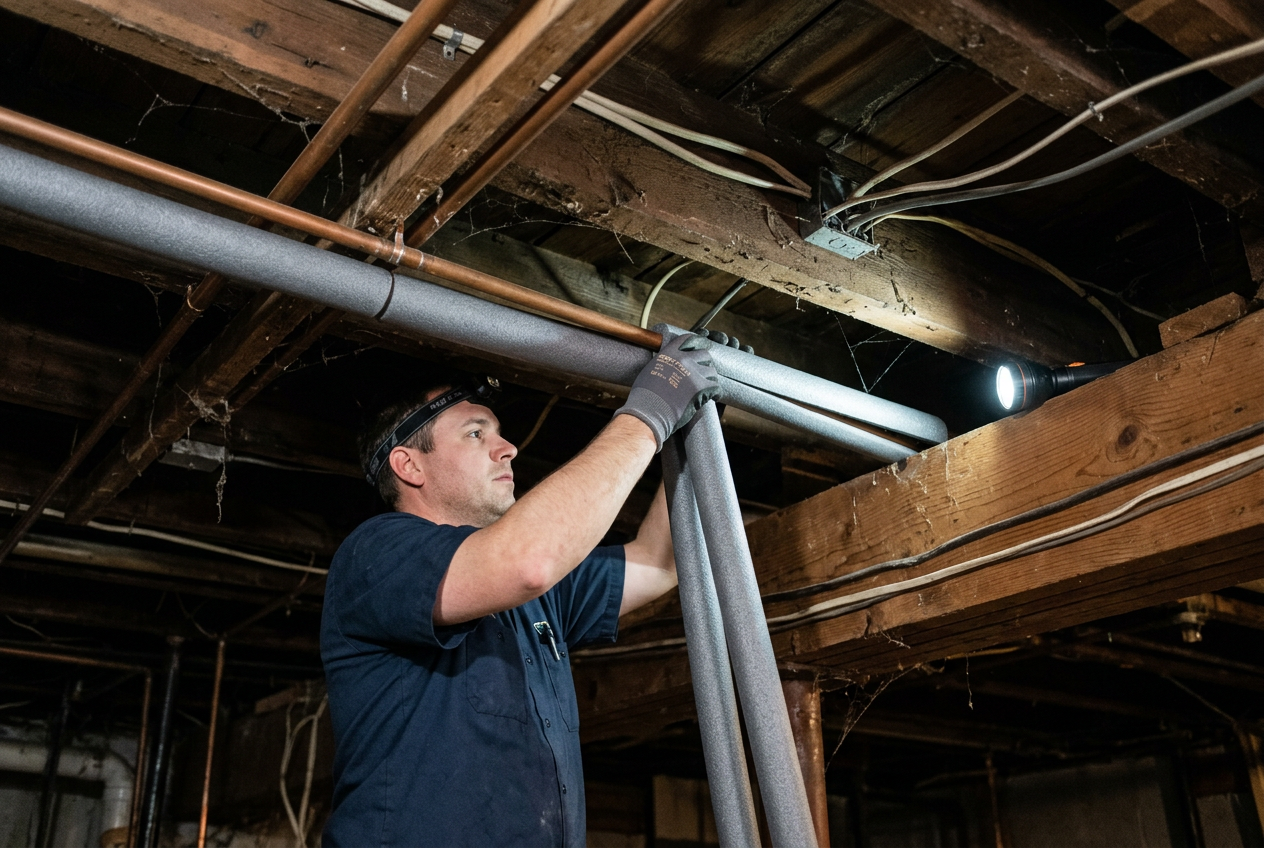
Water pipes freeze when they lose heat faster than they can hold it. The water inside turns to ice. Ice takes up more space than water. That pressure can crack the pipe or split it open. When the ice melts, water pours out. A burst pipe can flood a room and cost a lot to fix.
The pipes most at risk are the ones in cold, exposed spots. Think about your basement, crawl space, garage, and pipes that run along outside walls. These areas get the coldest. The fix is simple. You slip foam covers over the exposed pipes. This slows the heat loss and helps stop freezing.
Measure Your Pipes First
Before you buy anything, measure your pipes. You need the outside diameter. Wrap a tape measure or a string around the pipe, then check the size. Common home water pipes are about 1/2 inch or 3/4 inch. Foam covers are sold to fit set pipe sizes, so a good match matters. If the cover is too big, it will slide and leave gaps.
Slip On Pre-Slit Foam Covers
Most foam pipe covers come pre-slit. That means they have a cut running down one side. You just open the slit and press the cover onto the pipe. No tools needed. Many covers have self-sealing edges or tape to hold the seam shut. Push them together and smooth them down.
Here are some options to match different pipe sizes and jobs.
For short runs or odd spots, foam stick covers are easy to cut and fit around curves. The Duck Brand covers work on both hot and cold water pipes.
If you have longer stretches of 3/4 inch pipe, longer tubes save time. This set gives you several six-foot pieces with built-in tape on the seam.

For 1 inch pipes, or if you have many pipes to cover, a larger multi-pack gives you plenty to work with. You can cut each piece to length.

It Helps in Summer Too
Insulating pipes is not just a winter job. In warm months, cold water pipes can “sweat.” That means moisture forms on the outside and drips. Foam covers stop that too. So the work you do now pays off all year.
When to Call a Plumber
Some pipes are hard to reach. They may run behind walls, under floors, or deep in a tight crawl space. If you cannot safely get to a pipe, do not force it. Call a licensed plumber. They can insulate hidden pipes and check for weak spots. A plumber is also the right call if a pipe has already frozen or leaked. It is better to ask for help than to risk a bigger problem.
Heating System and Safety Checks You Shouldn’t Skip
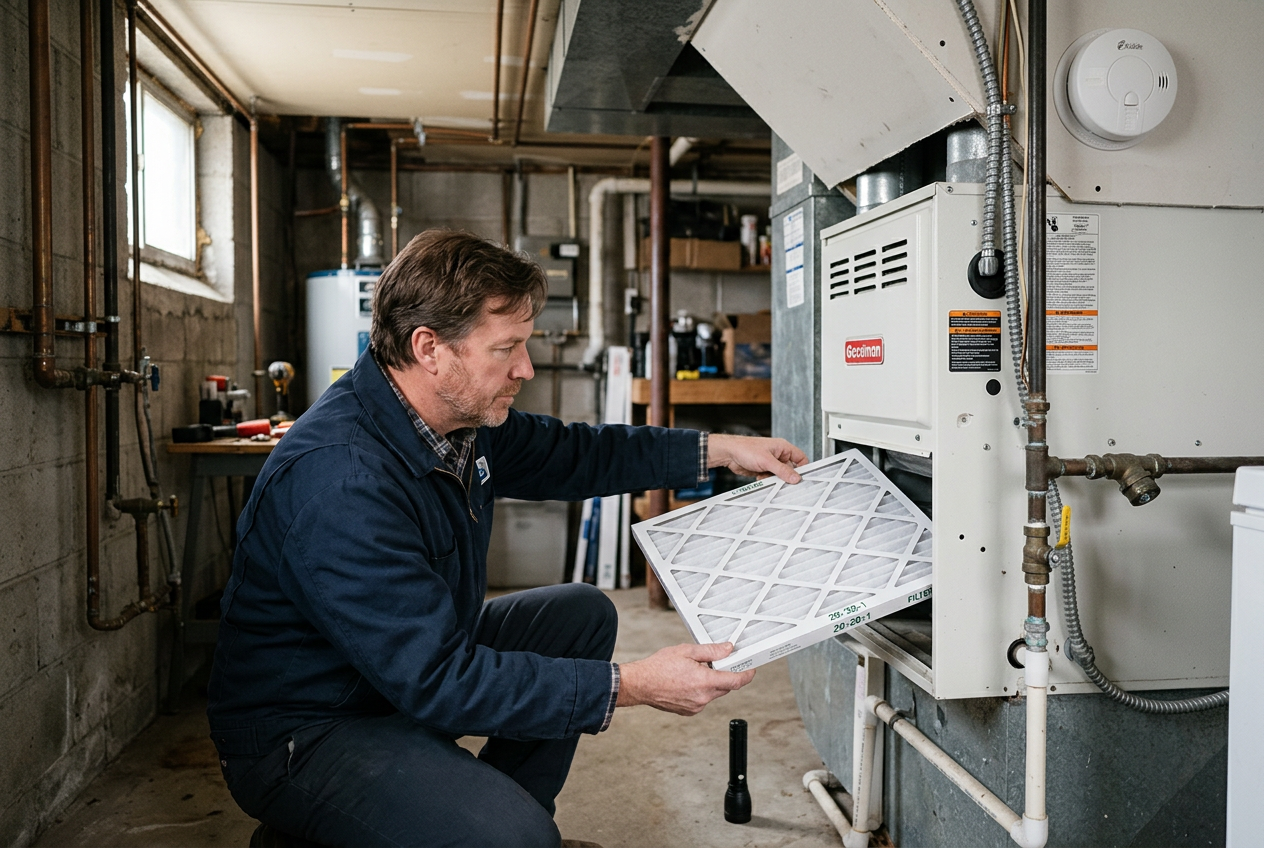
Your heating system does the hard work all winter. A few simple checks now help it run well and keep your home safe. Most of these tasks cost nothing. Some are easy to do yourself. Others need a professional. Here is how to tell them apart.
Replace Your Furnace Filter
Start with the furnace filter. A dirty filter blocks airflow. That makes your furnace work harder and run less well. Check the filter before heating season begins. If it looks gray and clogged, swap it out. This is an easy job you can do yourself. Slide out the old filter and slide in a new one of the same size. The size is usually printed on the edge of the old filter. During heavy use, check it every month or two.
Schedule Professional Heating Service
Before the cold hits, book a service visit for your heating system. A trained technician can inspect the parts, clean them, and spot problems early. This is not a do-it-yourself job. Furnaces and boilers involve fuel, electricity, and moving parts. A professional knows what to look for and how to work safely. Try to book early. Companies get busy once the first cold snap arrives.
Learn Where Your Main Water Shutoff Is
Find your main water shutoff valve now, before you need it. This is the valve that turns off all the water coming into your home. If a pipe freezes and bursts, shutting the water fast can limit the damage. The valve is often near where the water line enters your home. Check the basement, a utility closet, or near your water meter. Once you find it, make sure everyone in the house knows where it is and how to turn it.
Test Your Smoke and Carbon Monoxide Detectors
Winter means more heating, and that raises the risk of fire and carbon monoxide. Carbon monoxide is a gas you cannot see or smell. It can come from furnaces and other fuel-burning appliances. Working detectors are your warning system.
Test your smoke detectors and carbon monoxide detectors at the start of winter. Most units have a test button. Press it and listen for the alarm. If the alarm is weak or silent, replace the batteries and test again. If it still does not sound, replace the unit. Do not skip this step. It is quick, and it matters.
Check your detectors at least once a month through the season. This is a simple habit that keeps your family safe.
What You Can Do Versus What Needs a Pro
You can change the filter, locate the shutoff valve, and test detectors yourself. Leave the furnace or boiler inspection to a professional. When fuel, gas, or electrical parts are involved, a trained technician is the safe choice. Knowing the difference keeps you safe and your system running well.
Outdoor and Exterior Tasks: Gutters, Hoses, and Outdoor Faucets
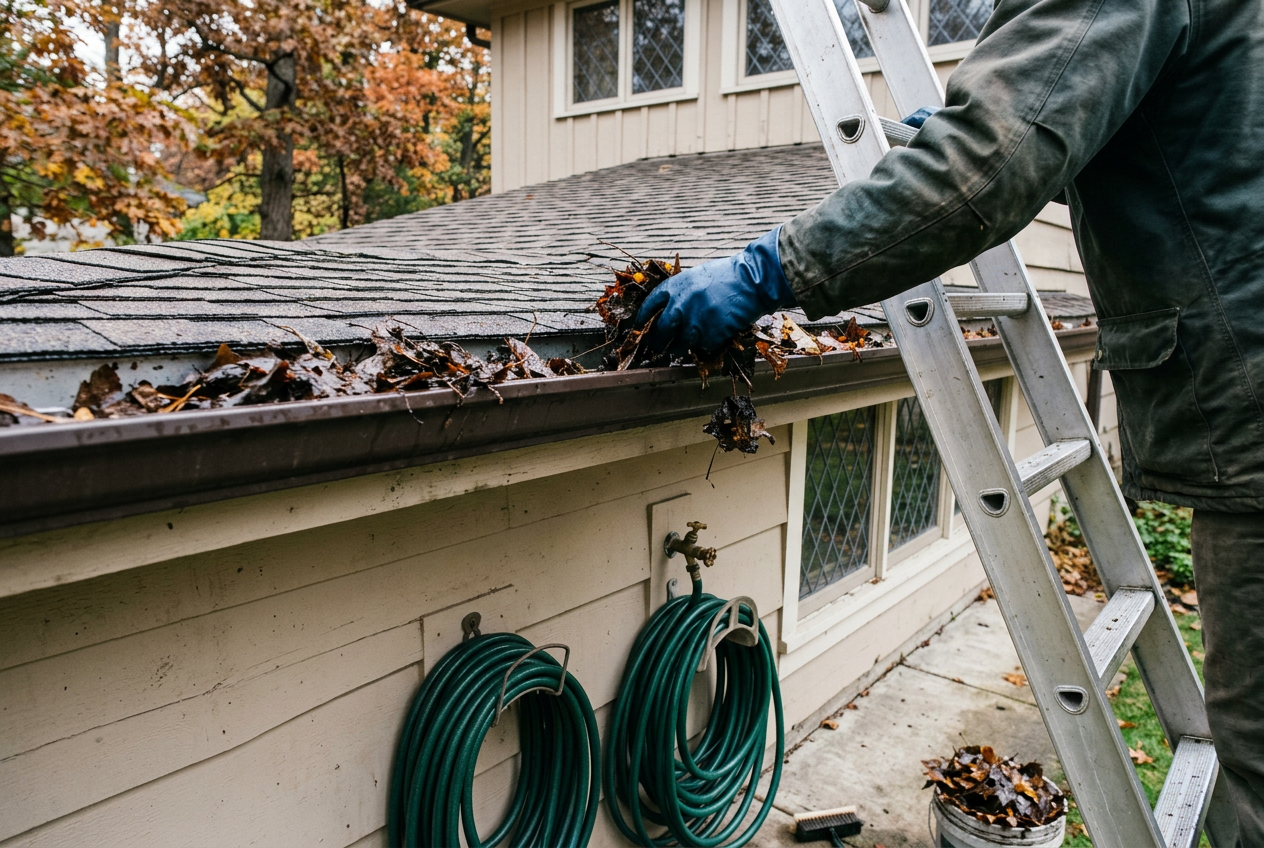
The outside of your house needs attention too. These jobs are mostly free. They take an afternoon. And they can save you from big repair bills later. Freezing water is the main problem to stop here. When water freezes, it expands. That expansion can crack pipes, split faucets, and damage your roof. A little work now prevents all of that.
Clean Your Gutters
Gutters carry rain and melting snow away from your house. When they get clogged with leaves and dirt, water cannot drain. In winter, that trapped water can freeze. Frozen gutters are heavy. They can pull away from the house. Blocked water can also back up under your roof edge and leak inside.
Wait until most of the leaves have fallen. Then clear your gutters out. Scoop out leaves and debris by hand or with a small trowel. Wear gloves. Then flush the gutters with a garden hose. Watch the water flow. It should run freely to the downspout and out the bottom. If water pools or drains slowly, you may have a clog in the downspout.
Always use a stable ladder. Have someone hold it for you. If your house is tall or the roof is steep, hire a pro. This is not worth a fall.
Disconnect and Drain Garden Hoses
A garden hose left connected in winter is a common cause of damage. Water trapped in the hose freezes. That ice pushes back into the faucet and the pipe behind it. The pipe can crack inside your wall. You may not know until spring, when it leaks.
The fix is simple. Unscrew each garden hose from its outdoor faucet. Drain the water out by stretching the hose on a slope or lifting one end. Then coil it up and store it inside. A garage or shed works well. Storing hoses indoors also helps them last longer.
Shut Off and Drain Outdoor Faucets
Outdoor faucets, also called hose bibs or spigots, need to be drained too. Many homes have a separate shutoff valve for outdoor faucets. It is usually inside, often in the basement or a crawl space. Look for a valve on the pipe that leads to the outside faucet.
Turn that valve off. Then go outside and open the faucet fully. Let any water left in the pipe drain out. Leave the outdoor faucet open through winter. This gives any remaining water room to expand if it freezes.
If your home has frost-free faucets, they are built to drain on their own. Still, you should disconnect the hose. A connected hose stops a frost-free faucet from draining the way it should.
Do these three tasks before the first hard freeze. They cost nothing but time, and they protect your home all winter.
Draft-Sealing and Pipe Products Compared
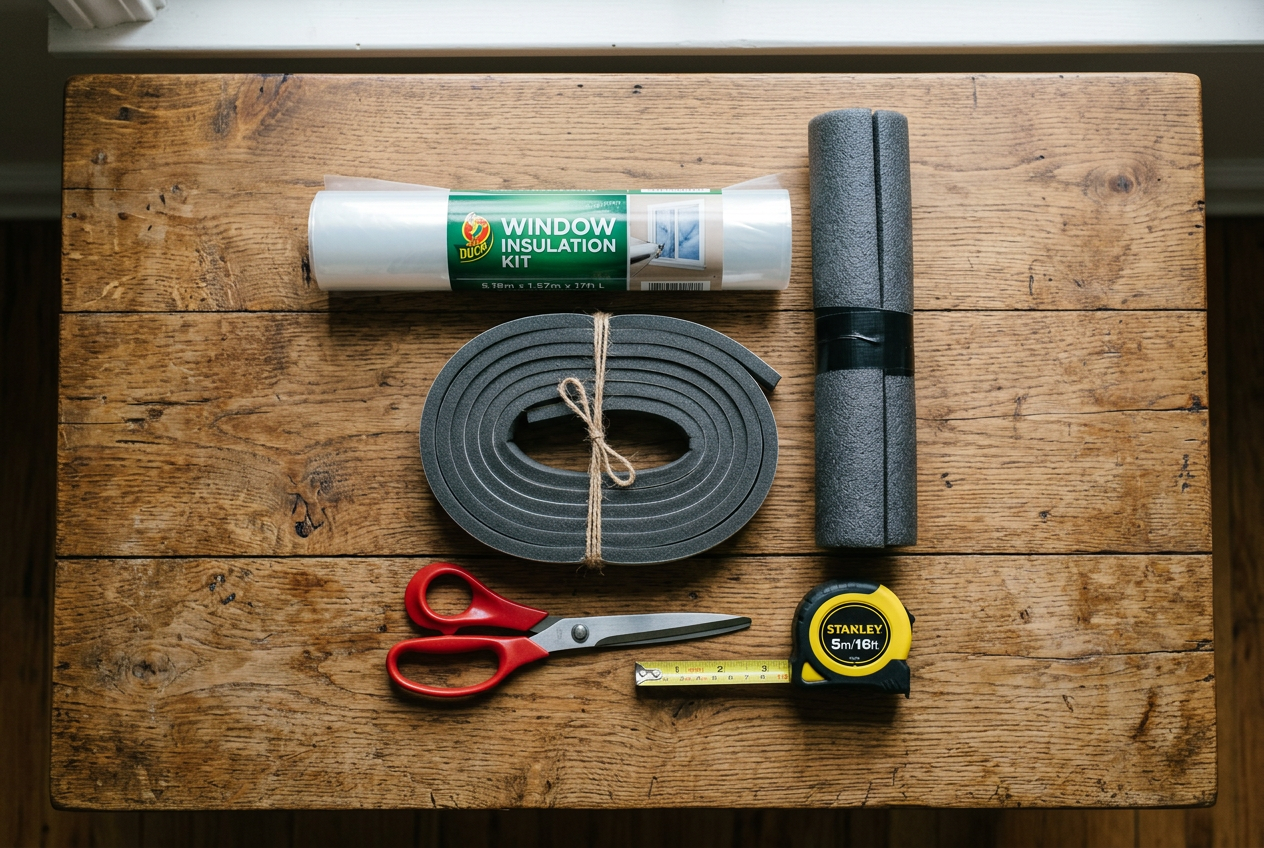
By now you know the main jobs: seal windows, seal doors, and insulate pipes. There are a lot of products that do these jobs. You do not need all of them. Pick the ones that match the problems you found during your walk-through. Buying extra things you will not use just wastes money.
Here is a quick look at the products covered in this article. The table shows what each one solves, where it goes, and the tools you need. Use it to match the right fix to the right room.
How to pick without over-buying
For windows, both shrink kits do the same job. They cover the glass with a clear film that you tighten with a hair dryer. This makes an airtight layer that blocks drafts. The Duck Brand Window Insulation Kit comes in a roll, so you can cut it to fit many window sizes. The Frost King Shrink Window Kit works the same way. Pick based on how many windows you need to cover.
For doors, think about where the cold comes in. If you feel air around the sides, use foam weather stripping like the Bantie EVA Foam Weather Stripping. It fits the frame where the door shuts. If the cold comes in under the door, the Holikme Door Seal Strip seals that bottom gap. The Alien Draft Seal flaps are clear and work on both doors and windows. Many homes need more than one of these.
For pipes, match the foam to the pipe size and length. The Duck Brand Foam Pipe Covers come in short pieces, good for small spots. The FUYITE Pipe Insulation Foam comes in longer 6 foot tubes, better for long runs. Both are pre-slit, so you just wrap them around the pipe.
Start with the rooms where you felt the worst drafts. Fix those first. You can always add more later if you still feel cold air. This saves money and keeps your work simple.
Frequently Asked Questions
How much can winterizing save on heating?
Sealing drafts and insulating pipes helps keep warm air inside your home. When warm air stays in, your heating system does not have to work as hard. This can lower your energy costs during the cold months. The exact savings depend on your home, your climate, and how drafty your house is. We cannot promise a set dollar amount. But small steps like sealing windows and doors add up over a full winter.
Can renters do this without damaging the property?
Yes. Many winterizing steps are renter friendly. You can use removable weather stripping around doors and windows. Foam pipe covers slip over pipes and come off later. Window insulation film peels away in spring. These products use adhesive or shrink film, so always test a small spot first. Check that the adhesive does not pull off paint or finish. If you are unsure, ask your landlord before you start. Most landlords are happy when tenants help prevent frozen pipes and heat loss.
What temperature should I set the thermostat if I leave home?
If you leave your home empty during cold weather, do not turn the heat off. Set your thermostat to a low but safe temperature. A common guide is to keep it at least 50 to 55 degrees. This keeps your pipes and other items from freezing while you are away. If you are leaving for a long time, you may also want to shut off your property’s water supply at the main valve. That way, if a pipe does fail, less water can escape. Know where your main shutoff valve is before you need it.
How do I prevent frozen pipes during a cold snap?
Start by insulating your pipes before the cold hits. Foam pipe covers are easy to install and help both hot and cold water pipes. They are pre-slit, so you just open them and press them over the pipe.
During a hard freeze, keep your heat on and set to a safe temperature. If you have pipes along outside walls, let a faucet drip slowly. Moving water is less likely to freeze. Open cabinet doors under sinks so warm room air can reach the pipes. Also make sure you know where your main water shutoff valve is. If a pipe does burst, you can stop the water fast.
What else should I check for safety before winter?
Winter means more time with the heat running and the windows closed. Test your smoke detectors and carbon monoxide detectors at the start of the season. Check them again at least once a month. Replace the batteries if needed. It only takes a few minutes, and it keeps your household safe through the whole heating season.
Your Room-by-Room Action Checklist
Here is the whole house in one place. Work top to bottom. You can finish most of this in a weekend. To save this list, just print this page.
A few items are free. Some need cheap supplies. A few need a pro. We mark each one so you know before you start.
Start Here: Find Your Drafts
- Walk through each room. Feel around windows and doors for cold air. (Free)
- Note the spots that need sealing. (Free)
- Find your main water shutoff valve so you know where it is. (Free)
Windows
- Lock all windows. Locked windows seal tighter. (Free)
- Add weather stripping to gaps. (Low-cost)
- Apply a shrink film kit for an extra layer. (Low-cost)
Doors
- Add a door bottom seal under drafty doors. (Low-cost)
- Add weather stripping around the door frame. (Low-cost)
Pipes
- Wrap pipes in cold spots with foam covers. Think garage, basement, and crawl spaces. (Low-cost)
- On very cold nights, let a faucet drip to keep water moving. (Free)
- If you leave the house empty, keep heat at least 50 to 55 degrees to stop freezing. (Free)
Heating and Safety
- Change your furnace filter. (Low-cost)
- Have a pro service your heating system. (Pro)
- Test every smoke alarm. (Free)
- Test every carbon monoxide alarm. (Free)
- Replace old batteries in both. (Low-cost)
Outdoor and Exterior
- Clean leaves out of your gutters. (Free)
- Disconnect and drain garden hoses. (Free)
- Shut off and drain outdoor faucets. (Free)
- Cover or insulate outdoor faucets. (Low-cost)
Quick Reference Table
Use this to plan your weekend. It shows cost and how hard each job is.
Tackle It in One Weekend
Start Saturday morning with the free jobs. They cost nothing but time. Move to the low-cost sealing and pipe jobs next. Save the gutters and outdoor faucets for daylight hours.
Book your furnace service early. Pros get busy once the cold hits. The rest of this list you can do yourself.
Work through each room and check it off. By Sunday night, your house will be ready for the first freeze.
Conclusion: Next Steps Before the First Freeze
You do not need to do everything at once. The two biggest wins are simple. Seal the drafts around your windows and doors. Insulate your pipes so they do not freeze. Both jobs are low cost. Both make a real difference in how warm your home feels and how safe your pipes stay.
Start With the Free Walk-Through
Before you spend any money, walk through your house. This step costs nothing. On a cold or windy day, move slowly along your windows and doors. Feel for cold air coming in. Check the gaps at the bottom of doors. Look at your pipes, especially any in cold spots like the basement, garage, or under sinks on an outside wall.
Write down what you find. Note which windows let in drafts. Note which doors have gaps. Note which pipes sit in cold, unheated areas. This list is your plan. It tells you exactly what to fix.
Buy Only What Your Walk-Through Found
Do not guess. Do not buy a cart full of products you may not need. Let your list guide you.
If your windows are drafty, a window film kit can help. The Duck Brand Window Insulation Kit or the Frost King Indoor Shrink Window Kit both create a clear, sealed layer over the glass.
If cold air comes in around a door frame, weather stripping fills the gap. The Bantie EVA Foam Weather Stripping and the Alien Draft Seal are good options to close those gaps.
If the gap is under the door, a door bottom seal like the Holikme Weather Stripping Door Seal blocks the draft coming in along the floor.
If your pipes sit in cold spots, foam pipe covers are an easy fix. The Duck Brand Foam Pipe Covers and the FUYITE Pipe Insulation Foam Tube slip right over the pipe and seal shut.
Buy for the problems you actually found. Nothing more.
Finish Before the First Hard Freeze
Timing matters. Draft sealing and pipe insulation are easiest to do before the cold sets in. Window film goes on best on a clean, dry, room-temperature surface. Adhesive strips stick better when it is not freezing. And once a pipe freezes and bursts, the repair costs far more than the foam cover would have.
So pick a mild weekend. Do the walk-through first. Fix the drafts. Wrap the pipes. Then check off the rest of the tasks in your room-by-room list, like testing your smoke and carbon monoxide detectors and knowing where your main water shutoff is.
You can print this page and use it as your checklist. Start with the free steps today. Finish the small purchases before the first hard freeze hits. Your home will be warmer, your bills lower, and your pipes safe through the cold months.
Sources and Further Reading
- How to Winterize a House
- 9 Steps for Winterizing Your Home
- How to Winterize your home.
- How to Winterize Your Texas Home Before the Next Freeze
- How To Winterize Your Home | Blog | Elizabeth Bain