Home Fire Safety Checklist: A Room-by-Room Guide to Prevent Fires (2026)
You walk past the same fire hazards every day. A frayed cord behind the couch. A smoke alarm with a dead battery. A stove towel too close to the burner. You do not see them because they blend in. That is the real danger. Most home fires start from small things you stopped noticing.
October is the best time to change that. Fire Prevention Week lands this month, and it is a simple reason to stop and check your home. You do not need to be an expert. You just need a plan and about an hour.
That is what this guide gives you. We walk through your home one room at a time. Each room has its own risks, and a room-by-room check catches problems a quick glance would miss. You will look at the kitchen, the highest-risk room in most homes. You will check living areas, bedrooms, and the garage.
We also cover the gear that saves lives. You will learn where to place smoke and carbon monoxide alarms and how to test them. We compare fire extinguishers so you can pick the right one. Then we help you build a home fire escape plan your whole family can follow.
At the end, you get a printable home fire safety checklist. Print it, work through it, and mark each task done.
- Put a working smoke alarm in every bedroom, outside sleeping areas, and on each level of your home.
- Test all alarms once a month and swap the batteries at least once a year.
- Keep a fire extinguisher in the kitchen and near other high-risk spots like the garage.
- Add carbon monoxide detectors near sleeping areas to catch a danger you cannot see or smell.
- Make an escape plan with two ways out of each room and practice it twice a year.



Reviewed by Marcus T., James W. & Priya K. — contributors with hands-on preparedness experience. How we test
Getting your home ready for a fire starts with a few key tools. Grab these first, then read on to see how each one fits into your room-by-room plan.

First Alert Smoke Alarm
This battery alarm gives you an early warning if a fire starts, so your family has time to get out. Its smart sensing also cuts down on false alarms from cooking.
Check Price on Amazon
Kidde Home Fire Extinguisher
Keep this in the kitchen or garage to stop small fires before they spread. It works on common home fires like wood, paper, liquids, and electrical flare-ups.
Check Price on Amazon
X-Sense Smoke and CO Combo
This 5-pack covers your whole home with both smoke and carbon monoxide sensing in one device. It helps protect you from the fire you can see and the CO gas you cannot.
Check Price on AmazonIn this guide
Why Trust This Guide?
This article was researched and reviewed by contributors with hands-on experience in emergency preparedness. They have tested gear, built real systems, and lived through situations where these skills actually mattered.
How to Use This Home Fire Safety Checklist
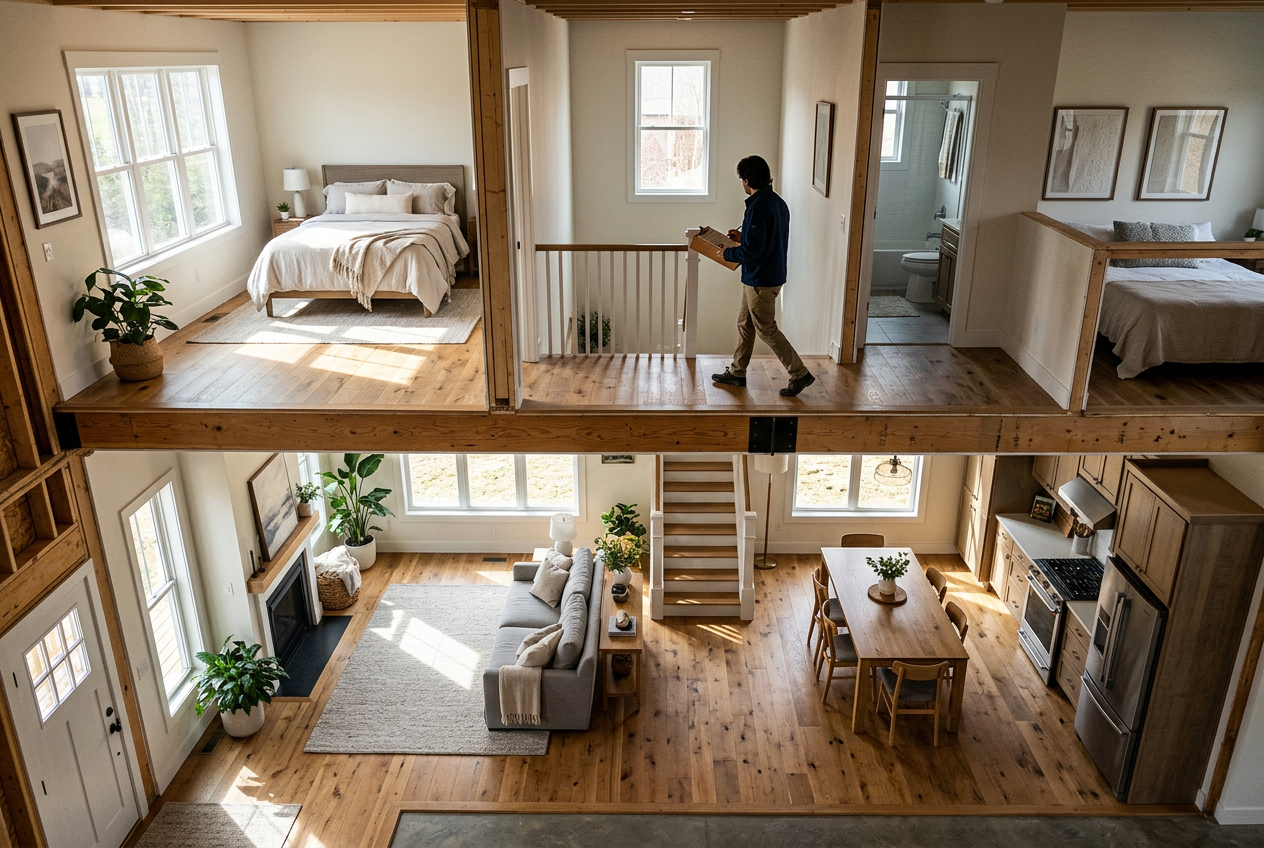
This home fire safety checklist works best when you go room by room. Instead of trying to fix everything at once, you walk through your home one space at a time. You look for hazards in each room. You check the safety gear that belongs there. Then you move to the next room. This slow, steady approach helps you catch problems you might miss if you rushed.
Walk Through Your Home Step by Step
Start at one end of your home and work your way through. Many people begin in the kitchen, since it is the highest-risk room. From there, move to your living areas, then bedrooms, then the garage. Do not skip hallways and stairways. These are the paths you use to get out during a fire, so they matter too.
In each room, ask yourself a few simple questions. Are there working alarms nearby? Are cords, outlets, and appliances in good shape? Is anything flammable sitting too close to heat? Do you have a clear way out? Write down what you find. A short note helps you remember what to fix later.
You do not have to finish the whole home in one day. If you only have time for one room, that still counts. The goal is progress, not perfection. Come back and tackle the next room when you can.
Check Your Safety Gear as You Go
As you move through each room, look at the safety tools already in place. Test your smoke alarms. Look at your carbon monoxide alarms. Check that any fire extinguisher is easy to reach and still works. Later sections in this guide cover alarm placement, extinguisher choices, and escape planning in more detail. For now, just note what you have and what is missing.
If you find you need new alarms or an extinguisher, we point to solid options in those later sections. You can add them to your fix-it list as you walk.
Use Trusted Safety Standards as Your Baseline
This checklist follows guidance from respected safety groups. The U.S. Fire Administration, part of FEMA, offers a home fire safety checklist for both homeowners and renters. The National Fire Protection Association, or NFPA, shares tips on how home fires start and how to stay safer. The American Red Cross recommends steps like installing smoke alarms on every level of your home, inside bedrooms, and outside sleeping areas. The Red Cross also says to test those alarms every month and to talk with your family about safety.
These groups set the baseline standards this guide builds on. If you ever want to dig deeper, their resources are worth a look. Links to these sources appear at the end of this article.
Keep your findings in one place, like a notebook or a phone note. When you finish your walk-through, you will have a clear list of things to fix. That list becomes your plan of action.
Smoke and Carbon Monoxide Alarms: Placement and Testing
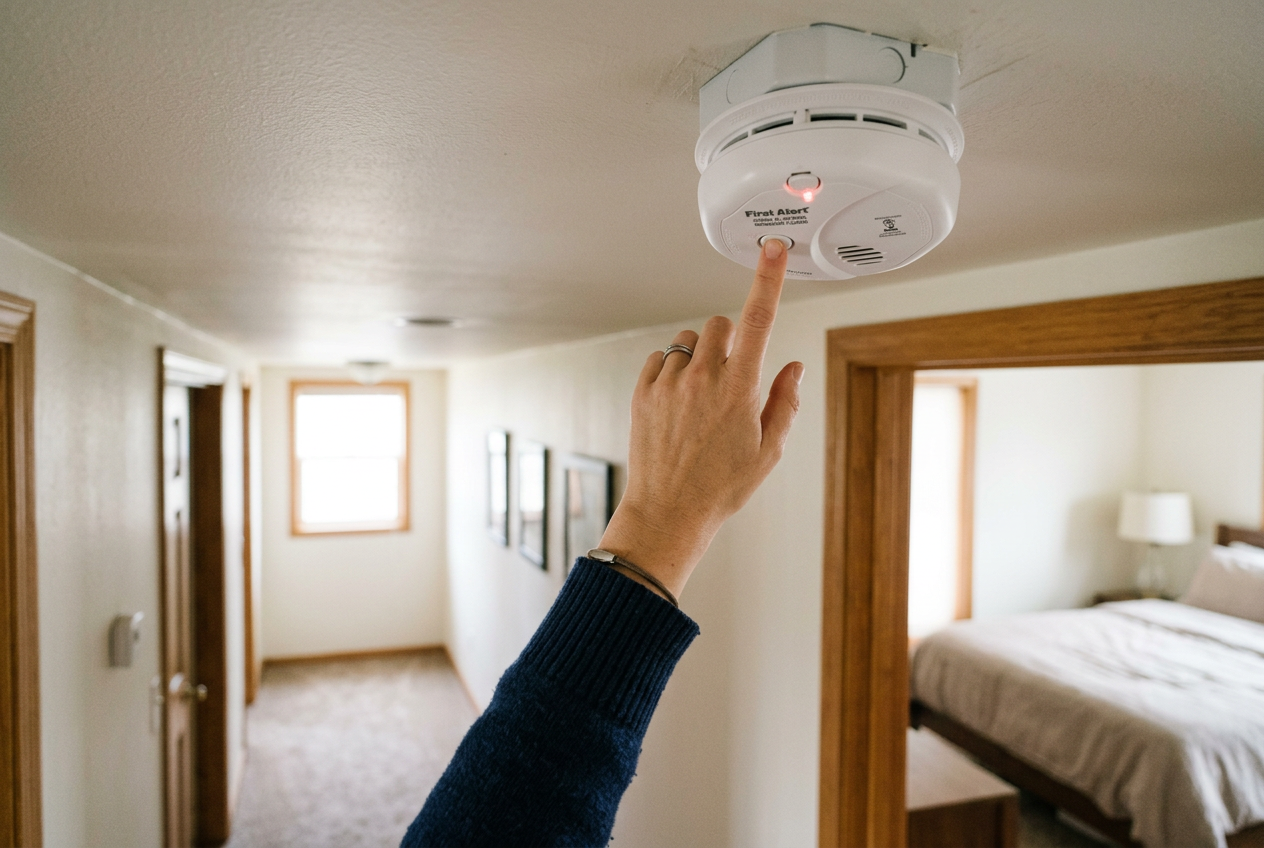
Working alarms are your first line of defense. They give you time to get out. Getting placement and testing right matters just as much as owning them.
Where to Put Your Alarms
Follow the same simple rule from the Red Cross and NFPA. Install smoke alarms on every level of your home. Put one inside each bedroom. Put one outside each sleeping area too. If a fire starts while you sleep, an alarm near your bed can wake you fast.
Carbon monoxide (CO) is a gas you cannot see or smell. It needs its own protection. You can use a combination unit that detects both smoke and CO. This cuts down on the number of devices you need to install and check.
Test Every Month
Both the Red Cross and NFPA say to test your smoke alarms every month. This takes only a minute. Press the test button until you hear the alarm sound. If it does not sound, replace the batteries or the whole unit.
Make monthly testing a habit. Pick the same day each month so you do not forget.
Combination Smoke and CO Units
A combination alarm gives you two kinds of protection in one device. The X-Sense SC07 is a photoelectric smoke sensor paired with an electrochemical CO sensor. It is ETL Listed and meets the UL 217 and UL 2034 safety standards. It comes in a 5-pack, so you can cover a whole home. It needs no rewiring and mounts with the included bracket and screws.
If you want a smoke-only alarm for spots that do not need CO detection, the First Alert battery model uses Precision Detection technology. This is built to reduce false alarms from cooking. The front battery compartment makes swaps easy.
Interconnected Alarms for Whole-Home Coverage
Interconnected alarms work as a team. When one senses smoke or CO, they all sound. This helps everyone hear the alert, even on another floor. That extra warning time can matter in a big house.
The First Alert hardwire combination alarm interconnects with most First Alert and BRK alarms. It has a battery backup, so it keeps working during a power outage. This is a good choice if your home is already wired for alarms.

If you do not want to deal with wiring, the X-Sense SC01-W links wirelessly. When one detects smoke or CO, all connected units sound. It has a sealed 10-year lithium battery. That means no battery swaps, no late-night low-battery chirps, and no ladder climbing for a decade. The 6-pack covers a full home.

Whichever alarms you choose, place them right, test them monthly, and replace old units as the maker directs.
Kitchen Fire Safety: The Highest-Risk Room
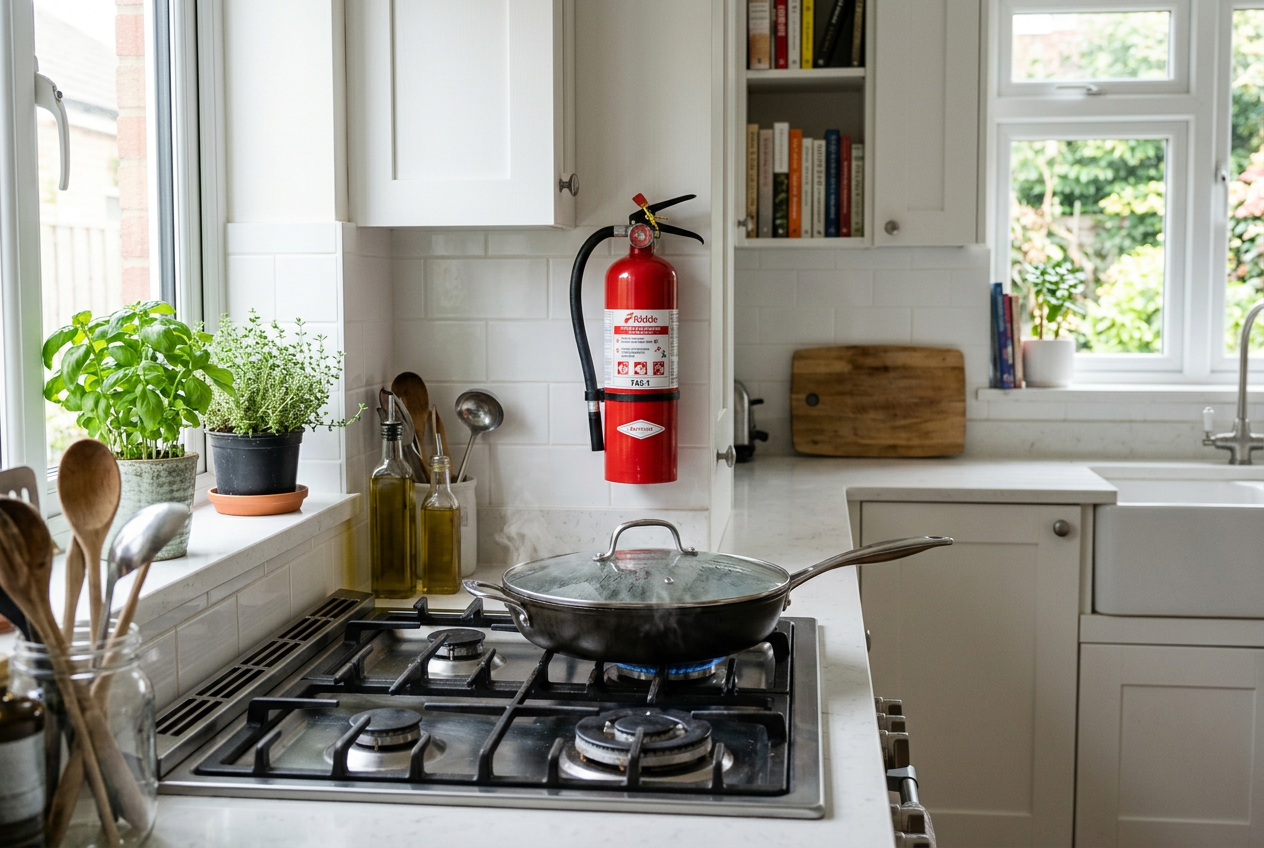
The kitchen is where most home fires start. Hot pans, open flames, and hot oil all sit close together. A small slip can turn into a big fire fast. The good news is that most kitchen fires are easy to prevent. A few simple habits keep you safe.
Never Leave Cooking Unattended
Most kitchen fires start when no one is watching the stove. Stay in the kitchen while you fry, grill, or boil. If you must leave, turn off the burner first. When you bake or roast, check often and set a timer. A timer reminds you the food is still cooking.
Keep the stove area clear. Move towels, paper, and food boxes away from burners. Push pot handles to the back so no one bumps them. Watch loose sleeves near flames. Long, hanging clothes can catch fire.
How to Handle a Grease Fire
Grease fires are the most dangerous kitchen fires. Never throw water on burning oil. Water makes the flames explode and spread. If a pan of oil catches fire, do this instead:
- Turn off the burner if you can reach it safely.
- Slide a metal lid over the pan to smother the flames.
- Leave the lid in place until the pan is fully cool.
For fires that spread beyond the pan, you need the right tool. A grease-rated fire extinguisher is made for this job. The Kidde set below includes a white extinguisher with a flared nozzle. That nozzle helps stop oil from splashing when you spray. This set covers Class A, B, and C fires. That means trash, wood, paper, cooking grease, liquids, and electrical fires.

Keep an Extinguisher Within Reach
Store a fire extinguisher near the kitchen, but not right next to the stove. You do not want to reach through flames to grab it. Mount it by the exit door instead. That way you can grab it as you move toward safety.
Some newer extinguishers use a spray formula and cover more fire types. The AmzBoom set handles wood, cooking oil, gasoline, and even lithium-ion battery fires. It comes with mounting brackets, so you can keep one handy in the kitchen and one in the car. The formula is water-based and leaves no messy residue.

Know When to Fight and When to Flee
An extinguisher is only for small, early fires. Use it only if the fire is small, you have a clear way out, and the room is not full of smoke. Always keep your back to an exit.
If the fire spreads fast, gets big, or fills the room with smoke, get out. Close the door behind you. Call 911 from outside. No pan of food is worth your life. When in doubt, leave and let the pros handle it.
Living Areas, Bedrooms, and Garage: Room-by-Room Hazards
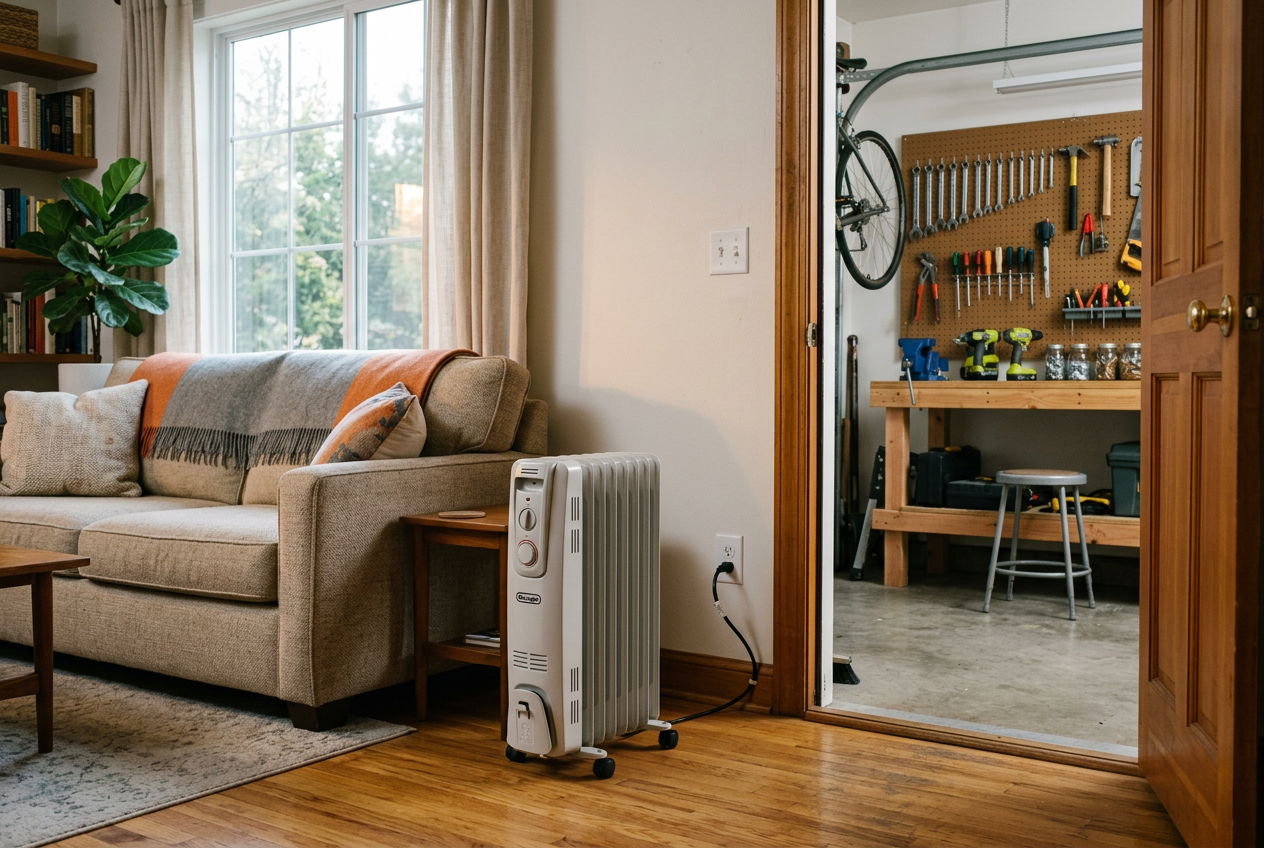
The kitchen gets the most attention, but fires start in other rooms too. Each space in your home has its own risks. Walk through them one at a time. Fix what you can as you go.
Living Rooms and Family Spaces
Living areas are full of electronics and cords. Start with your outlets. Do not overload them. Plugging too many things into one outlet can cause it to overheat. Use a power strip with a built-in circuit breaker if you need more spots.
Check your cords too. Look for cracks, fraying, or damage. Do not run cords under rugs or across doorways. That traps heat and wears them down. Replace any cord that looks worn.
Keep clutter away from heat. Newspapers, blankets, and boxes catch fire fast. Give lamps, TVs, and other gear room to breathe.
If you use a space heater, treat it with care. Keep it at least three feet from anything that can burn. That means curtains, furniture, and bedding. Place it on a hard, flat surface. Never leave it running when you sleep or leave the room. Plug it right into the wall, not into a power strip.
Bedrooms
Bedrooms need extra care because people sleep there. A working smoke alarm inside each bedroom is a must. Keep cords and chargers away from bedding. Phone and laptop chargers can get hot. Do not charge devices under a pillow or blanket.
Make sure each bedroom has two ways out. That could be a door and a window. Check that windows open easily. In a fire, you may need that second exit fast.
Skip candles in the bedroom, or use flameless ones instead. It is easy to fall asleep with a candle still lit.
Garage and Workshop
The garage often holds the most fire risk in the home. It is where you store fuel, tools, and chemicals. Keep gasoline in approved containers only. Never store fuel inside living spaces. Keep it away from heat, sparks, and anything that could light it. Store it out of reach of children.
Let engines cool before you refuel. Never use your mouth to siphon fuel. Follow the maker’s directions and your local fire rules.
Watch for clutter here too. Oily rags, cardboard, and paint cans pile up fast. Store them safely and clear out what you do not need.
A garage or workshop should have its own fire extinguisher. Pick a heavy-duty model rated for wood, liquids, and electrical fires. The First Alert HOME2PRO is UL rated 2-A:10-B:C and built with all-metal parts. It can be recharged by a certified pro after use. That makes it a solid choice for a workshop.
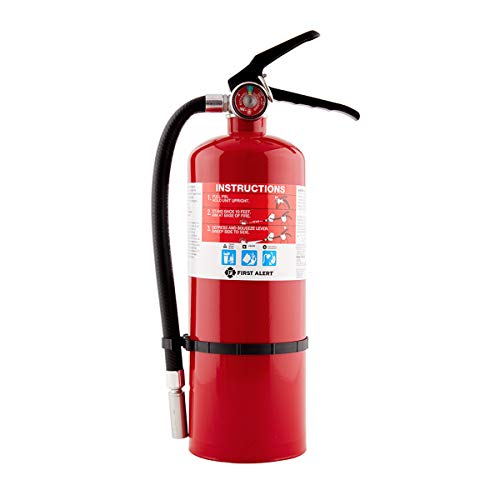
If you want a set that covers both the home and kitchen, this Kidde value pack includes two extinguishers rated for common home fires. One has a flared nozzle made for grease fires.
Check each room, fix the hazards, and move on to the next.
Choosing the Right Fire Extinguisher: Comparison Table
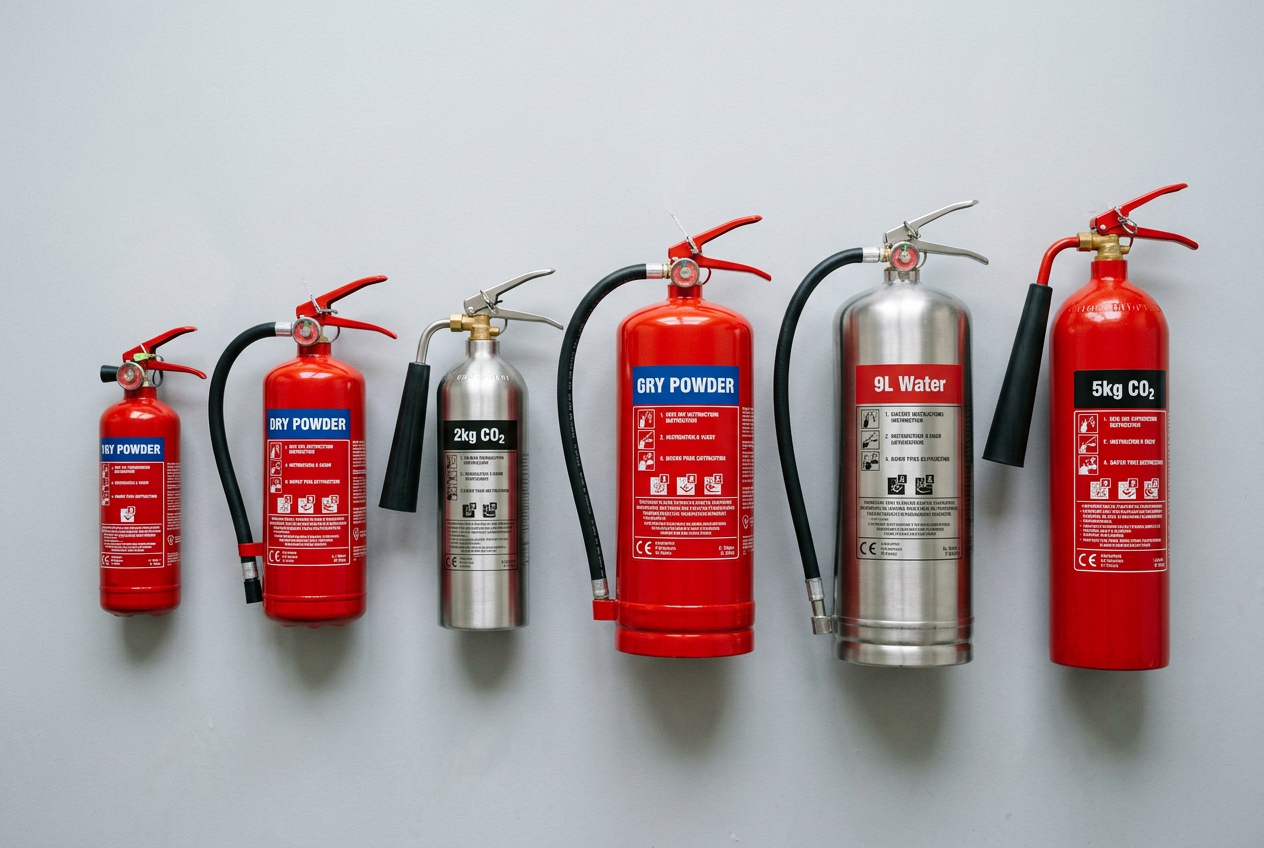
A fire extinguisher only helps if it matches the fire. That is why extinguishers use letter ratings. Each letter stands for a type of fire. Pick the right one for each room, and you stay ready.
What the Letters and Numbers Mean
Extinguishers use the classes A, B, and C. Here is what each one covers.
- Class A: Ordinary stuff like wood, paper, cloth, and trash.
- Class B: Flammable liquids and gases, like grease, oil, and gasoline.
- Class C: Electrical fires, like wiring and appliances.
Many home units carry all three ratings. You may see a label like “1-A:10-B:C”. The numbers show how much fire the unit can handle. A bigger number means more power against that class of fire.
For most homes, a multipurpose A:B:C extinguisher is the smart choice. It works on the most common home fires. Keep one on every level of your home. Store each unit near an exit, not deep inside a room. You want to grab it and back away toward the door.
A Simple Room-by-Room Match
Different rooms face different risks. Use this table to match the right type to each space.
A few room notes to keep in mind:
- Kitchen: Cooking fires often start with grease or oil. Use a unit rated for those fires. Never throw water on a grease fire.
- Garage: You may store fuel, paint, or tools here. An A:B:C unit covers most of these risks. Follow the fuel safety rules and keep containers away from ignition.
- Bedrooms and living areas: A small A:B:C unit works well. Mount it near the door.
A Solid Multipurpose Pick
If you want one unit that covers most home fires, a basic A:B:C extinguisher is a good start. The Kidde Basic 110 carries a 1-A:10-B:C rating. That means it handles trash, wood, paper, liquids, gases, and electrical fires. It has all-metal construction and an easy pull safety pin.
This budget unit fits well in a bedroom, living room, or garage. Keep a separate kitchen-rated unit for cooking fires.
Check the pressure gauge on each extinguisher every month. If the needle drops out of the green zone, replace or service the unit. Also read the manufacturer directions so you know how yours works before you ever need it.
Building a Home Fire Escape Plan

Alarms warn you when a fire starts. An escape plan gets you out fast. A fire can spread in seconds. You may have very little time to get outside. A clear plan helps everyone know what to do before smoke fills the house.
Make the plan with your whole family. Local fire safety checklists stress this point. Every person should know the plan. That includes kids, older adults, and anyone who needs extra help. Do not leave it in one person’s head. Talk it through together and write it down.
Map Two Ways Out of Every Room
Draw a simple map of your home. Mark each room. Then find two ways out of every room. The first way is usually the door. The second way is often a window.
Two exits matter because a fire may block the first path. If the hallway fills with smoke, you need a backup. Check each window now. Make sure it opens easily. Screens should pop out or push open without a fight.
Make Sure Doors and Windows Work
Test every exit door and window. They should open fast, even in the dark. A stuck window is useless in an emergency.
- Check that locks and latches move freely.
- Clear away furniture or boxes that block a window.
- If you have security bars on windows, use bars with a quick-release lever. You must be able to open them from the inside.
- Keep keys near locked doors so you can grab them fast.
Do this check on every level of your home.
Pick a Meeting Spot Outside
Choose one meeting spot outside the home. It should be a safe distance from the house. A tree in the front yard, a mailbox, or a neighbor’s porch all work well.
Everyone goes to the same spot after they get out. This way you can count heads fast. You will know right away if someone is still inside. Tell the firefighters. Never go back in yourself.
Practice Fire Drills
A plan only works if you practice it. Run a home fire drill at least twice a year. Practice during the day and at night. Fires do not wait for a good time.
Push the test button on your smoke alarm so everyone knows the sound. Then have each person move to their nearest exit and head to the meeting spot. Time it. Try to get everyone out in under two minutes.
Teach a few key habits during each drill:
- Get low and go. Smoke rises, so crawl under it.
- Feel a door before you open it. If it is hot, use your second way out.
- Do not stop for toys or bags. Just get out.
Practice makes these moves feel normal. When kids and adults know the steps by heart, they act fast under stress. That calm response can save lives.
Your Printable Home Fire Safety Action Checklist
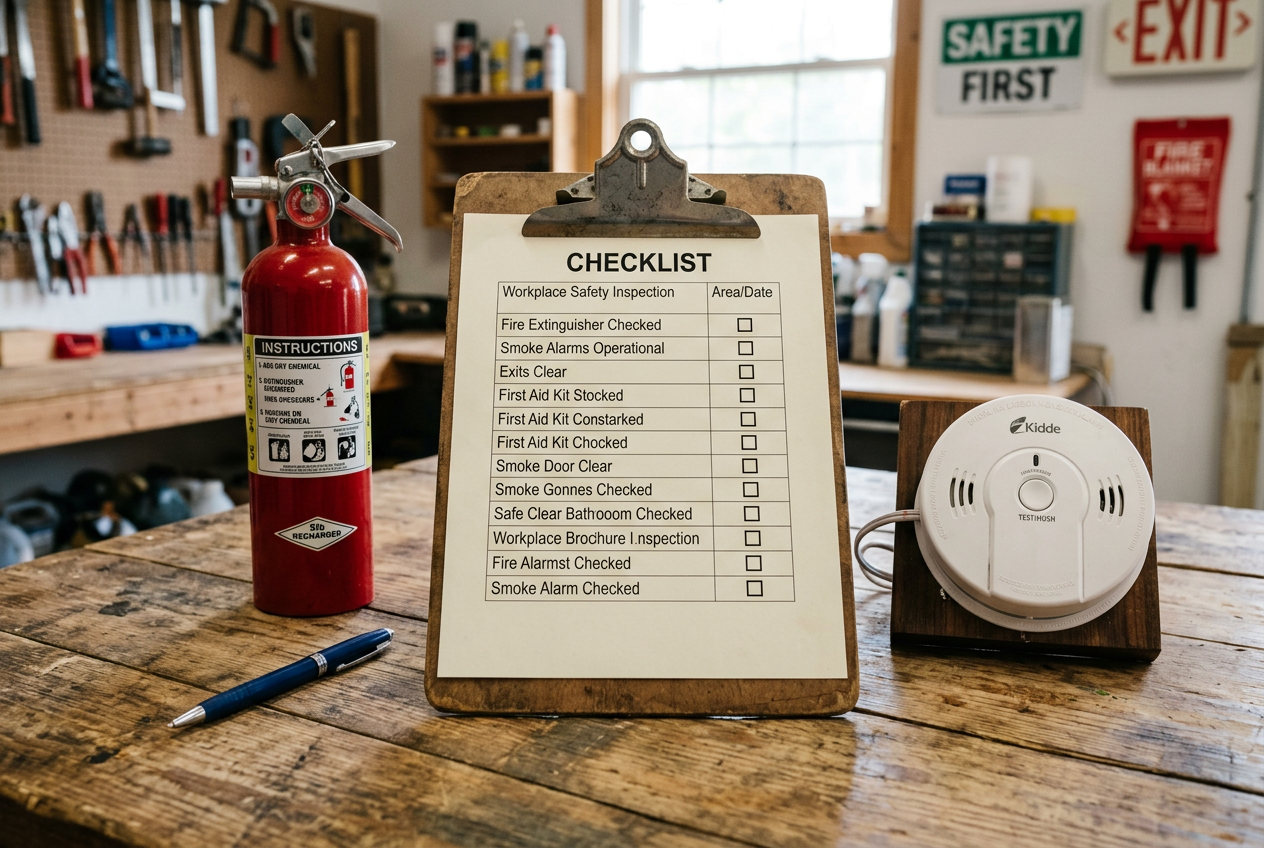
Print this list. Walk through your home room by room. Check off each item as you finish it. Come back once a month to repeat the maintenance tasks.
Alarms: Every Level, Every Bedroom
- Install smoke alarms on every level of your home.
- Put a smoke alarm inside each bedroom.
- Put a smoke alarm outside each sleeping area.
- Install carbon monoxide alarms on every level, especially near bedrooms.
- Consider a combo unit that senses both smoke and CO to cover both jobs. The X-Sense SC07 combo is one easy-to-mount option.
- Pick interconnected alarms so when one sounds, they all sound.
Fire Extinguishers: Right Place, Right Type
- Keep a fire extinguisher on every level of your home.
- Keep one in or near the kitchen. Mount it away from the stove so you can reach it during a grease fire.
- Keep one in the garage or workshop.
- Choose an extinguisher rated for common home fires. A basic ABC unit like the Kidde FA110 covers trash, wood, liquids, and electrical fires.
- Mount each extinguisher where you can grab it fast.
- Make sure everyone at home knows where they are and how to use them.
Escape Routes: Two Ways Out
- Find two ways out of every room.
- Check that all doors and windows open easily.
- Clear clutter from hallways and exits.
- Pick one meeting spot outside your home.
- Make sure kids know the plan.
- Practice your escape plan with everyone in the house.
Kitchen Safety
- Never leave cooking food alone on the stove.
- Keep towels, paper, and other items away from burners.
- Keep a lid nearby to smother a small pan fire.
Living Areas and Bedrooms
- Do not overload outlets or power strips.
- Check cords for cracks or fraying.
- Keep space heaters at least three feet from anything that can burn.
- Turn heaters off when you leave the room or go to sleep.
Garage and Fuel Storage
- Store gasoline only in approved containers.
- Never store fuel inside living space.
- Keep fuel away from heaters, water heaters, and other ignition sources.
- Keep fuel out of reach of children.
- Let engines cool before you refuel.
Monthly Maintenance
- Test every smoke alarm.
- Test every carbon monoxide alarm.
- Replace batteries when an alarm chirps.
- Check the pressure gauge on each fire extinguisher.
- Look for blocked exits or new clutter near doors.
- Review the escape plan with your family.
Tape this list inside a cabinet door. Set a monthly reminder on your phone. A few minutes each month keeps your home safer all year.
Home Fire Safety FAQ
How many smoke alarms do I need?
Install smoke alarms on every level of your home. Put one inside each bedroom. Put one outside each sleeping area too. If your home has more than one bedroom hallway, add an alarm for each one.
This layout gives you the best chance to hear an alarm no matter where you are. If your bedroom door is closed at night, an alarm inside the room can still wake you.
How often should I test my alarms?
Test every smoke alarm and carbon monoxide alarm once a month. Just press the test button and listen for the sound. This takes a few seconds and confirms the alarm still works.
Pick a day you will remember, like the first of each month. If an alarm does not sound, replace the battery or the whole unit right away.
How often should I replace them?
Batteries wear out and so do the alarms themselves. Change standard batteries when the alarm chirps to warn you it is low. Some alarms use a sealed 10-year battery, so you never swap batteries during that time. The X-Sense interconnected combo alarms use this kind of sealed lithium battery.
Interconnected alarms are a smart choice for bigger homes. When one alarm senses smoke or CO, all of them sound. That means you hear the warning even if the danger starts far away.
Where should I mount a fire extinguisher?
Keep an extinguisher on every level of your home. Mount it near an exit, not deep inside a room. You want to be able to grab it and still have a clear path out the door.
The kitchen is the most common spot for home fires, so keep one nearby. Do not store it right next to the stove, though. If a fire starts there, you may not be able to reach it. Mount it a safe distance away instead.
Use the included bracket to hang the extinguisher on a wall. Keep it off the floor and out of the reach of small children. A basic home unit like the Kidde FA110 is easy to mount and use.
When should I fight a fire and when should I get out?
Only fight a fire if it is small and not spreading. The fire should be smaller than a trash can. You should have a clear way out behind you. And everyone else should already be leaving or out.
Never turn your back to a fire. Keep the exit at your back so you can leave fast if the fire grows.
Get out and stay out if the fire is spreading, if smoke fills the room, or if you feel unsure. Call 911 from outside. A fire can double in size in seconds. Your life matters more than any object in the house.
Next Steps: Make Fire Safety a Habit
Fire safety is not a one-time job. It works best as a habit. You checked your rooms. You fixed the hazards. Now build a routine so your home stays safe all year.
Start with the actions that matter most. These few steps protect you more than anything else on the list.
The Highest-Impact Actions
Do these first if you have not already:
- Put smoke alarms on every level of your home. Add them inside each bedroom and outside sleeping areas.
- Add carbon monoxide alarms near sleeping areas too. A combo unit like the X-Sense interconnected smoke and CO combo covers both in one device.
- Keep at least one fire extinguisher on each level. Put one in the kitchen. A pick like the Kidde Basic 110 handles common home fires.
- Make a home escape plan. Give every room two ways out. Practice it with everyone who lives there.
- Never leave cooking unattended. The kitchen is the highest-risk room.
If you get these five things right, you cover most of the danger.
Set a Monthly Reminder
Alarms only help if they work. Test every smoke and carbon monoxide alarm once a month. It takes just a few minutes. Press the test button and listen for the sound.
Set a repeating reminder on your phone. Pick the same day each month so you do not forget. Many people pick the first of the month. Some pick a payday or a set weekend. The day does not matter. The habit does.
While you test, do a quick look around. Check that extinguishers are still in place. Make sure exits are clear. Fix small problems before they grow.
Do a Yearly Review During Fire Prevention Week
Once a year, do a deeper check. Fire Prevention Week in October is a great time to do it. Use it as your yearly cue, the same way you might change clocks or check the furnace.
During your yearly review:
- Walk through the full room-by-room checklist again.
- Replace alarm batteries if your units are not the sealed 10-year type.
- Check the age of your alarms. Older units may need to be replaced.
- Look over your escape plan. Update it if you moved furniture or someone new lives there.
- Practice the escape plan with the whole household.
Write the date on your calendar for next year before you finish. That keeps the habit going.
Build a Complete Home Safety Plan
Fire safety is one part of being ready. A strong home plan covers more than fire.
Look at our other preparedness guides to round out your plan. Cover things like emergency kits, escape routes, and safe fuel storage. When your whole home is ready, you and your family can act fast and stay calm in any emergency.
Small habits, done often, keep your home safe. Start today.
Sources and Further Reading
- Fire Safety Checklist for Homeowners and Renters
- Home Fire Safety
- Home Fire Prevention & Safety Tips
- Form Center • Residential Fire and Life Safety Checklist
- Household Fire Safety Checklist | State Fire Marshal Office
- NWS Awareness and Preparedness Calendar
- Awareness and Preparedness Weeks