Ready
Ready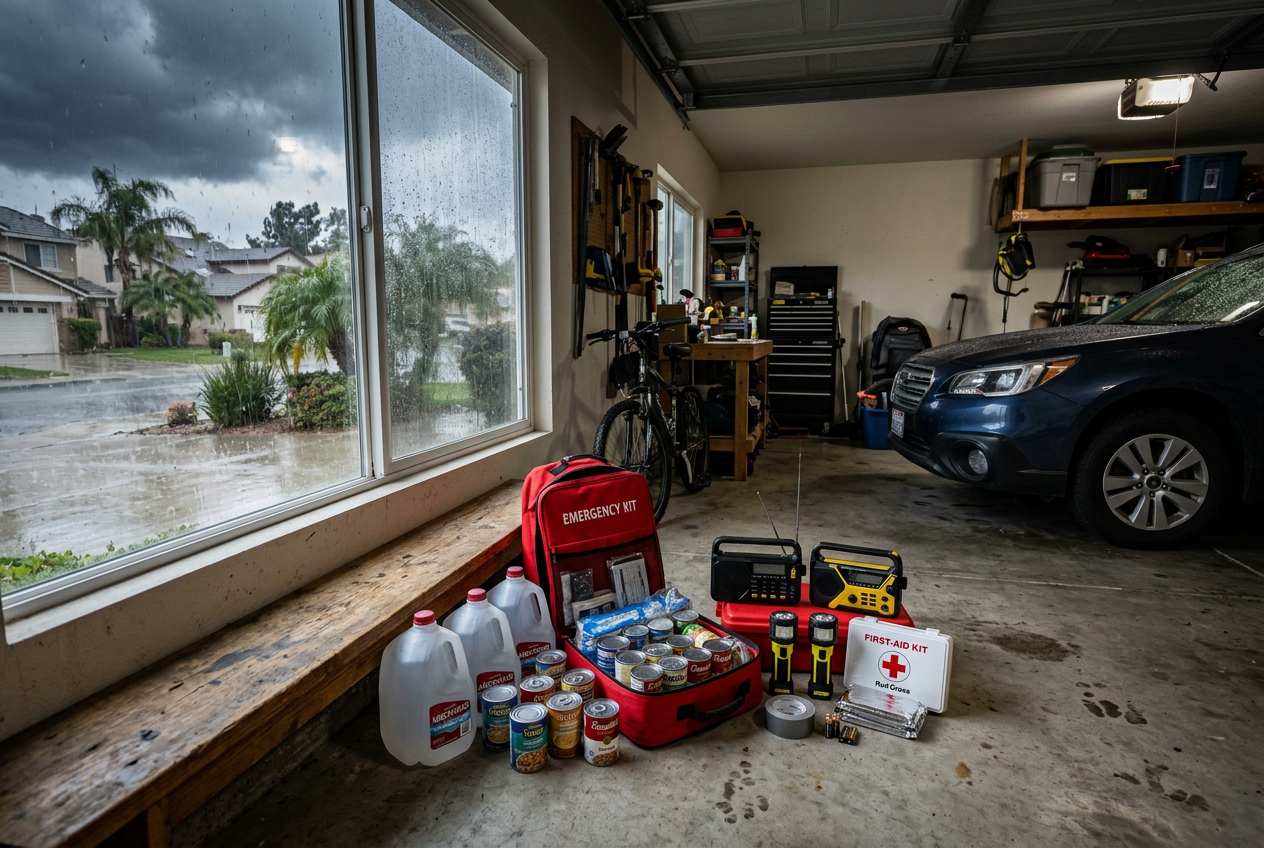
California El Nino Preparedness: What Households Should Do This Week (2026)
California just declared a statewide state of emergency. On September 21, 2026, Governor Newsom made the call ahead of what state officials say could be a historic El Nino season. That means a wet, stormy winter may be coming. Heavy rain can flood streets, back up drains, and trigger mudslides in some areas.
Here is the good news. You do not need to panic. You have time this week to get ready. Most of the steps in this guide cost little or nothing. Some just take an hour and a few tools you already own.
This article walks you through simple, practical actions. First, you will learn how to check your flood and mudslide risk. Then you will clear your gutters, downspouts, and drains so rain flows away from your home. We will show you how to set up flood barriers at doors and other weak spots. You will learn how to remove water fast with a sump pump or utility pump if it gets inside.
We also cover how to build or refresh a 72-hour emergency kit. You will back up important documents and make an evacuation plan. At the end, you get a clear this-week checklist you can print from this page.
The goal is calm readiness, not fear. Let’s get your household set for winter storms and flooding, one easy step at a time.
- Set up flood barriers at doors and low spots now, since bags can take a few minutes to activate once wet.
- Keep a pump ready to clear water fast, because even a few inches in a basement can cause big damage.
- Pack a 72 hour kit for every person in your home, covering food, water, and first aid for 3 full days.
- Do these steps this week, not the day a storm warning hits, so you are not caught scrambling.
- Check drains, gutters, and your emergency plan so water flows away from your house.



Reviewed by Elena V., Ryan C. & Marcus T. — contributors with hands-on preparedness experience. How we test
Getting ready for El Nino storms starts with having the right gear on hand before the rain arrives. Here are the items worth grabbing this week, and below we explain why each one matters.

Quick Dam Flood Bags
These bags grow to about 3.5 inches high in minutes once they get wet, so you can block, contain, and steer flood water. Line them up at doors and garage entries before the storm.
Check Price on Amazon
1 HP Submersible Utility Pump
This pump moves up to 2113 gallons per hour to clear a flooded basement or drain standing water fast. It runs on batteries, so it works even when the power goes out.
Check Price on Amazon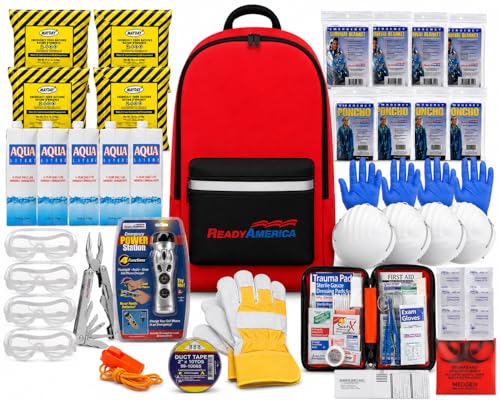
Ready America 4-Person Kit
This backpack supports four people for up to 72 hours with food, water, first aid, and shelter gear. Keep it packed and easy to grab if you lose power or need to leave quickly.
Check Price on AmazonIn this guide
Why Trust This Guide?
This article was researched and reviewed by contributors with hands-on experience in emergency preparedness. They have tested gear, built real systems, and lived through situations where these skills actually mattered.
Know Your Flood and Mudslide Risk This Week
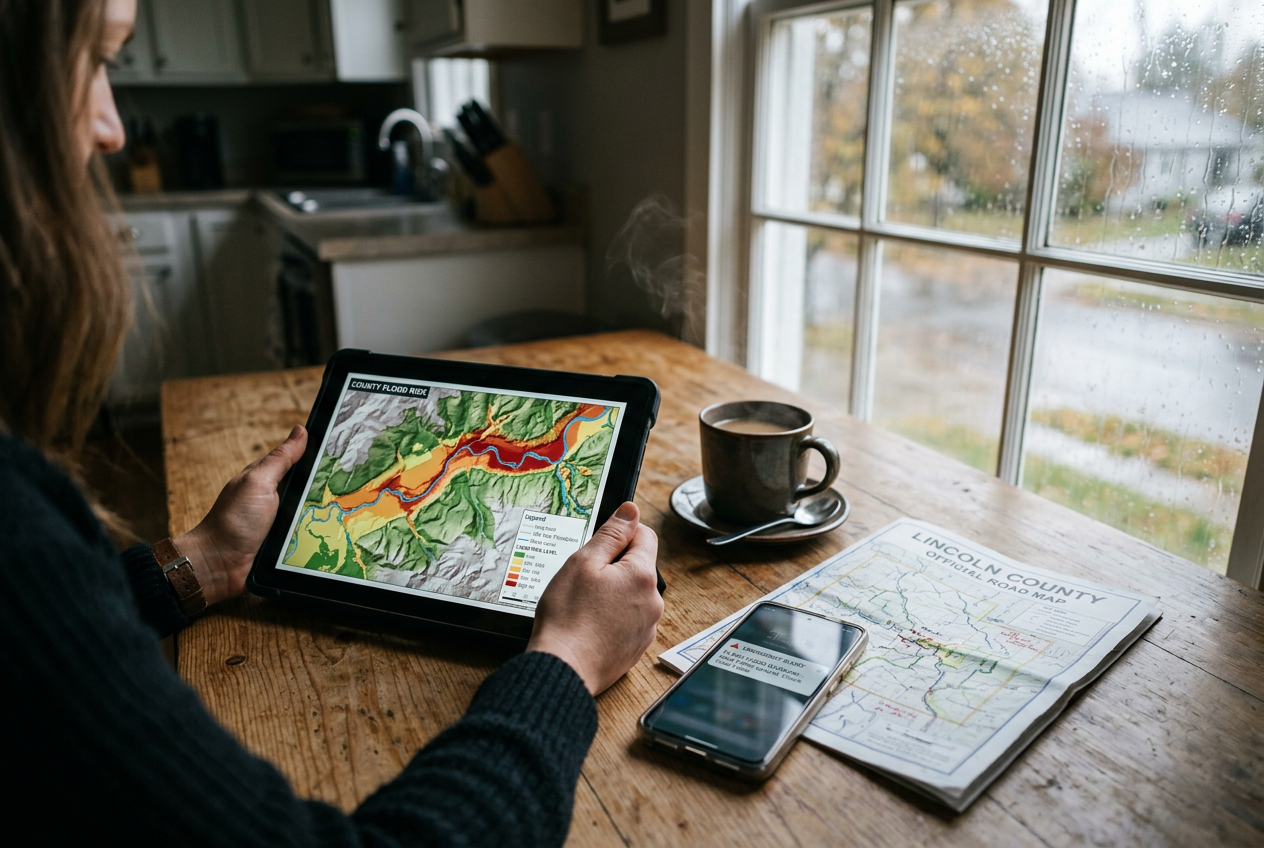
Before you buy anything or fill a single sandbag, find out what your home is actually up against. California just declared a statewide state of emergency ahead of what officials say could be a historic El Nino season. That means heavy winter storms are on the way. But not every home faces the same danger. Some sit in flood zones. Others sit below hills that can slide. Knowing your risk this week helps you spend your time and money where it matters most.
Check if your home is in a flood zone
Start with a free FEMA flood map. Go to the FEMA Flood Map Service Center and type in your address. The map shows whether your home sits in a known flood area. This is a good first step, but it is not the whole story. Flood maps do not always show local street flooding or drainage problems.
That is why you should also check your county. Many California counties post flood risk tools online. County public works and emergency pages often have maps made for local storms. For example, Marin County shares planning and prep guidance on its public works site. Santa Cruz County has an El Nino page that covers floods, mudslides, and debris flows. Search your county name plus “flood risk” or “El Nino” to find yours.
Understand mudslide and debris-flow risk
Water is not the only danger. Homes below steep hills can face mudslides. Homes near or below a recent wildfire burn scar face an even higher risk. Burned ground cannot soak up rain well. Heavy rain runs off fast and picks up mud, rocks, and debris. This is called a debris flow. It can move quickly and cause real damage.
If you live at the bottom of a slope, near a canyon, or below a burn scar, treat debris flow as a serious risk. Santa Cruz County lists mudslides and debris flows as a top concern for its residents. Never drive through a flooded road, and never ignore an evacuation order in these areas.
Sign up for local emergency alerts
You cannot prepare for a warning you never get. Sign up for your local alert system now. These free systems send texts, calls, or emails when danger is near. Marin County uses AlertMarin. Many California areas use Nixle or other county tools. Search your county name plus “emergency alerts” to find the right one.
State officials also urge residents to sign up for alerts, know their flood risk, stay informed, and have an evacuation plan. Do all four this week. Knowing your risk is the step that makes every other step in this guide work better. Once you know what you face, the rest of your prep gets much simpler.
Clear Gutters, Downspouts, and Drains Before the Rain
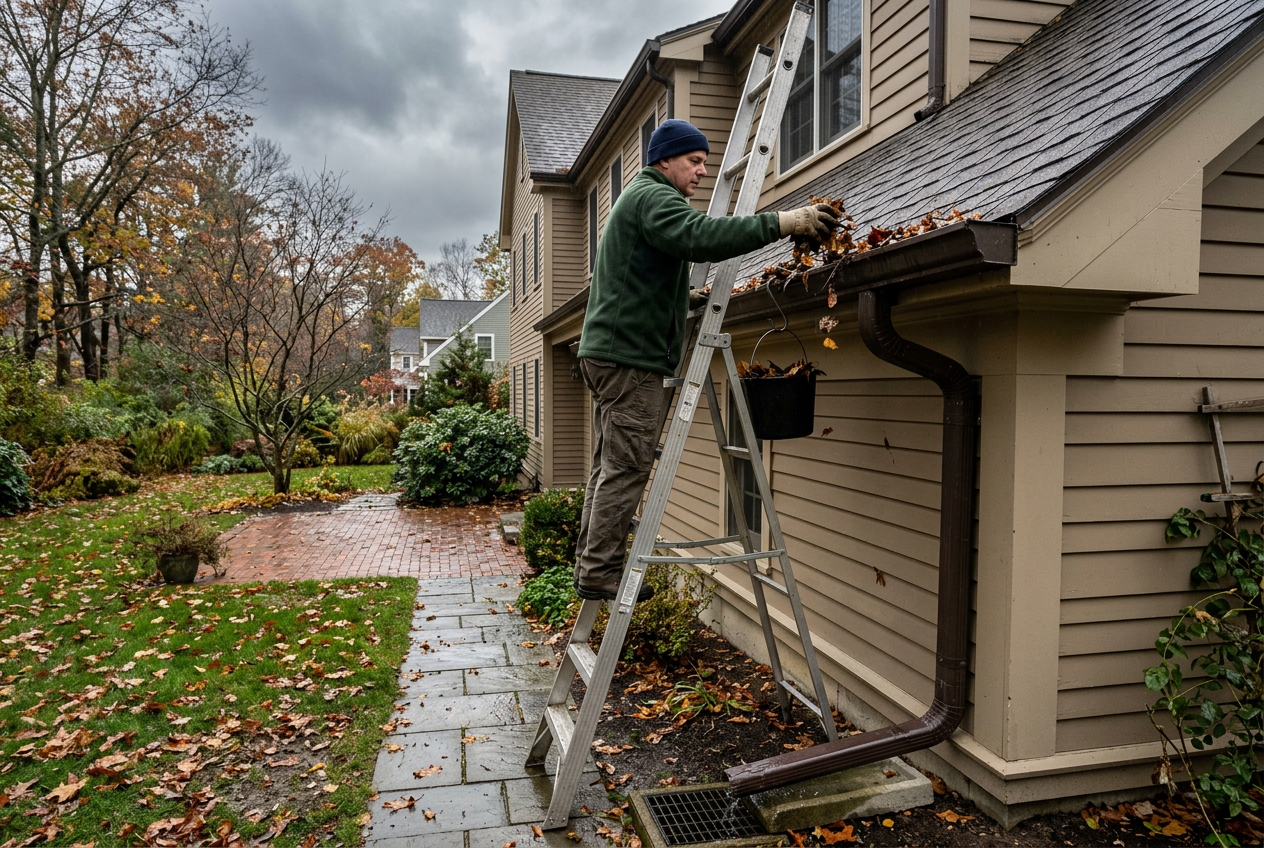
Water needs a path. If your gutters and drains are clogged, rain has nowhere to go. It backs up, spills over, and pools near your home. That water can seep into your walls and foundation. The good news is that clearing this path costs nothing but time. It may be the single most useful free step you take this week.
Start With Your Gutters
Gutters catch rain from your roof and move it away. Over time, they fill with leaves, twigs, and dirt. A clogged gutter overflows during a storm. That sends water straight down your walls.
Grab a sturdy ladder and a bucket. Have someone hold the ladder for you. Scoop out the leaves and debris by hand. Wear gloves. Once the gutters are clear, rinse them with a garden hose. Watch how the water flows.
If water pools instead of draining, you may have a low spot or a deeper clog. Keep flushing until the water runs freely toward the downspouts.
Check the Downspouts
Downspouts are the vertical pipes that carry water to the ground. They clog too. Run your hose into the top of each downspout. If water backs up, there is a blockage inside.
Try tapping the pipe to loosen the clog. You can also feed the hose up from the bottom to push it out. Clear it until water runs through freely.
Then look at where the water lands. It should flow away from your house, not toward it. If a downspout dumps water right next to the wall, add an extension or a splash block. Aim the water at least a few feet from the foundation. Directing water away from your foundation is the most important part of this whole job.
Clear Yard and Storm Drains
Walk your yard and driveway. Look for any drains or grates. Leaves and mud can cover them fast. Rake the debris away so water can enter. If a drain is packed, dig it out by hand. A clear drain moves water off your property before it can pool.
Check the Roof for Leaks
While you are looking up, check your roof from the ground. Use binoculars if you have them. Look for missing or lifted shingles. Pay close attention to the flashing. Flashing is the metal that seals joints around chimneys, vents, and where roof sections meet. Many leaks start there.
Inside, check your attic and ceilings for water stains. A stain now means a bigger leak later.
When to Call a Professional
Do not climb onto a steep or slick roof. Do not work on a wet roof or in high wind. If your roof is high, steep, or hard to reach, call a licensed roofer or gutter service. A fall is not worth it. Pros have the right gear and can spot damage you might miss.
Set Up Flood Barriers at Doors and Vulnerable Spots
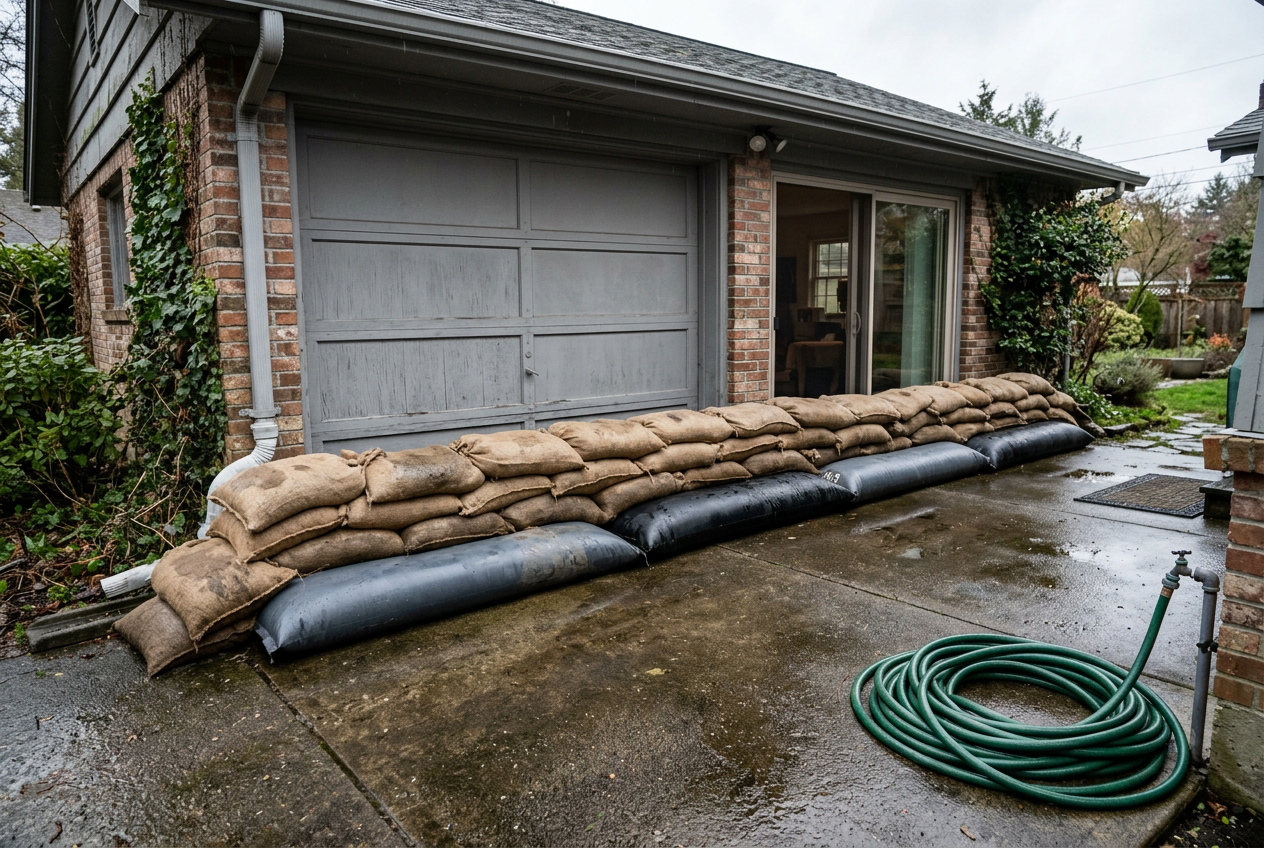
Water finds the lowest way in. That means doorways, garage entries, and sliding doors are your weak spots. A good barrier at these points can keep water out or slow it down. This gives you time to move things or call for help.
Start by walking around your home. Look for low spots where water could pool. Check the bottom of doors, garage doors, and any vents near the ground. These are the places to protect first.
Traditional Sandbags vs. Water-Activated Bags
You have two main choices. The first is the classic fill-yourself sandbag. You add your own sand, tie it shut, and stack it. These bags are strong and reusable. But they take work. You need sand, a shovel, and some muscle. They are a good pick if you want a barrier you can use again and again.

The second choice is a water-activated bag. These start out flat and light. You add water, and a gel inside soaks it up and swells. In a few minutes, the bag grows into a firm barrier. There is no sand and no heavy lifting. These are easy to store because they stay small until you need them.
Small water-activated bags work well for spreading along a doorway or around a leaking appliance. They can control and divert water where you need it.
For wider gaps like sliding doors or french doors, a long barrier bag covers more space in one piece. You lay it across the base of the door, add water, and let it expand. This saves you from lining up many small bags.

How to Place Your Barriers
Set barriers flat against the door or gap you want to protect. Push them tight so water cannot slip through the sides. If you use small bags, overlap the ends like bricks. This closes the gaps between them.
For deeper water, stack a second row on top of the seams of the first row. This makes the wall stronger. Barriers hold back shallow water best. They will not stop a fast, deep flood. Do not count on them to keep every drop out.
Storage Limits to Know
Water-activated bags are one-time use once you wet them. After they soak up water, you cannot dry them and use them again. Store the dry bags in a cool, dry place until you need them. Follow the maker’s directions on the package.
Do not open or activate them early. Keep them sealed until rain is close. That way they stay ready when a storm hits.
Set up your barriers before the rain starts, not during it. Wet, slippery ground makes the job harder and less safe.
Prepare to Remove Water: Sump Pumps and Utility Pumps
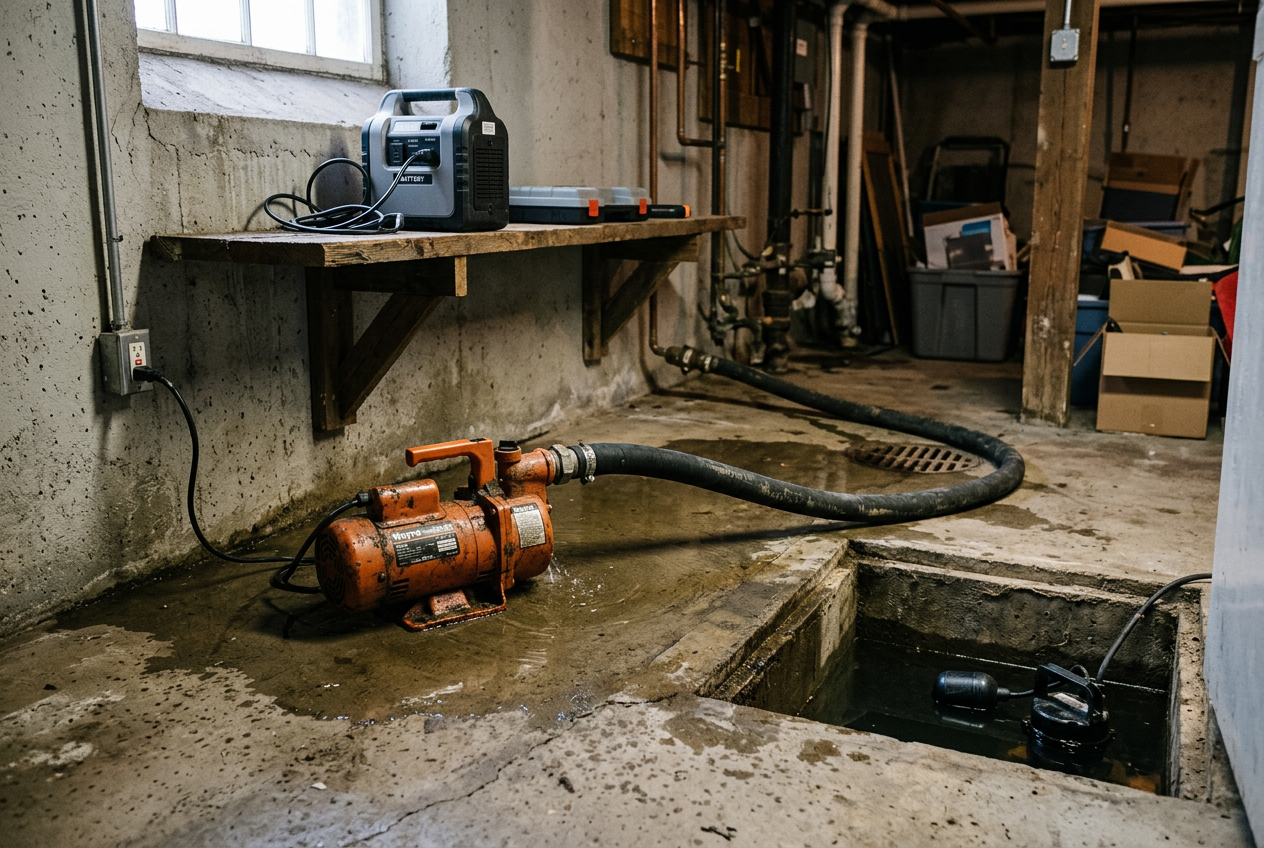
When rain gets heavy, water can pool in low spots. It can seep into your basement, garage, or under doors. A pump helps you move that water out fast. This week is a good time to check the tools you have and think about backups.
Check Your Existing Sump Pump
Many homes have a sump pump in the basement. It sits in a small pit and turns on when water rises. Do not wait for a storm to find out if it works. Test it now.
Pour a bucket of clean water into the pit. The pump should switch on and push the water out. Then it should shut off on its own. If it does not turn on, or runs but moves no water, it needs service or replacement. Also check that the drain hose points away from your house. Water should not flow right back toward your foundation.
Add a Portable Utility Pump
A portable utility pump gives you a backup or a way to clear water where no sump pump exists. This helps in a flooded garage, a wet basement corner, or on top of a pool cover. You drop it in the water, plug it in or turn it on, and it pumps the water out through a hose.
A larger pump moves more water per hour. That helps with bigger jobs like a flooded basement.
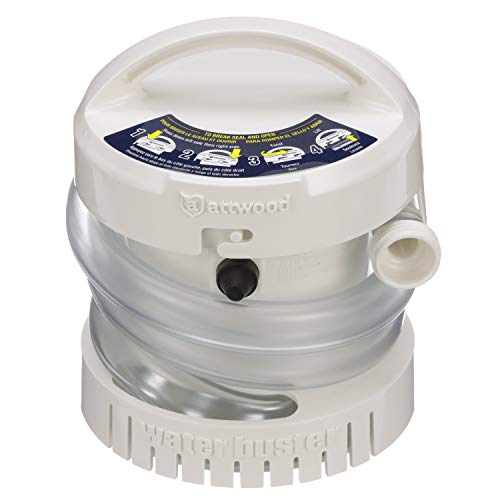
For small jobs, a battery pump is simple and light. It does not need an outlet. That matters if your power goes out during a storm. A small pump like this works well on pool covers, boats, or a shallow puddle.
Clean Water Only
This is important. These pumps are made for clean water. Do not use them on sewage or on water full of mud, leaves, or debris. That kind of gunk can jam the pump and burn out the motor. If you have sewage backup or thick muddy water, that is a job for a specialist and different equipment. Call a professional for those cases.
Battery vs. Corded: Which to Pick
Both types have trade-offs. Here is a quick look.
A corded pump moves more water but needs working power. A battery pump keeps going when the lights are out, but it handles smaller amounts. Many households keep both. Use the big pump for large jobs and the battery pump when the power fails.
Whatever you choose, test it before the rain comes. Read the maker’s directions. Keep a hose ready and know where you will send the water.
Build or Refresh Your 72-Hour Emergency Kit
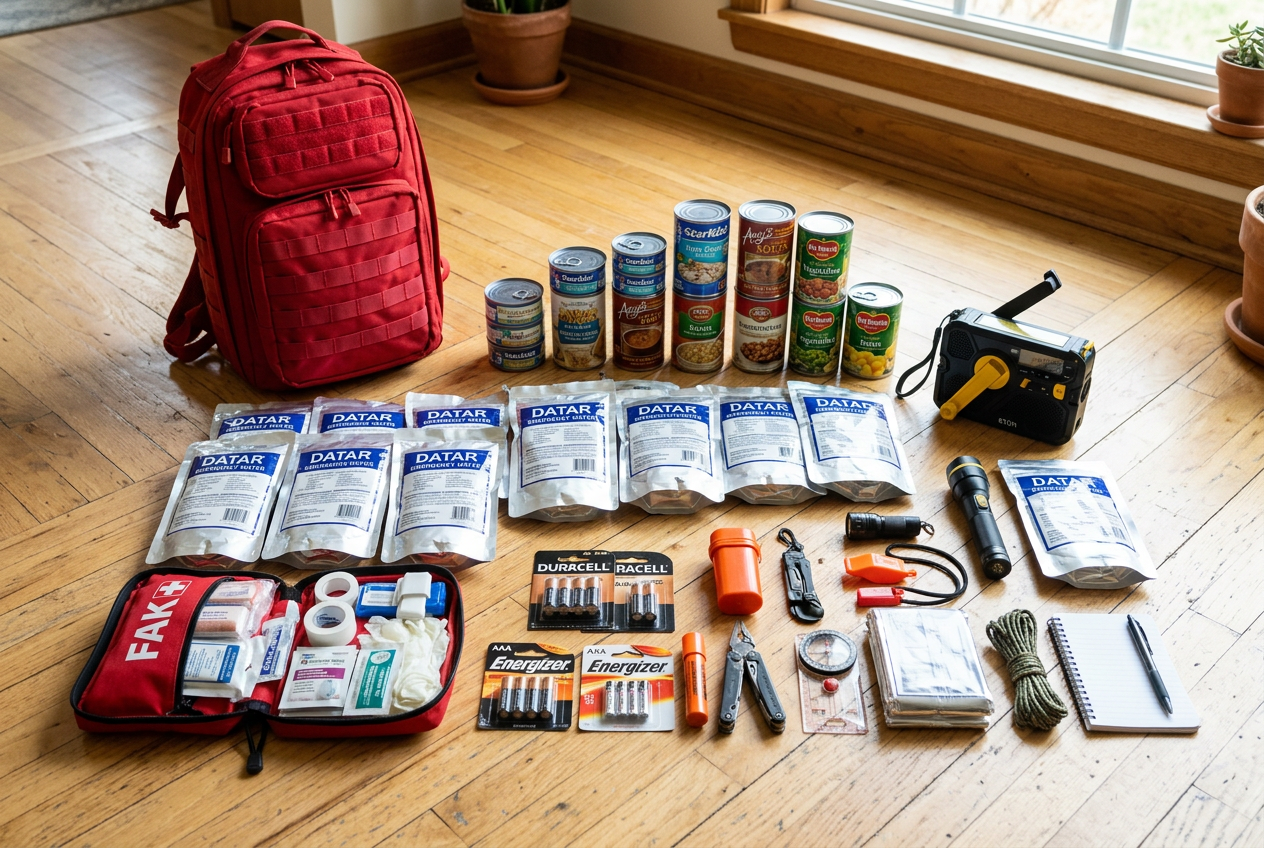
Winter storms can knock out power. Flooding can block roads. You may be stuck at home with no help for a while. That is why every household should have a 72-hour emergency kit. This means enough supplies to get through three days on your own.
A good kit covers four basics: food, water, first aid, and light. You want food that keeps for a long time and needs no cooking. You want clean drinking water or a way to make water safe. You want a first aid kit for cuts and small injuries. And you want a flashlight or lightstick so you can see when the power is out.
Why Three Days?
Three days is a common goal for good reason. It gives crews time to clear roads and restore power. It gives you a cushion if you cannot leave your home. If a storm hits and you have not shopped, it is too late. Build your kit now, before the rain starts.
What a Ready-Made Kit Includes
You can build a kit from scratch. Many people find it easier to start with a ready-made kit. These come packed in a backpack so you can grab them fast. They usually include emergency food bars, water, a first aid kit, and shelter items like blankets and ponchos.
Here is a kit built for four people. It packs emergency food bars, water cartons, a 107-piece first aid kit, gloves, and a whistle. It also comes with a power station and lighting.
Here is another four-person option. It includes food and water rations for four and an 85-piece first aid kit. The maker says its contents exceed Red Cross guidelines for preparedness.

If your household is smaller, a two-person kit may fit better. This one packs food bars, water pouches, water purification tablets, a refillable bottle, a 33-piece first aid kit, and two N95 dust masks.

How to Size Your Kit
Match the kit to how many people live with you. Count everyone, including kids. A four-person kit works for a family. A two-person kit works for a couple or a single person who wants extra.
Think about special needs too. Ready-made kits do not include prescription medicine. They do not include baby formula, diapers, or pet food. Add these yourself. Keep a few days of any needed medicine on hand.
Do not forget water. A kit gives you a start, but experts often suggest one gallon per person per day. Store extra sealed water jugs if you can.
If you already own a kit, this is the week to refresh it. Check the dates on food and water. Swap out anything expired. Add any new items your household needs.
Compare Flood-Control and Kit Options
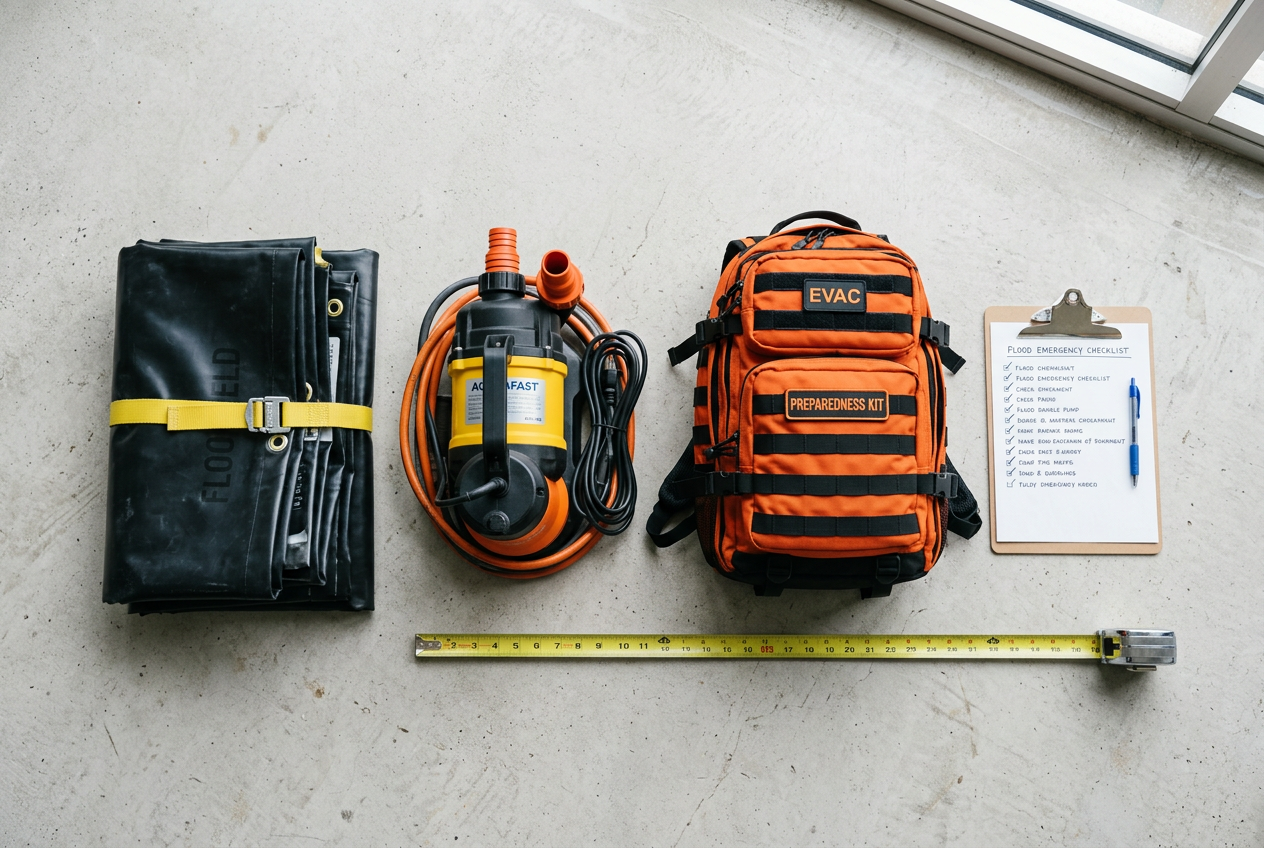
By now you know the main jobs. You need to block water at doors and vents. You need to remove water that gets inside. You need a ready kit if you must leave fast. The problem is picking the right tool for your home. This table puts the referenced options side by side. Use it to match a product to your situation.
The tables below split into three groups. First are flood barriers. Second are water removal pumps. Third are emergency kits. Read the “Best Use” column first. Then check size and capacity.
Flood Barriers
These block or divert water at doors, vents, and low spots. Water activated bags soak up water and swell. They need no sand or heavy lifting. Traditional sandbags need sand and a shovel, but they are reusable.
Water Removal Pumps
These pull standing water out after it gets inside. The high-flow pump moves a lot of water fast. It runs on batteries and handles clean water only. Do not use it on mud or sewage. The WaterBuster is small and runs on D batteries. It fits pool covers, sump pits, and small floods.
Emergency Kits
These are ready go-bags for 72 hours. Pick the kit that fits your household size. All three include food, water, first aid, and shelter basics.
How to Choose
Start with your biggest risk. If water comes in under a door, a water activated barrier is quick and easy. If you have room to store sand, reusable sandbags cover bigger areas. For pumps, match the flow rate to the job. A big flood needs a high-flow pump. A small puddle needs only the WaterBuster. For kits, count the people in your home and pick a size that fits. You can always add your own extras like medicine and copies of key papers.
Buy only what solves your real problem. Do not overbuy. A few barriers, one pump, and one kit cover most homes this week.
Back Up Documents and Make an Evacuation Plan
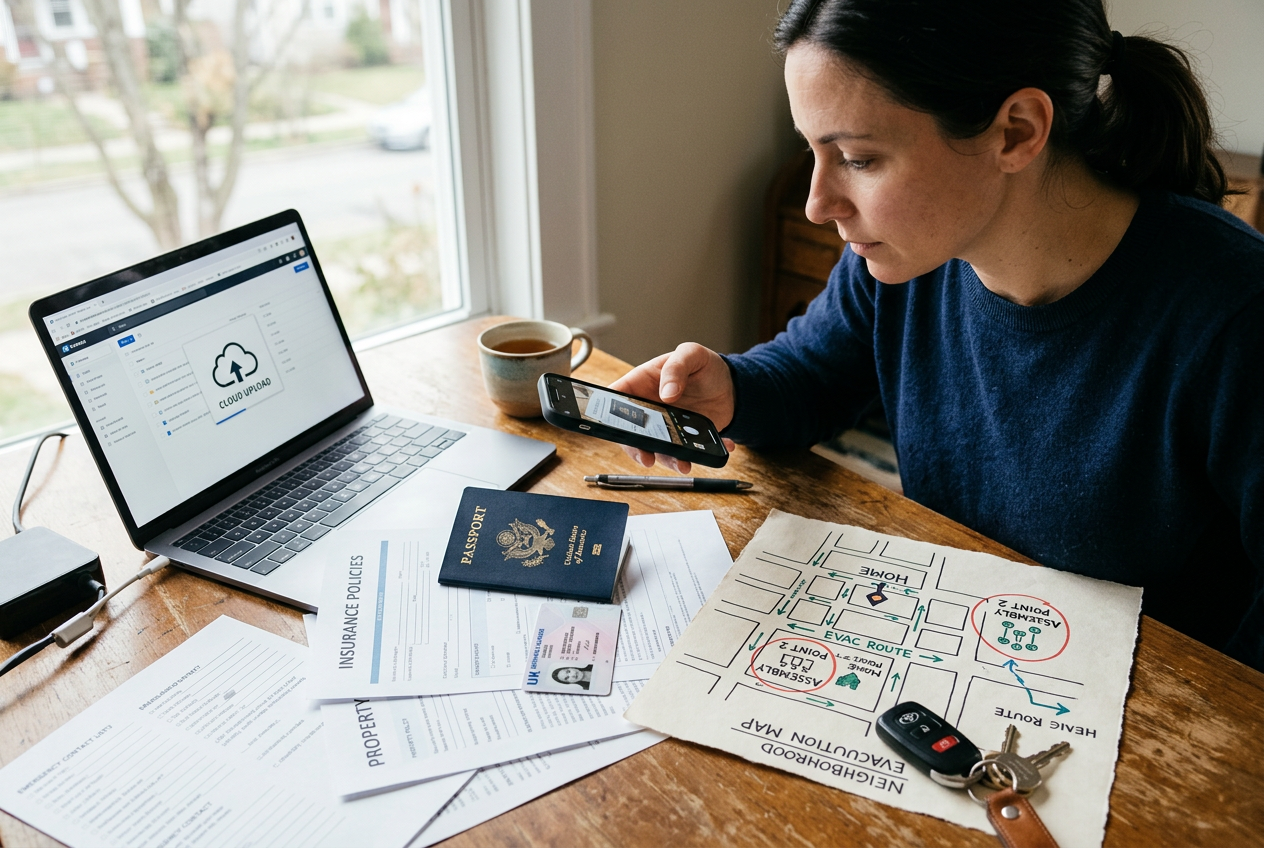
Storms can move fast. Floodwater and mudslides can force you to leave home with little warning. Two simple steps can save you a lot of stress. First, back up your important papers. Second, make a family plan so everyone knows what to do. You can finish both this week.
Back Up Your Key Documents
Start by gathering your most important papers. These are things you would need after a disaster. Common examples include:
- Driver’s licenses and passports
- Birth certificates and Social Security cards
- Home insurance and rental agreements
- Medical records and a list of medications
- Bank and credit card details
- Photos of your home and belongings for insurance
You do not need a scanner. Just use your phone. Take a clear photo of each document. Make sure the text is easy to read.
Next, store the photos in more than one place. Save them in a cloud service like your phone’s built-in backup, Google Drive, or Dropbox. A cloud copy stays safe even if your home floods. You can also email copies to yourself or keep them on a USB drive. Do not rely on only one method.
Keep a small set of paper copies too. Put them in a sealed plastic bag. Store the bag in your emergency kit or a grab-and-go folder. That way you can leave fast without hunting for anything.
Make a Simple Family Evacuation Plan
State officials have urged every household to have an evacuation plan. You do not need a fancy document. A short, clear plan works best.
Talk with everyone in your home. Agree on the basics together. Your plan should cover these points:
- Two ways out of your neighborhood. One road may flood or wash out. Know a backup route.
- A meeting point near your home. Pick a spot like a neighbor’s driveway or a nearby tree. Use this if you must leave the house quickly.
- A meeting point outside your area. Choose a place farther away, like a relative’s home or a store. Use this if you cannot get back to your neighborhood.
- An out-of-town contact. Pick one person everyone can call or text. Local phone lines may be busy during a storm. It is often easier to reach someone far away.
- A plan for pets, kids, and older family members. Know who helps whom. Plan for medications and any special needs.
Write the plan down. Give a copy to each person. Save it on everyone’s phone too.
Never Drive Through Floodwater
This is the most important rule. Never drive through a flooded road. It is hard to tell how deep the water is. Just a small amount can sweep a car away or stall the engine. If you see water on the road, turn around and find another way.
Want more help building a full plan? See our related family emergency plan guides here on the site for step-by-step tips.
Frequently Asked Questions
What does the state of emergency mean for me?
On September 21, 2026, Governor Newsom declared a statewide state of emergency to help California get ready for what officials say could be a historic El Nino season. This does not mean you are in danger right now. It means the state is taking early action so crews and resources are ready. For your household, treat it as a signal to prepare this week. Clear your drains, check your risk, and get your supplies in order before the rain comes.
Do I need flood insurance now?
Flood insurance is worth looking into, but there is one thing you should know. Most flood policies do not start right away. There is often a waiting period before coverage begins. That means buying a policy today may not protect you from the next storm. Standard homeowners and renters insurance usually does not cover flood damage. To learn your options, call your insurance agent or check the National Flood Insurance Program. Do this soon so you understand what you have and what you do not.
How many sandbags do I need?
It depends on the size of the area you want to protect. A single door needs less than a wide driveway or garage. Traditional sandbags need sand, a shovel, and some muscle to fill and stack. Water activated bags are easier for most households. They start flat and grow when they get wet. Products like the Quick Dam water activated flood bags work well around doors and low spots. For a wide sliding door, a long barrier like the Flood Hero 6 ft barrier covers more ground with one piece. Measure your openings first. Then buy enough to make a full, unbroken line. A gap lets water through.
What should I do if the power goes out during a storm?
Power outages are common in big storms. Here is how to stay safe and ready.
- Keep flashlights and extra batteries where you can reach them in the dark. Avoid candles if you can, since they are a fire risk.
- Keep your phone charged before the storm hits. A charged power bank helps too.
- Keep your fridge and freezer closed. Food stays cold longer that way.
- If you have an electric sump pump, remember it will not work without power. A battery powered pump like the Attwood WaterBuster can help remove smaller amounts of water when the lights are out.
- Never run a generator or grill indoors or in a garage. They give off carbon monoxide, which can kill.
A stocked kit makes an outage much easier. A ready made option like the Ready America 72 Hour Deluxe kit keeps food, water, first aid, and light in one bag. Sign up for your local alert system so you get updates even if the power is out.
Your This-Week Action Checklist
You can do most of these steps in one weekend. Work through the list from top to bottom. Check off each item as you go.
Friday evening: know your risk and sign up for alerts
- Look up your local flood and mudslide risk. Check your county or city website for maps and warnings.
- Sign up for your local emergency alert system. Many counties have their own alerts, like AlertMarin in Marin County. Find yours and register your phone.
- Talk with your household. Pick a meeting spot and a way to reach each other if you get separated.
Saturday morning: clear water paths
- Clear leaves and debris from your gutters. Blocked gutters send water down your walls.
- Clean out your downspouts. Make sure water flows away from your home, not toward it.
- Clear nearby drains and culverts if you can reach them safely. Standing water backs up fast in a storm.
- Check your roof for leaks. Look around the flashing, where many leaks start.
Saturday afternoon: stage your flood barriers
- Find the doors, vents, and low spots where water could get in.
- Stage flood barriers near those spots now, so you are ready before the rain. Water-activated bags like the Quick Dam flood bags store flat and grow when wet. For sliding doors, the Flood Hero barriers need no sand.
- Keep some barriers by your garage or basement entry if you have one.
Sunday morning: check your pumps
- If you own a sump pump, test it. Pour water in the pit and make sure it turns on and drains.
- Have a backup way to remove water. A battery-powered pump like the Attwood WaterBuster works during a power outage. For larger jobs, a corded or battery pump like the 1 HP submersible utility pump moves more water fast.
- Only use clean-water pumps for clean water. Do not run them dry.
Sunday afternoon: kit and documents
- Build or refresh your 72-hour emergency kit. It should hold food, water, first aid, light, and warmth for everyone in your home. A ready-made kit like the Ready America 4-person kit gives you a fast start.
- Check dates on food, water, and batteries. Replace anything expired.
- Back up your important documents. Scan or photograph your ID, insurance papers, and medical info. Save copies to a phone, cloud account, or a small drive you can grab.
- Make an evacuation plan. Know two ways out of your neighborhood. Plan for pets, medications, and anyone who needs extra help.
- Remember the golden rule: never drive through floodwater.
Print this page and post the checklist somewhere you will see it. When you finish, you will be ready for the season, not scrambling when the first storm hits.
Next Steps: Stay Ready All Season
El Nino season is not a one day event. Storms can come in waves over many weeks. The best time to get ready is now, before the rain starts. Preparing early always beats reacting in the middle of a storm.
Here is the simple truth. When water is rising at your door, you do not want to be searching for sandbags or a pump. You do not want to be hunting for flashlights or copies of your ID. You want those things ready and easy to reach. A little work this week saves you stress later.
Governor Newsom declared a statewide state of emergency ahead of this El Nino season. That is a clear signal to act. But you do not need to panic. You just need to take small, steady steps. Each one adds up to a safer home.
Keep Your Momentum Going
Do not stop after one weekend of prep. Make readiness a habit that lasts all season. Here are easy ways to stay on track.
- Check the weather forecast before each storm. Know when heavy rain is coming.
- Sign up for local alerts. Many California counties offer free emergency alert systems. These tell you about floods, mudslides, and evacuation orders.
- Refresh your supplies after each storm. Replace anything you used. Recharge pump batteries. Restock food and water.
- Walk your property once a month. Clear gutters and drains again. Leaves and mud build up fast during wet weather.
- Review your family plan. Make sure everyone still knows where to go and who to call.
Build Your Kit Piece by Piece
You do not have to buy everything at once. Start with the basics and add more over time. A ready made kit can give you a strong head start. A grab and go kit like the Ready America 72 Hour Deluxe Emergency Kit packs food, water, first aid, and shelter into one backpack. Keep it by the door so it is ready if you need to leave fast.
For flood control, water activated bags store flat until you need them. When rain is in the forecast, you can set them out in minutes.
Read More to Go Deeper
This guide covers the steps to take this week. But there is more to learn as the season goes on. Explore our other guides for deeper help:
- Our flood preparedness guide goes further into barriers, pumps, and protecting your home.
- Our power outage guide helps you stay safe and warm when the lights go out during a storm.
- Our family emergency plan guide shows you how to make a plan everyone can follow.
You can also print this page to keep the checklist handy. Post it on your fridge or tuck it into your emergency kit.
Stay calm. Stay ready. Take one step at a time, and you will be prepared for whatever this season brings.
Sources and Further Reading
- El Nino Preparation | Laguna Hills, CA - Official Website
- Governor Newsom proclaims state of emergency to bolster …
- County Strategizes for Potential El Niño Season
- El Niño Preparedness Checklist | La Habra, CA
- El Niño
- Governor Newsom proclaims state of emergency to bolster statewide El Nino preparedness, protect California
- California declares state of emergency as historic El Niño storm season develops
- State of emergency declared for all of California ahead of strong El Niño forecast
- Fearing worst-ever El Niño, Newsom declares disaster in advance
- California state of emergency: Could El Niño impact Monterey County coast?