Ready
Ready
Canning for Beginners: How to Safely Preserve Your Own Food (2026)
Picture your pantry full of jars you filled yourself. Homemade tomato sauce. Sweet peaches. Green beans from your garden. Home canning lets you save food for months, and it puts you in control of what you eat.
Canning is a smart skill. It helps you waste less food. It saves money when produce is cheap or on sale. It builds a food supply you can lean on if store shelves run low or money gets tight. And once you learn it, you have it for life.
Here is the honest truth for beginners. Canning is not hard, but you must follow the rules. Safe canning is about steps and heat, not luck. When you do it right, your food stays good and stays safe.
There are two main ways to can food. Water bath canning works for high acid foods like fruit, jam, and pickles. Pressure canning works for low acid foods like vegetables, meat, and beans. You need to know which one fits your food, and we will make that clear.
This guide walks you through it all. You will learn what gear you need. You will see how to pick a canner and prep your jars. Then you will follow a simple step by step plan to can your first batch. We will also cover common mistakes so you can avoid them. Let’s get started.
- Use a water bath canner for high-acid foods like jams, pickles, and most fruits, which need a pH of 4.6 or lower.
- Use a pressure canner for low-acid foods like vegetables, meats, and beans, since the USDA says this is the only safe way to can them.
- Process pint jars in a boiling water bath for the full time your recipe lists, often 10 to 15 minutes.
- Always use tested recipes and check that every lid seals before you store your jars.
- Keep sealed jars in a cool, dark spot and eat them within about a year for the best quality.



Reviewed by Elena V., Dale M. & Marcus T. — contributors with hands-on preparedness experience. How we test
Getting set up for canning starts with the right gear. Grab these tools now, and read on to learn how each one keeps your food safe.

Supa Ant Water Bath Canner Kit
This 24 quart water bath pot and rack lets you safely can high-acid foods like jams and pickles. The included ladle, funnel, and measuring cups give beginners everything needed to start on day one.
Check Price on Amazon
Presto 23-Quart Pressure Canner
This pressure canner reaches the high heat needed to safely preserve low-acid foods like vegetables and meats. It works on many stove types, including induction, so you can build a real long-term food supply.
Check Price on Amazon
Yodecy 16 oz Mason Jars
These 12 wide mouth glass jars with airtight lids hold your canned goods for the long haul. They are reusable and easy to clean, so you can restock your pantry season after season.
Check Price on AmazonIn this guide
Why Trust This Guide?
This article was researched and reviewed by contributors with hands-on experience in emergency preparedness. They have tested gear, built real systems, and lived through situations where these skills actually mattered.
Water Bath vs. Pressure Canning: Which Method Do You Need?
Before you buy any gear, you need to know one thing. Not all foods can be canned the same way. The method you use depends on the food. Pick the wrong one and your food may not be safe to eat.
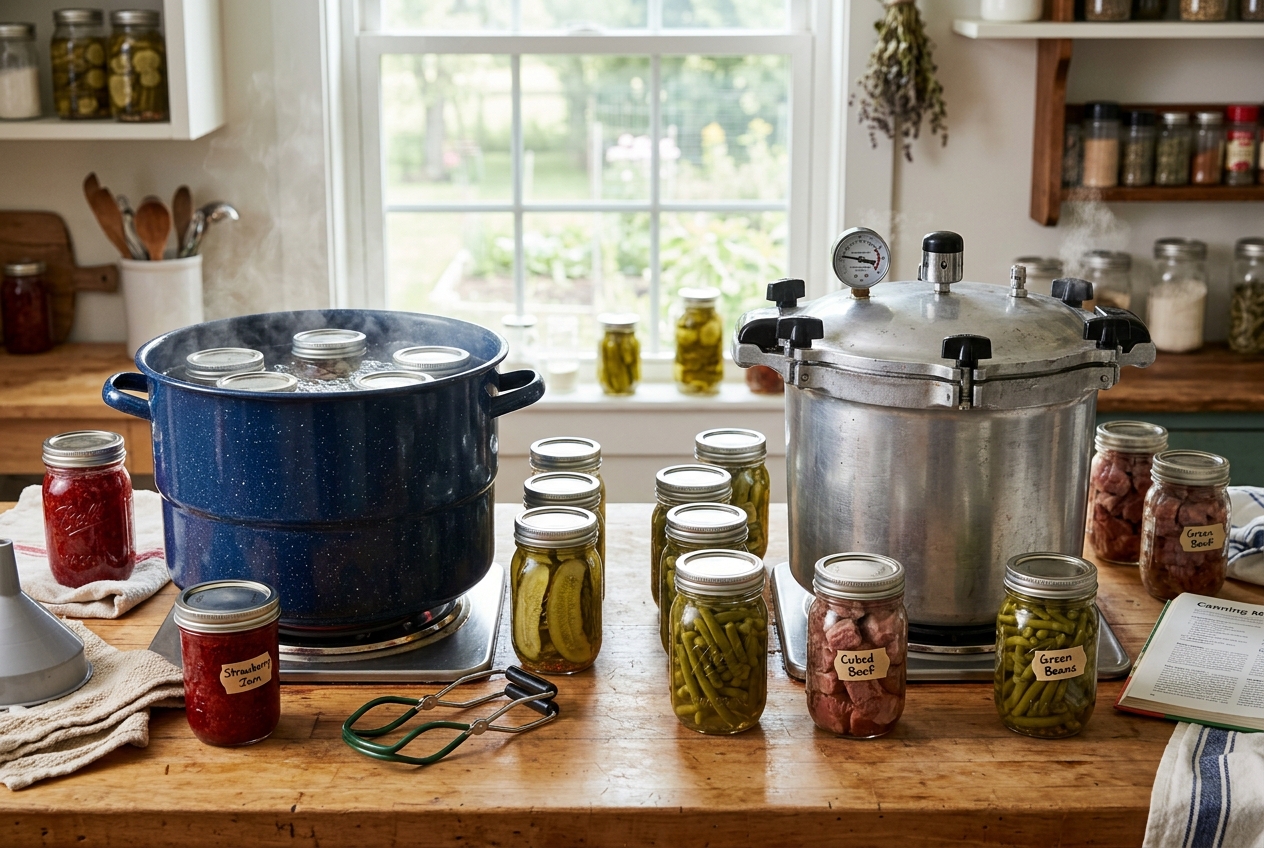
There are two main ways to can food at home. One is water bath canning. The other is pressure canning. The difference comes down to acid.
Why Acid Matters
Acid is what keeps canned food safe. High-acid foods stop harmful germs from growing. Low-acid foods do not. That is the whole reason there are two methods.
A dangerous germ called botulism can grow in low-acid foods. You cannot see it, smell it, or taste it. High heat is the only way to kill it. That is why the method you choose is so important.
Water Bath Canning
Water bath canning uses a big pot of boiling water. The water reaches 212 degrees Fahrenheit. That heat is enough for high-acid foods.
High-acid foods include jams, jellies, pickles, and most fruits. Tomatoes with added acid work too. Salsa and fruit butters also fit here.
This method is easier and cheaper. It is a great place for beginners to start. You just need a large pot and a rack.
Pressure Canning
Pressure canning uses a sealed pot that traps steam. This builds pressure and raises the heat well above 212 degrees. That extra heat is what makes low-acid foods safe.
Low-acid foods include most vegetables, meats, poultry, and seafood. Beans, corn, carrots, and green beans all need pressure canning. So do soups and stocks.
The USDA says pressure canning is the only safe way to can these foods. A water bath does not get hot enough. Do not try to skip this step.
Quick Comparison
How to Choose
Start by looking at the food you want to preserve. Is it high-acid or low-acid? Fruits and pickles are high-acid. Vegetables and meats are low-acid.
If you only want to make jam or pickles, a water bath setup is enough. If you want to can green beans or meat, you need a pressure canner.
Many people start with a water bath and add a pressure canner later. Some pressure canners can even do both jobs. That can save you money and space.
Once you know which method fits your food, you can pick the right gear. The next sections cover the tools you need for each path.
Essential Canning Equipment for Beginners
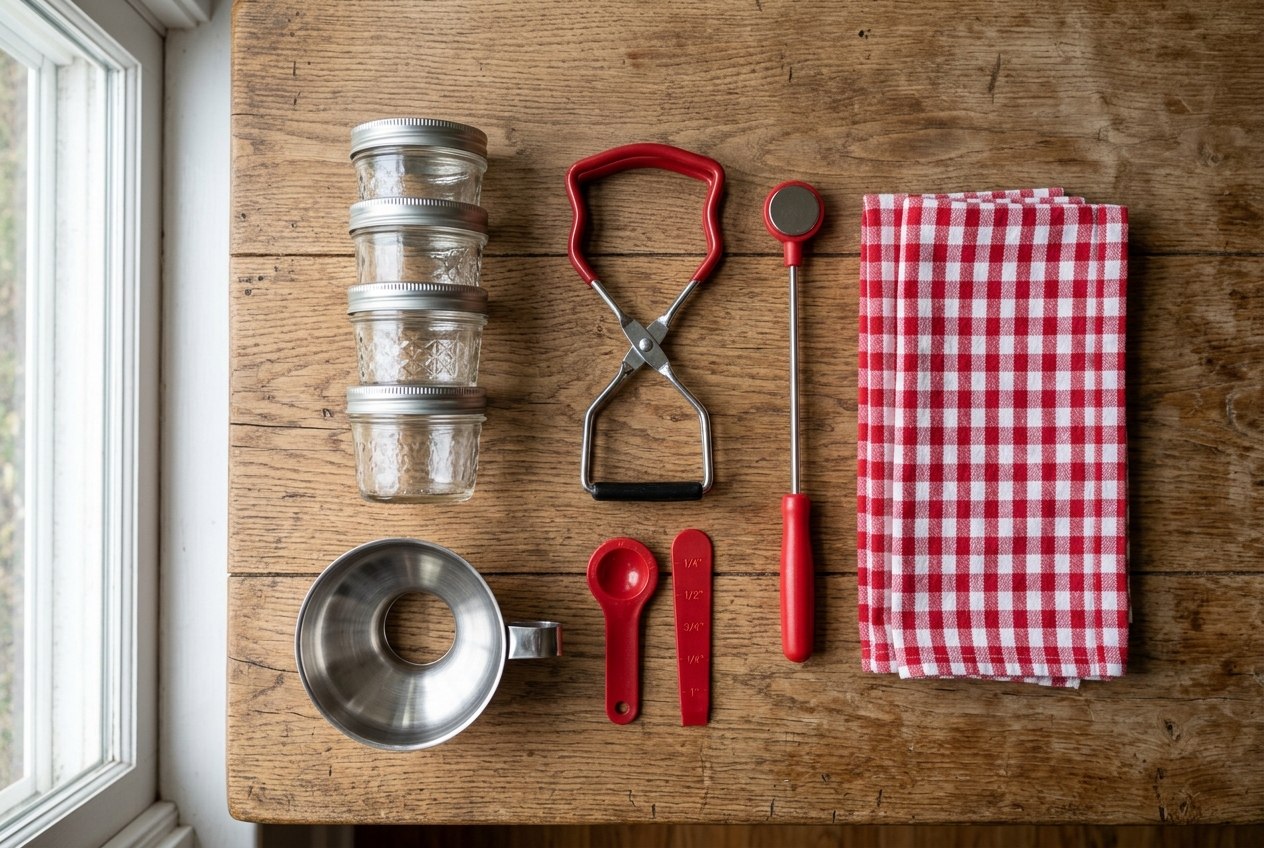
You do not need a full kitchen of gear to start canning. But a few tools make the job safer and easier. Here is what to gather before your first batch.
The Canner
The canner is the biggest piece you will buy. This is the large pot that heats your jars. There are two main types.
A water bath canner is a tall pot with a rack inside. It works for high-acid foods like jams, pickles, and most fruit. This is the easiest type for beginners. You just fill it with water and bring it to a boil.
A pressure canner is a heavier pot with a locking lid and a gauge. It reaches higher heat. You need it for low-acid foods like green beans, meat, and soup. It costs more and takes more care to learn. We cover it in the next section.
Most beginners start with a water bath canner. Look for a pot with a good rack, a snug lid, and enough room to hold jars off the bottom. Many come as starter kits with extra tools inside.
Beginner Starter Kits
A starter kit saves you time and money. Instead of buying each tool alone, you get the pot and the small tools in one box. Here are two good options for new canners.
This Supa Ant kit is a 24 quart water bath canner. It comes with a rack and a full set of tools. You get a funnel, jar lifter, bubble popper, magnetic lid lifter, jar wrench, tongs, a large scoop, and measuring cups. The pot is a lightweight porcelain enamel over a steel core. One thing to note: it does not work on induction or glass cooktops. So check your stove first. If you have a gas or standard electric coil stove, this is a solid all-in-one pick.

This kit is a 20 quart stainless steel canner. It also comes with a rack, lid, and the same key tools. The big plus here is the stove range. It works on induction, glass top, and gas stoves. So if you have a modern cooktop, this may be the better fit. It also throws in seven 16 ounce mason jars to get you started.
Small Tools You Will Use
Both kits above give you the small tools. But here is what each one does:
- Jar lifter: Grabs hot jars so you do not burn your hands.
- Canning funnel: Keeps food from spilling on the jar rim.
- Bubble popper: Pushes out air bubbles trapped in the jar.
- Magnetic lid lifter: Picks up flat lids without touching them.
Add some clean towels and a timer, and you are ready to move on to jars.
Choosing the Right Pressure Canner
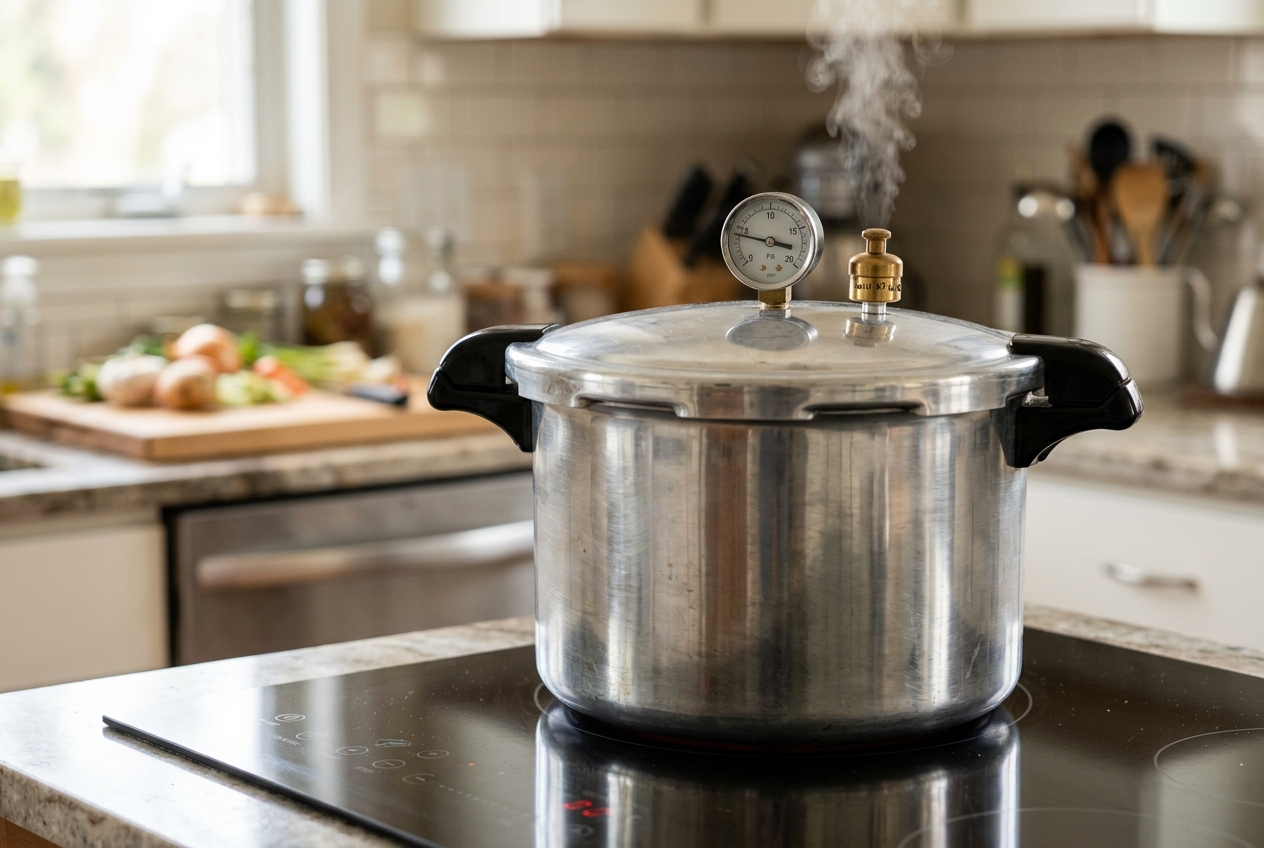
A pressure canner is a must if you want to can low-acid foods. This includes meat, poultry, seafood, and most vegetables. These foods can carry harmful bacteria that a boiling water bath cannot kill. A pressure canner heats food much hotter than boiling water. It reaches about 240°F. That heat kills the dangerous spores that cause botulism. This is why the USDA only approves pressure canning for low-acid foods. Do not skip this step to save time. It keeps your food safe to eat.
How a Pressure Canner Works
The canner traps steam inside a sealed pot. As the steam builds, it raises the pressure and the temperature. You hold that pressure for a set time based on your recipe and your altitude. Then you let the canner cool and the pressure drop on its own. Never force it open. A good canner has safety features like a locking lid and a pressure release valve.
Gauge vs. Weighted Canners
There are two main ways a canner shows pressure. A dial gauge has a needle that points to the pressure level. You must watch it and adjust your heat to hold the right number. A dial gauge needs testing once a year to stay accurate. A weighted gauge uses a small metal piece that rocks or jiggles when the right pressure is reached. It does not need yearly testing. Many canners include both, which gives you a backup and more control.
Stove Compatibility Matters
Check your stove before you buy. Not every canner works on every stove. Induction stoves need a canner with a magnetic base. Smooth-top electric stoves can be picky about weight and size. If your canner is too big or too heavy, it may not heat well or could crack the glass top. Look for one that lists your stove type by name.
Beginner-Friendly Options
The Presto 01784 works on induction, gas, electric, and smooth-top stoves. It uses a dial gauge and doubles as a boiling water canner. This makes it a flexible pick for a first-time canner.
The Denali Tanker is also induction-compatible and comes with both 10-pound and 15-pound weights plus a gauge. Having both options built in is handy while you learn.
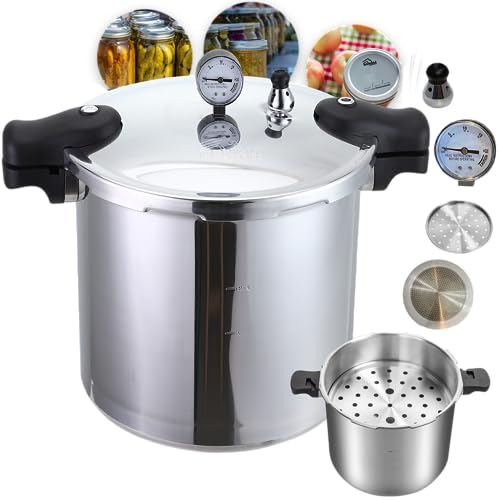
The Hestroney stainless steel canner is smaller at about 12.68 quarts. It has a six-tier safety system and is made from durable 304 stainless steel. A smaller size can be easier to handle if you have limited space or a lighter stove top.

Pick the canner that fits your stove, your batch size, and your budget. Always read the manual that comes with it.
Choosing and Preparing Your Mason Jars
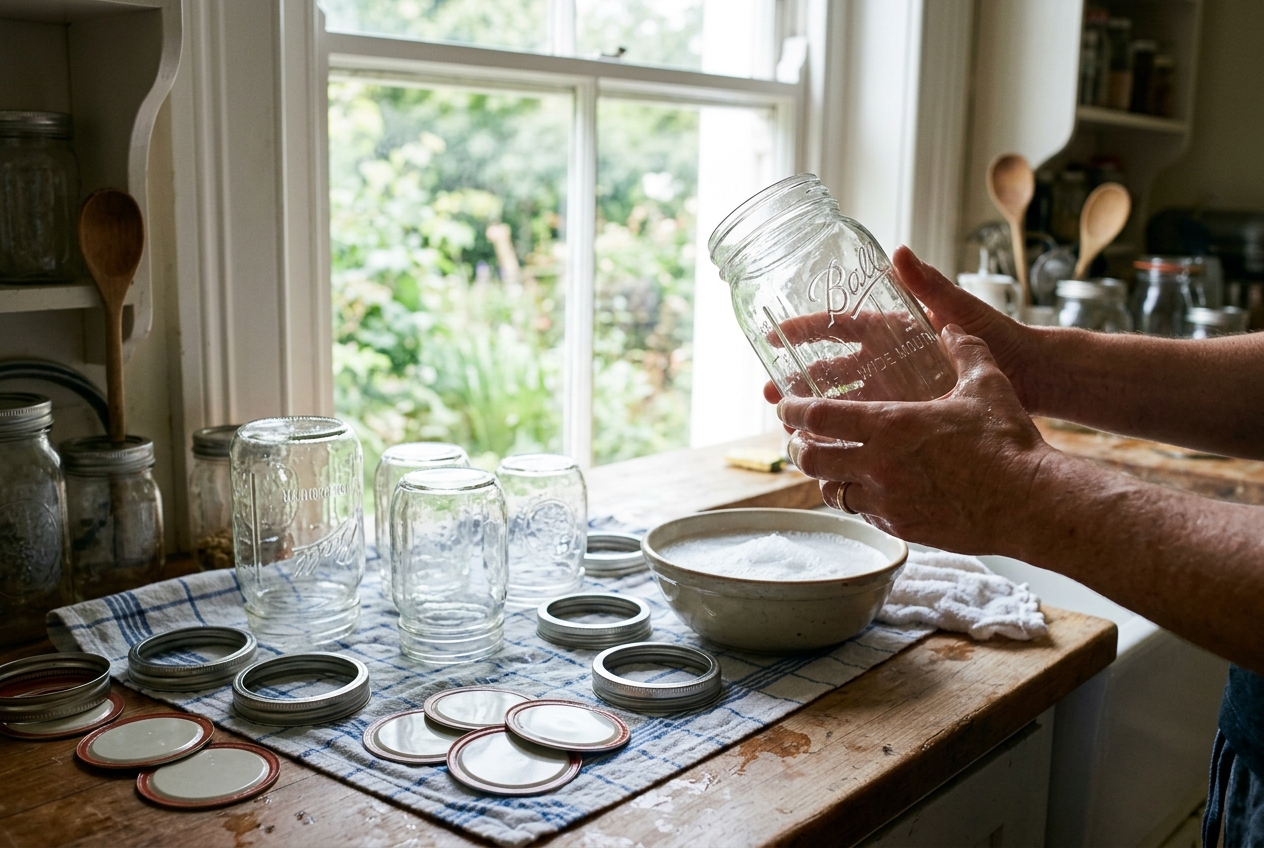
Mason jars are the heart of home canning. They come in a few sizes and styles. Picking the right jar makes your first batch easier and safer.
Jar Sizes and What They Hold
Jars come in small, medium, and large. Each size fits a different job.
Pint jars hold about 16 ounces. They work well for jams, jellies, and salsas. They are also a good size for small batches. If you are just starting out, a pint jar is easy to handle.
Quart jars hold about 32 ounces. These are great for tomatoes, pickles, soups, and larger fruits. A quart is the go-to size for many veggies and sauces.

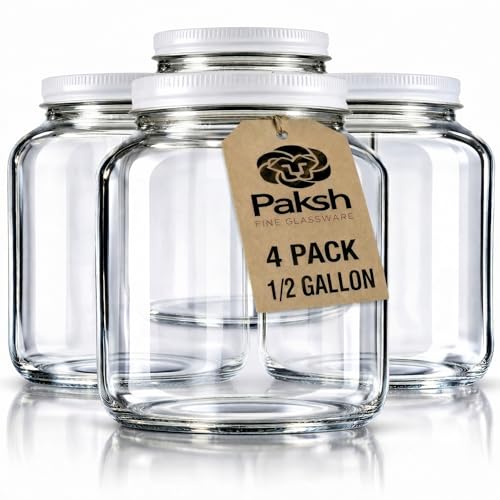
Half-gallon jars hold about 64 ounces. These are best for juice or fermenting big batches. Note that half-gallon jars are only safe for a few foods in home canning. Stick to pints and quarts for most recipes.
Wide Mouth vs. Regular Mouth
Jars have two mouth types. Regular mouth jars have a smaller opening. Wide mouth jars have a bigger opening.
Wide mouth jars are easier to fill and clean. They work great for large foods like peach halves or pickle spears. Beginners often like wide mouth jars for this reason. All three jars above are wide mouth, so filling them is simple.
Regular mouth jars use less lid material. They can be a good choice for jams and jellies. Both types work fine. Just make sure your lids match the mouth size.
Match the Jar to the Food
Pick your jar size based on how much you will use at once. A quart of pickles is handy for a family. A pint of jam is smart if you eat it slowly. Once a jar is opened, the seal is gone. So do not can more than you can use.
Clean and Inspect Every Jar
Wash your jars in hot, soapy water. Rinse them well. You can also run them through the dishwasher. Clean jars help the seal hold.
Check each jar with care. Look for cracks in the glass. Run your finger around the rim. Feel for chips or rough spots. A chipped rim will not seal right. Toss any jar that is cracked or chipped.
Prep the Lids and Bands
Lids come in two parts. The flat lid has a sealing ring. The band screws on to hold it in place.
Always use new flat lids for canning. Old lids may not seal again. Wash the lids and bands in warm, soapy water. Rinse them well. You do not need to boil new lids. Just keep them clean and ready. Bands can be reused if they are not rusty or bent.
Beginner Canner Comparison Table
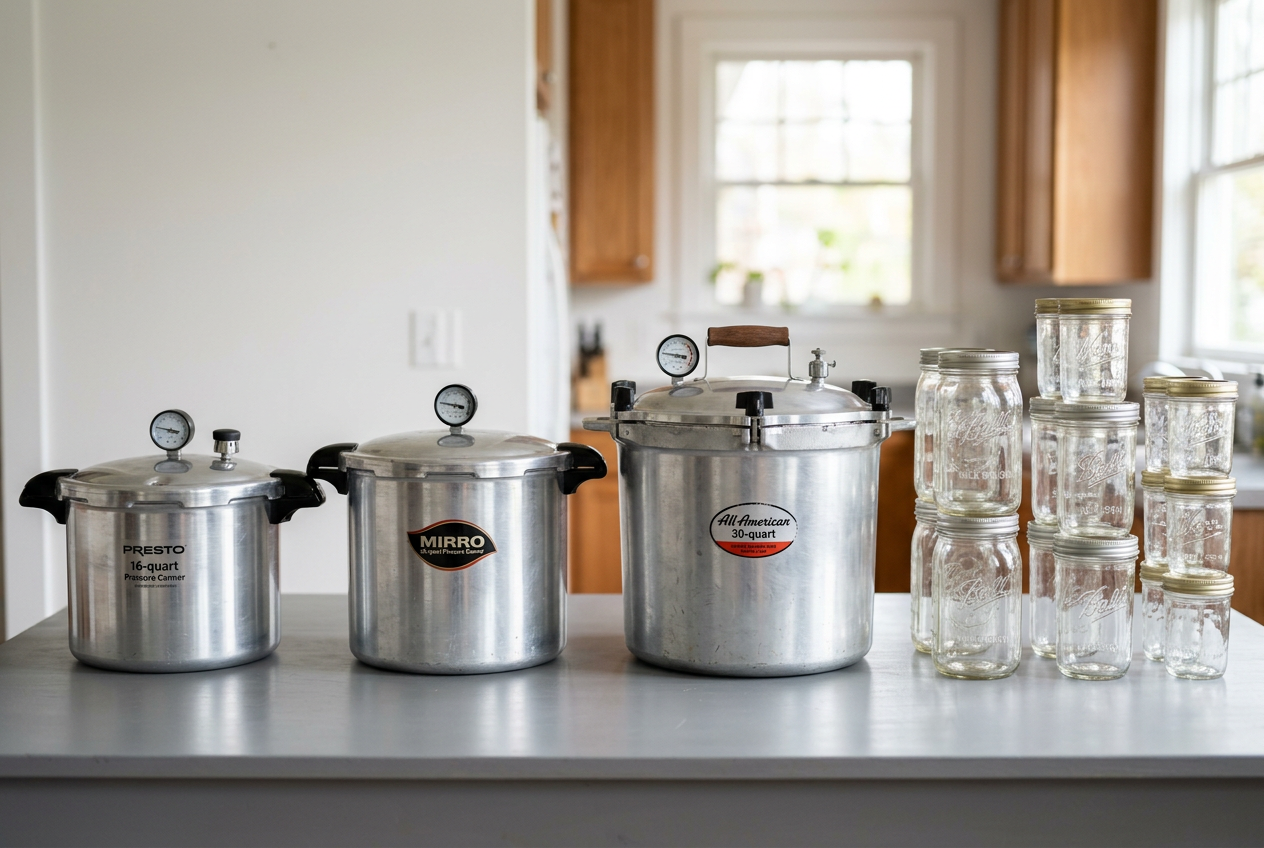
You have seen a lot of gear so far. Now let’s put it all in one place. This table shows the main canners and jar sets from this guide. It compares capacity, stove type, canning method, and best use. Use it to find the setup that fits your kitchen and your food goals.
How to Read This Table
The method column matters most. Pressure canners can do both jobs. They handle low-acid foods like meat and green beans. Many also work as water bath canners for high-acid foods. A water bath canner can only do high-acid foods like jams and pickles. If you want to can meat or plain veggies, you need a pressure canner.
Check the stove type column next. This trips up a lot of new canners. The Supa Ant water bath kit does not work on induction or glass cooktops. If you have one of those stoves, pick the 20 quart stainless kit instead. The Presto 01784 and Denali Tanker both work on induction, so they are safe bets for modern stoves.
Which Setup Fits You?
If you want to can just about anything, start with a pressure canner. The Presto and the Denali both hold 23 quarts. That means more jars per batch. If your kitchen is small, the Hestroney canner holds less but takes up less room.
If you only plan to make jams, pickles, or salsa, a water bath kit is enough. It costs less and is simpler to use. Both water bath kits above come with helper tools like a jar lifter and funnel. That is handy for beginners.
For jars, match the size to your food. Small 16 oz jars are great for jams. The 32 oz jars hold soups and sauces. The big 64 oz half gallon jars work for large batches and fermenting.
Pick one canner and one jar size to start. You can always add more later.
Step-by-Step: Canning Your First Batch
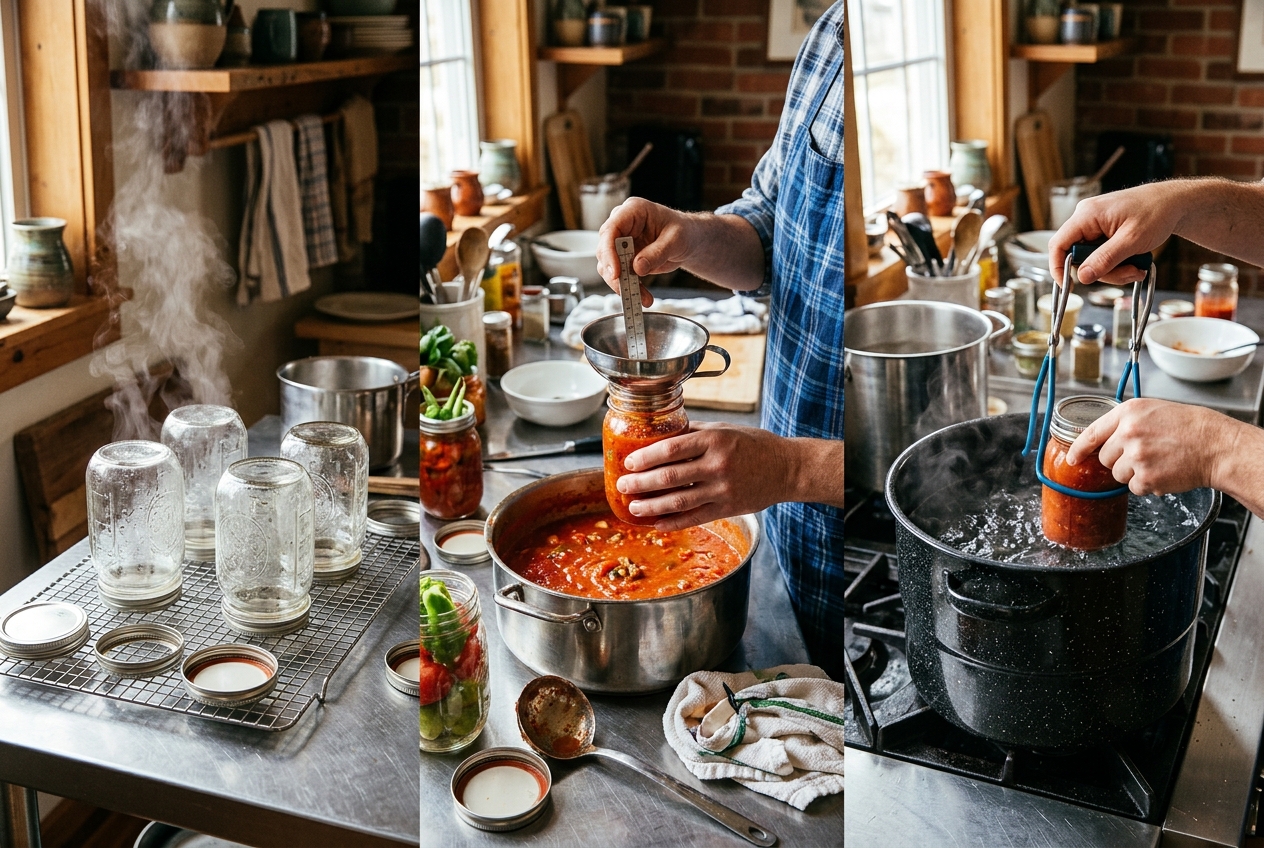
You have your gear. Now it is time to can. Follow these steps in order. Do not skip any. Each step keeps your food safe.
Step 1: Clean and Heat Your Jars
Wash your jars, lids, and bands in hot soapy water. Rinse them well. Then keep the jars hot until you fill them. You can leave them in warm water or a low oven. Hot jars will not crack when you add hot food. A good starter kit like the 20-quart water bath canner set comes with jars and tools to get you going.
Step 2: Prepare Your Food
Get your recipe ready. Use a tested recipe from a trusted source. Cook or pack the food as the recipe says. Have your funnel and ladle close by.
Step 3: Fill the Jars With Headspace
Set a hot jar on a towel. Put the funnel on top. Ladle in the food. Leave the right amount of empty space at the top. This empty space is called headspace. Most recipes want a quarter inch, half inch, or one inch. Your recipe will tell you.
Run a plastic tool down the sides to pop air bubbles. Wipe the jar rim clean with a damp cloth. A dirty rim will not seal. Set the lid on top. Screw the band on until it is just snug. Do not crank it tight.
Step 4A: Water Bath Canning
Use this for high-acid foods like jams, pickles, and fruit. Set the filled jars on the rack in your canner. Cover them with at least one inch of water. Turn the heat to high. When the water boils hard, start your timer. Boil for the full time your recipe lists. Keep the lid on. Add more boiling water if the level drops.
Step 4B: Pressure Canning
Use this for low-acid foods like meat, beans, and most vegetables. This is the only safe way for these foods. Put a few inches of water in the Presto 23-quart pressure canner or your chosen canner. Lock the lid. Let steam vent for 10 minutes. Then add the weight. Let the pressure build to what your recipe says. Hold that pressure the whole time. Watch the gauge. Adjust the heat to keep it steady.
Step 5: Cool and Check the Seal
When time is up, turn off the heat. For a pressure canner, wait for the pressure to drop to zero on its own. Do not rush it. Remove the lid away from your face.
Lift the jars straight up with a jar lifter. Set them on a towel. Do not tip them. Leave them alone for 12 to 24 hours. You may hear a ping as they seal.
Press the center of each lid. If it does not move, it sealed. If it pops back, put that jar in the fridge and eat it soon. Label your sealed jars with the date.
Common Canning Mistakes and Safety Rules
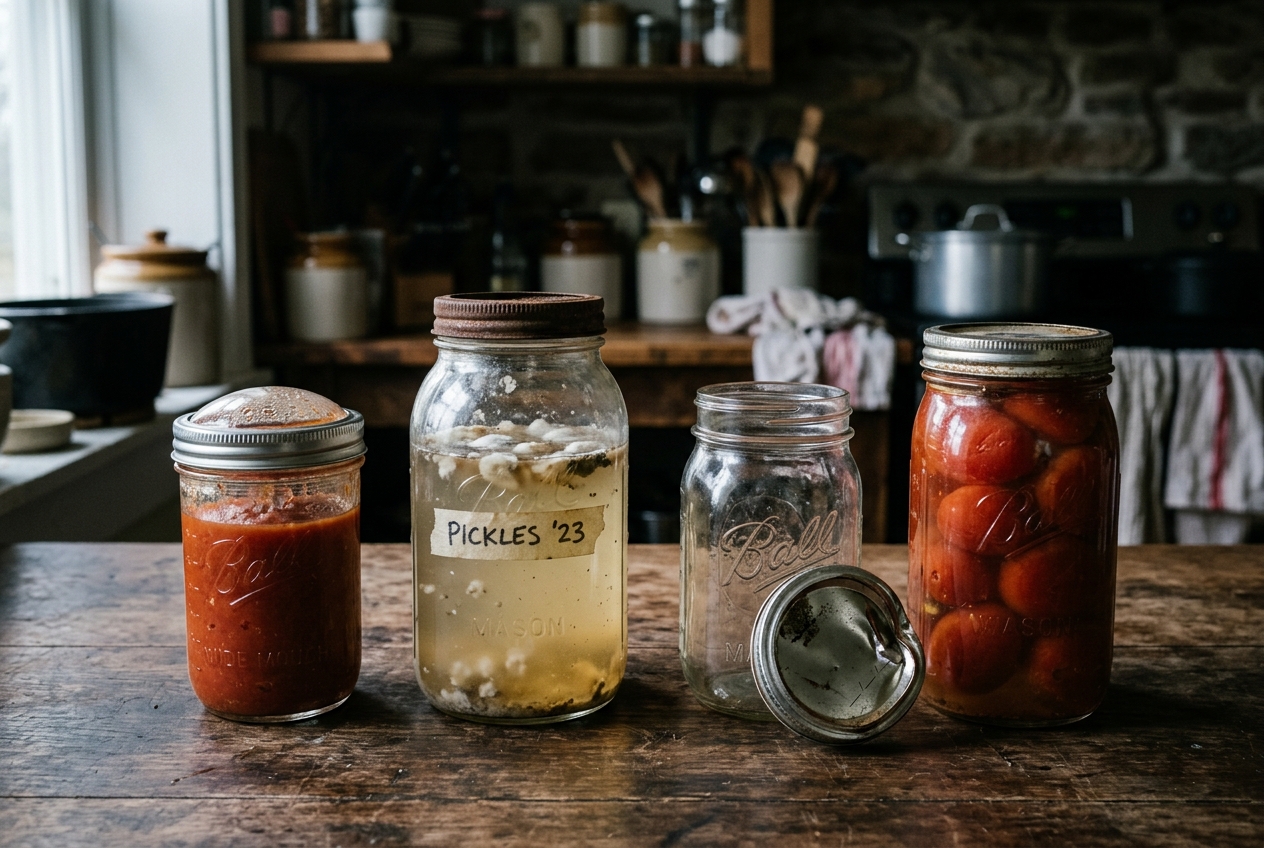
Canning is safe when you do it right. Most problems come from small mistakes. Here are the big ones to avoid, plus the safety rules that matter most.
Reusing Flat Lids
The flat metal lid on a Mason jar is meant for one use only. The sealing compound on the edge softens when heated. After that first use, it will not seal well again. Always use new flat lids for each batch. You can reuse the metal bands and the glass jars many times. Just check the jars for cracks or chips first.
Skipping or Guessing Headspace
Headspace is the empty gap between the food and the top of the jar. Every recipe tells you how much to leave. It might be 1/4 inch, 1/2 inch, or 1 inch. This gap is not random. Too little headspace can push food out and ruin the seal. Too much can leave air that stops a good seal. Use a bubble popper tool or a small ruler to measure. Do not guess.
Using Unsafe or Made-Up Recipes
This is the mistake that causes the most harm. Old family recipes and random online recipes may not be safe. They might skip acid, use the wrong method, or give short processing times. Stick to tested recipes. Good sources are the USDA, the National Center for Home Food Preservation, and Ball. These recipes have been tested to kill harmful germs.
Choosing the Wrong Method
Low-acid foods like meat, beans, and most vegetables must be pressure canned. A water bath is not hot enough to make them safe. High-acid foods like jams, pickles, and most fruit can use a water bath. If you are unsure, check a tested recipe. When in doubt, pressure can it.
Understanding Botulism Risk
Botulism is a rare but serious illness. It comes from a germ that grows in low-acid, low-oxygen places. A sealed jar is exactly that kind of place. The germ makes a toxin you cannot see, smell, or taste. This is why processing time and method matter so much. Follow USDA-approved times to the minute. Never shorten them to save time.
Checking for Failed Seals
After the jars cool for 12 to 24 hours, check each seal. Press the center of the lid. If it does not move or pop, it sealed. If it flexes up and down, it did not seal. Put unsealed jars in the fridge and eat that food soon, or process it again with a new lid.
Warning Signs to Throw Out
Never taste food you think might be bad. Toss any jar with these signs:
- A bulging or swollen lid
- Liquid that spurts out when you open it
- A bad smell
- Mold, cloudiness, or fizzing
- A broken seal you did not notice before
When in doubt, throw it out. One bad jar is not worth the risk.
Frequently Asked Questions
How long do home canned foods last?
Most home canned foods stay good for about one year. They are safe to eat after that, but the taste and texture start to drop. The color may fade too. For the best quality, use your jars within 12 months. Write the date on each lid or jar so you know how old it is. Older jars go first. Newer jars go to the back.
Do I really need to adjust for altitude?
Yes. This step matters a lot. Water boils at a lower temperature when you go higher up. That means your food may not get hot enough to be safe. If you live above 1,000 feet, you must adjust.
For water bath canning, you add more time. For pressure canning, you add more pressure. Check a trusted altitude chart for your exact numbers. The National Center for Home Food Preservation has free charts online. Do not skip this step, even if the recipe does not mention it.
What should I do if a jar does not seal?
This happens to new canners. It is not a big deal. First, check your jars within 24 hours. Press the center of each lid. If it pops up and down, it did not seal.
You have two choices. You can put the food in the fridge and eat it in a few days. Or you can reprocess the jar. To reprocess, remove the lid and check the jar rim for chips or food bits. Wipe it clean. Add a new lid. Then run the jar through the full canning process again. Use fresh timing, not shorter timing.
Which foods need a pressure canner?
This is the most important question for safety. Low acid foods need a pressure canner. A water bath canner does not get hot enough for them. Low acid foods include:
- Vegetables like green beans, corn, and carrots
- Meat, poultry, and fish
- Soups and stews
- Beans
High acid foods are safe in a water bath canner. These include fruits, jams, jellies, pickles, and most salsas. Tomatoes sit in the middle. Many recipes tell you to add lemon juice or vinegar to make them safe for water bath canning.
If you plan to can low acid foods, get a real pressure canner like the Presto 01784. Do not use a regular pressure cooker for canning.
How should I store my canned jars?
Store jars in a cool, dark, and dry place. A pantry or closet works well. Keep them away from heat and sunlight. Both can hurt the seal and the food.
Take the metal bands off before you store your jars. This keeps them from rusting on. It also helps you spot a broken seal later. Do not stack jars on top of each other. The weight can break seals. Keep jars off the floor and away from damp spots.
Your Canning Action Checklist
You have learned a lot so far. Now it is time to put it all together. Use this checklist to start canning the right way. Follow the steps in order. Do not skip ahead.
Step 1: Gather Your Gear
Buy your tools before you start. This saves stress later. Here is what you need:
- A canner. Pick a water bath canner for high acid foods like jams and pickles. Pick a pressure canner for low acid foods like veggies and meat. If you want one tool that does both, the Presto 23-Quart Pressure Canner works as both a pressure canner and a water bath canner.
- Mason jars with new lids. Use jars made for canning. The Yodecy 16 oz Wide Mouth Mason Jars are a good size for first batches.
- A jar lifter. This lets you move hot jars safely.
- A canning funnel. This keeps food off the jar rims.
- A bubble popper and headspace tool.
- A magnetic lid lifter.
If you want most of these tools in one box, a starter kit is the easy path. The Supa Ant Water Bath Canning Kit comes with a pot, rack, and the small tools you need.
Step 2: Learn the Safety Rules
Safety keeps your food good to eat. Follow these rules every time:
- Use a tested recipe from a trusted source. Do not guess amounts.
- Match the method to the food. High acid foods use a water bath. Low acid foods must use a pressure canner.
- Wash your jars and tools well.
- Check each jar for cracks or chips. Toss any that are damaged.
- Leave the right headspace at the top of each jar.
- Wipe the jar rims clean before you put on lids.
- Process for the full time your recipe says.
- Let jars cool without moving them. Do not touch the lids for at least 12 hours.
Step 3: Check Your Seals
After the jars cool, test each lid. Press the center. If it does not pop or move, the seal is good. If a lid flexes up and down, the seal failed. Put that jar in the fridge and eat the food soon.
Step 4: Try an Easy First Recipe
Start with something simple. Strawberry jam is a great first project. It is high acid, so you only need a water bath canner. Here is the basic flow:
- Wash and mash your strawberries.
- Mix them with sugar and pectin. Follow the recipe amounts.
- Cook the mix until it thickens.
- Ladle the hot jam into clean jars. Leave the right headspace.
- Wipe the rims and add the lids.
- Process the jars in your water bath canner for the full time.
- Let the jars cool and check the seals.
Once you master jam, try pickles or salsa. Build your skills one batch at a time. You will get better fast.
Next Steps: Building Your Canning Skills
You made it. You now know the basics of safe canning. The next part is simple. Start small and build from there. You do not need to can a whole pantry in one weekend. That is a fast way to feel stressed and give up.
Start With One Easy Recipe
Pick one simple recipe for your first batch. Good starter choices are jam, pickles, or applesauce. These use water bath canning. That method is more forgiving for new canners. Make one batch. See how it goes. Then make it again next week.
Once you feel sure, try something new. Salsa is a great next step. After that, you can move into pressure canning. That opens the door to beans, soups, and meats. Take it one skill at a time. Each batch teaches you something.
Keep a Canning Log
A canning log is one of the best habits you can build. It does not need to be fancy. A cheap notebook works fine. Write down what you canned and the date. Note the recipe you used. Write down the jar size and the process time. Add the altitude setting you used, too.
Then add a few notes after each batch. Did the seals hold? Did the food taste good? Would you change anything next time? Over the years, your log turns into your own recipe book. It also helps you spot problems fast. If a batch fails to seal, your notes can help you figure out why.
Label every jar as well. Write the food name and the date on each lid or side. Older jars go to the front of your shelf. That way you use the oldest food first.
Grow Your Skills Over Time
Canning is a skill you keep getting better at. Each season, try to learn one new thing. Maybe you learn to can tomatoes. Maybe you try a new pickle recipe. Maybe you finally use your pressure canner for chicken stock.
Buy your jars in the size that fits your needs. Pint jars are handy for small servings. Quart jars hold more for soups and sauces. If you want to store big batches, half gallon jars work well for some foods. Match the jar to the recipe and the method you use.
Trust safe, tested recipes. Stick to guides from the USDA or a trusted extension office. Do not guess on process times. When in doubt, look it up.
Keep Learning
Canning fits into a bigger plan for food storage and being ready. Once you feel good with canning, look at other ways to store food. Freezing, drying, and root cellars all pair well with canning. Check out our other guides on food storage and home preparedness on Ready Guidance. One jar at a time, you are building real skills that last.