Food Preservation Methods Compared: Canning, Drying, Freezing, and Fermenting (2026)
You just picked a bushel of apples. Or your garden gave you more tomatoes than you can eat. Maybe a store sale left you with too much meat for one week. Now what? You do not want good food to rot. This is the exact problem food preservation solves.
Two times a year, this question gets loud. Fall harvest fills kitchens with fruits and vegetables. Then January stock-up brings big grocery hauls after the holidays. Both times, people want to keep food fresh longer without waste.
The tricky part is picking the right method. There are four main ways to preserve food at home. You can can it, dry it, freeze it, or ferment it. Each one works well for some foods and not others. Each one costs different amounts of time, gear, and effort. Freezing is simple but needs power. Canning lasts long but takes work. Drying makes food light. Fermenting adds good microbes and flavor.
This article compares all four side by side. You will learn what each method does best, what it needs, and which foods fit. That way you can match the method to your food and your kitchen.
Food safety comes first with every method. For step-by-step rules and safe times, lean on research-based sources like the National Center for Home Food Preservation and government food safety sites. We link to them at the end.
- Drying removes moisture so food lasts months without power, and a dehydrator with 600 W and 6.5 ft² of space handles big batches fast.
- Vacuum sealing pulls out air to slow spoilage, and a strong sealer locks bags tight in about 8 to 18 seconds.
- Fermenting uses salt and time to turn vegetables into long-lasting sauerkraut, kimchi, and pickles in a 1 gallon crock.
- Canning and freezing round out your options, so mixing methods gives you the safest, most flexible food storage.
- Match the method to the food: dry fruits and herbs, ferment cabbage and cucumbers, seal meats and grains.



Reviewed by Elena V., Dale M. & Marcus T. — contributors with hands-on preparedness experience. How we test
Getting ready for hard times starts with keeping food safe to eat. Read on to see which tools make each preservation method work.

Cosori 6-Tray Food Dehydrator
Drying is one of the oldest ways to make food last without refrigeration. With 6 stainless steel trays and a strong fan, you can preserve large batches of fruits, herbs, and jerky at once.
Check Price on Amazon
10-in-1 Vacuum Sealer
Pulling air out of bags keeps food fresh far longer and blocks freezer burn. This sealer locks bags tight in about 8 to 18 seconds so your stored supplies stay safe.
Check Price on Amazon
1 Gallon Fermentation Crock
Fermenting lets you turn cabbage and vegetables into sauerkraut, kimchi, and pickles that store for months. The 1 gallon crock holds 5 to 6 pounds and comes with weights and a pounder to do it right.
Check Price on AmazonIn this guide
Why Trust This Guide?
This article was researched and reviewed by contributors with hands-on experience in emergency preparedness. They have tested gear, built real systems, and lived through situations where these skills actually mattered.
The Four Main Food Preservation Methods at a Glance
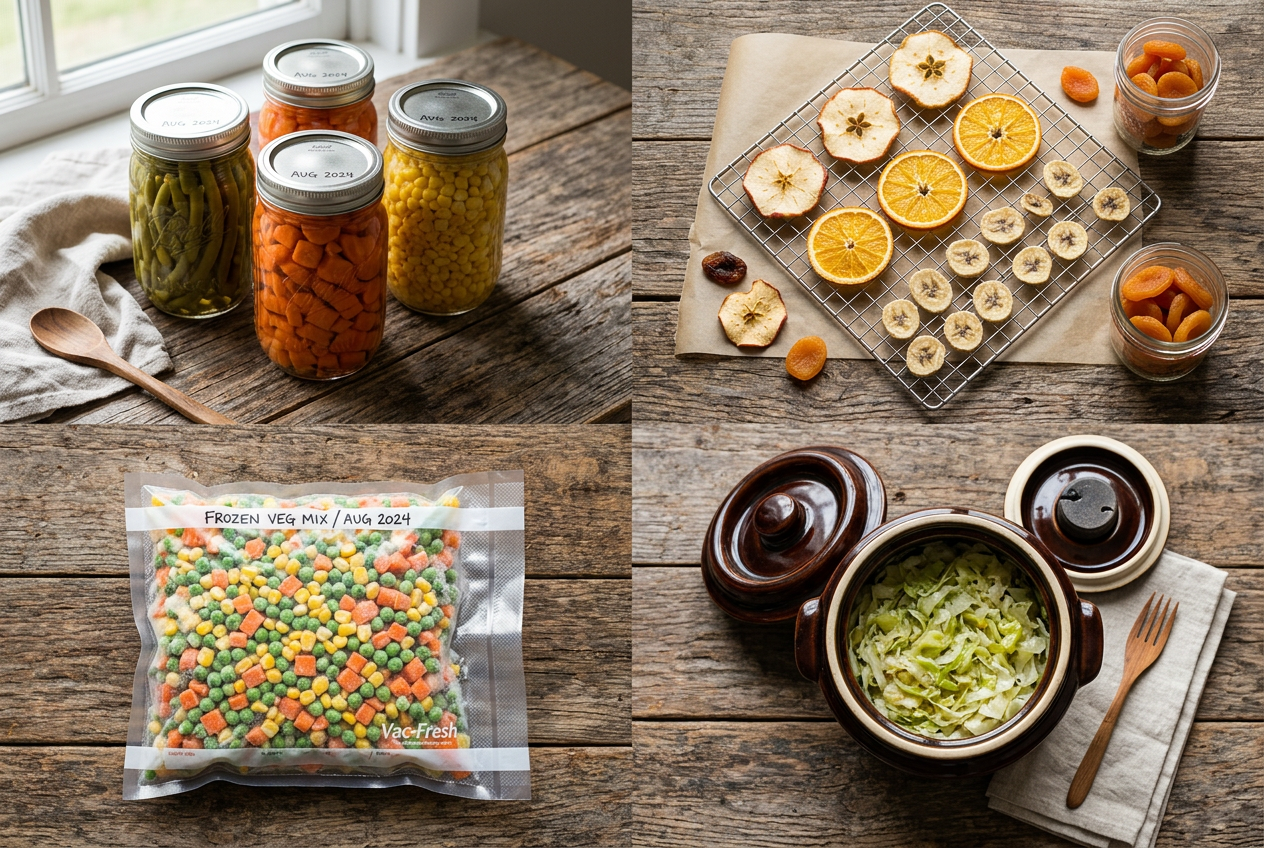
Food spoils because tiny living things grow in it. Bacteria, mold, and yeast break food down. Natural chemicals in food, called enzymes, also cause it to go bad over time. Every food preservation method works by stopping or slowing these things. Once you understand how each one does that, the rest is easy.
There are four main methods most home cooks use. They are canning, drying, freezing, and fermenting. Each one attacks spoilage in a different way. Let’s look at the basic science behind each.
Canning: Heat That Kills and Seals
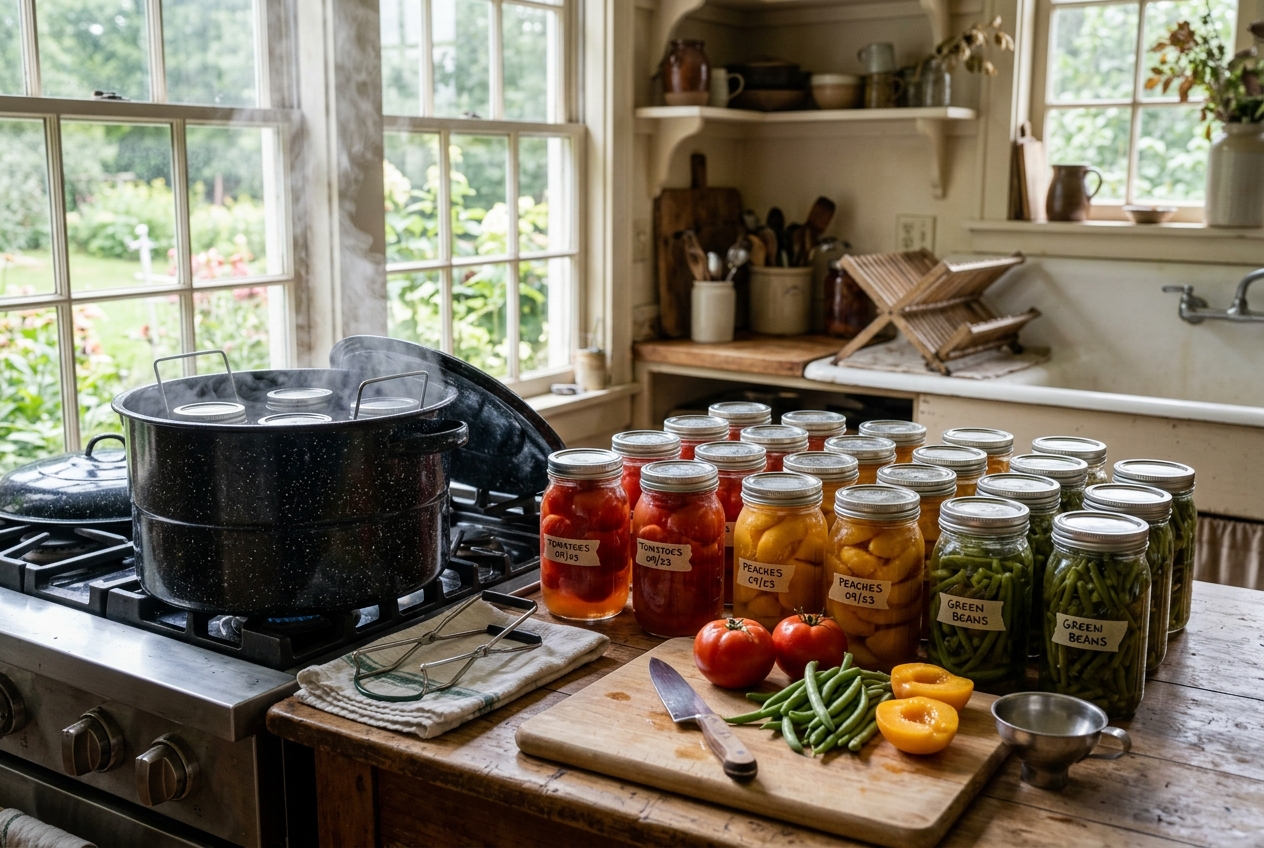
Canning uses heat to preserve food. You put food in jars and heat it to a high temperature. The heat kills the microbes that cause spoilage. It also pushes air out of the jar. As the jar cools, a tight seal forms on the lid. That seal keeps new air and microbes out.
Because of this seal, canned food can sit on a shelf for a long time. It does not need a fridge until you open it. Canning is a research-based method, and safe steps matter a lot. The National Center for Home Food Preservation shares current recommendations for home canning.
Drying: Take the Water Away
Drying, also called dehydrating, removes moisture from food. Microbes need water to grow. When you dry food, you take that water away. Without enough water, bacteria and mold cannot spread.
Dried food gets light and small. That makes it easy to store and carry. Think of dried fruit, jerky, and herbs. A dehydrator uses gentle heat and airflow to pull water out slowly.
Freezing: Cold That Slows Things Down
Freezing uses cold to stop spoilage. Cold does not kill most microbes. Instead, it puts them to sleep. At very low temperatures, bacteria and enzymes almost stop working. The FDA says your freezer should stay at 0°F (-18°C). Check the temperature now and then.
Freezing is the simplest method for most homes. You do not need special skills. But food quality can drop if air gets to it. That is why many people seal food in airtight bags before freezing.
Fermenting: Good Microbes Do the Work
Fermenting is a little different. Instead of killing all microbes, it grows helpful ones. Good bacteria eat sugars in the food and make acid. That acid makes the food sour. It also makes the food a hard place for harmful microbes to live.
Sauerkraut, kimchi, and pickles are common fermented foods. Fermenting can add tangy flavor and helpful bacteria to your meals.
Each method has clear strengths and trade-offs. The next sections break each one down in more detail. That way you can pick the method, or the mix of methods, that fits your kitchen and your goals.
Canning: Long Shelf Life Without Refrigeration
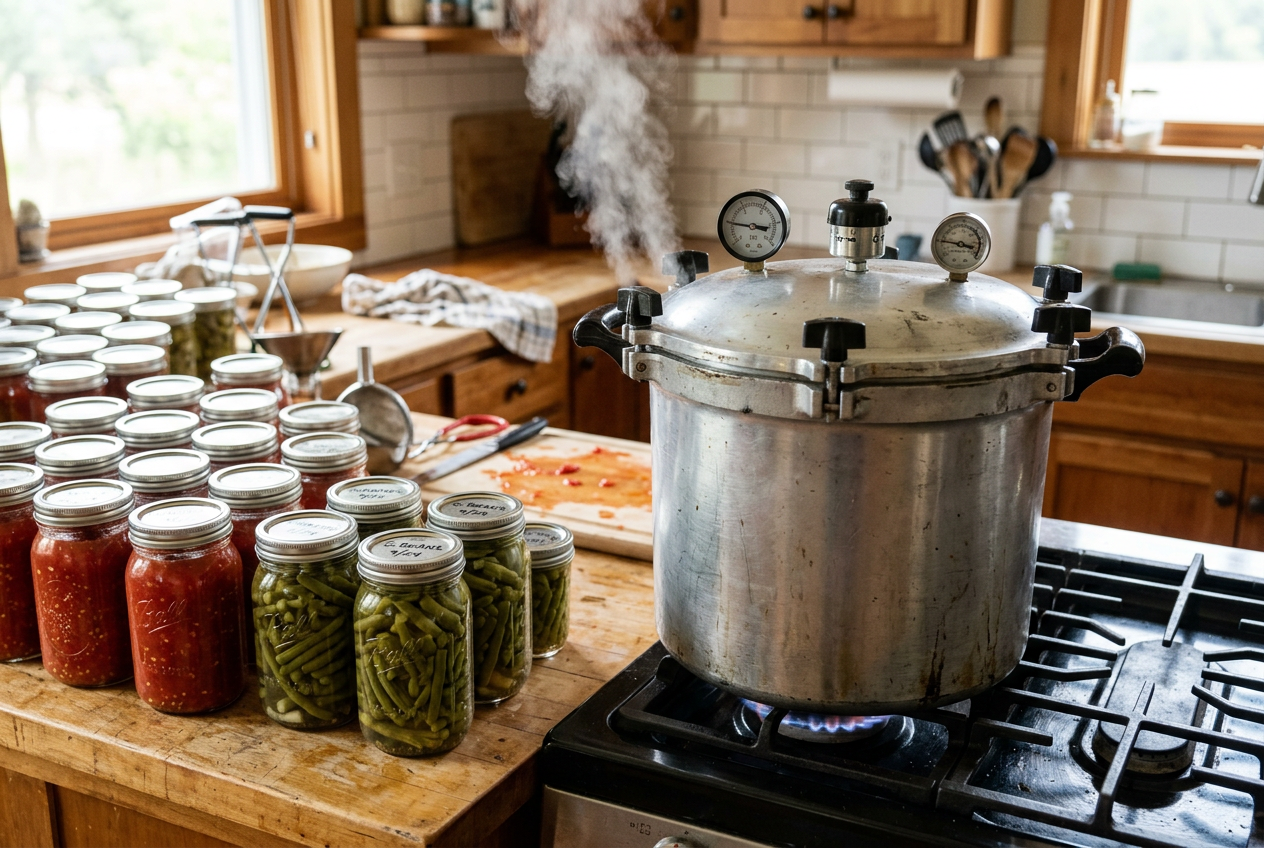
Canning seals food in jars so it can sit on a shelf for a long time. You do not need a fridge or freezer. That makes canning a great choice when you have a big harvest or want a backup food supply. Done right, canned food stays safe and ready to eat for months.
There are two main ways to can food at home. The one you pick depends on the food itself. Getting this choice right matters for safety, so read this part closely.
Water-Bath Canning
Water-bath canning uses a big pot of boiling water. You fill jars, seal them with lids, and lower them into the water. The heat kills spoilage organisms and pulls air out so the lids seal tight.
This method works only for high-acid foods. That means fruits, jams, jellies, pickles, and tomatoes with added acid like lemon juice or vinegar. The acid helps stop harmful bacteria from growing. Water-bath canning is simple and needs less gear, so many people start here.
Pressure Canning
Pressure canning uses a special sealed pot that traps steam. That steam gets much hotter than boiling water alone. The extra heat is what makes it safe for low-acid foods.
Low-acid foods include vegetables, meat, poultry, fish, and beans. These foods can carry bacteria that survive boiling water. Only a pressure canner reaches the temperature needed to make them safe. Do not use a water-bath for these foods. That is one of the most important rules in home canning.
Follow Research-Based Recipes
Canning is not a place to guess or wing it. Old family recipes and random online tips can be risky. Bad methods can let dangerous bacteria grow, and you cannot always see or smell the problem.
Use current, research-based directions instead. The National Center for Home Food Preservation is the trusted source for this. Their guidance is tested and kept up to date. Match your food to the right method, use approved recipes, and follow the steps exactly. Do not change amounts, skip acid, or shorten processing times.
Safe food storage also matters after you can. General food safety advice from sources like FoodSafety.gov reminds you to keep things clean and store food the right way. Label your jars with the date. Check seals before you eat. Toss any jar that looks off, leaks, or has a bulging lid.
Where to Learn the Steps
This section gives you the big picture, not the full how-to. Canning has many small steps, like prepping jars, checking headspace, and testing seals. Those steps deserve their own walk-through.
For a full step-by-step guide, see our beginner canning guide. It covers gear, jar prep, and processing in plain language. Start there before you fill your first jar.
Drying and Dehydrating: Lightweight, Shelf-Stable Food
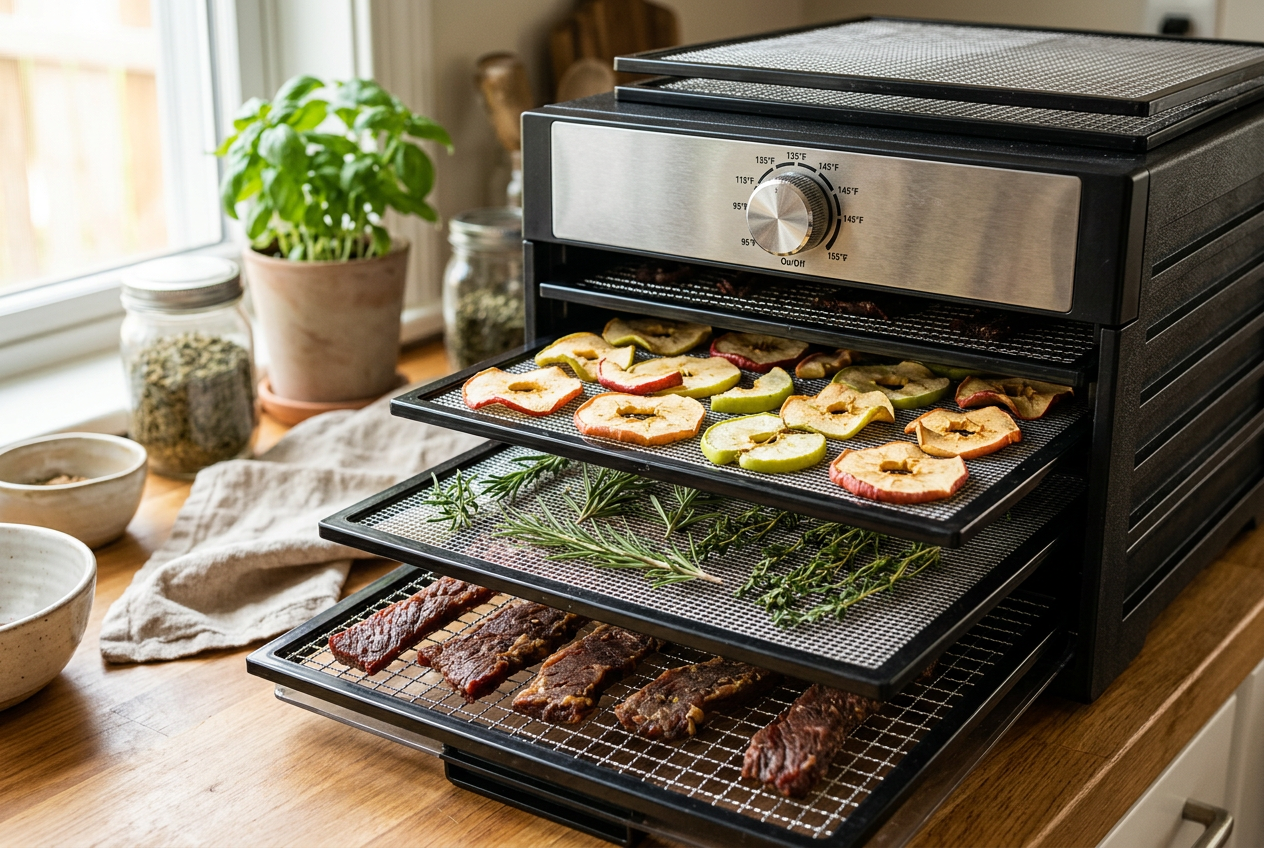
Drying is one of the oldest ways to preserve food. It works by removing the water. Bacteria and mold need moisture to grow. Take the water out, and food lasts much longer at room temperature.
You can dry many foods. Sliced apples, bananas, and berries turn into chewy snacks. Vegetables like peppers, onions, and tomatoes shrink down small. Herbs dry fast and keep their flavor. Thin strips of meat become jerky. Dried food is light and takes up little space. That makes it easy to store on a shelf or pack for a trip.
Air drying works in some cases, but a dehydrator gives you steady heat and airflow. That means faster, more even results. A good machine keeps the temperature low enough to protect nutrients and flavor while still pulling out the water.
What to Look For in a Dehydrator
A few features matter most when you pick a machine.
- Tray space. More trays let you dry bigger batches at once. Stainless steel trays are easy to clean and hold up well.
- Temperature control. Different foods dry best at different temperatures. Jerky needs more heat than herbs. A machine with an adjustable range gives you more control.
- Timer. A digital timer lets you set it and walk away. Some run for many hours without you touching them.
- Quiet operation. If you plan to run it overnight, a quiet motor helps.
Three Dehydrators Compared
The Cosori has six stainless steel trays and a large drying space. Its 600 watt motor and rear fan push air across the food for even drying. The brushless motor runs below 48 decibels, so it stays quiet overnight.
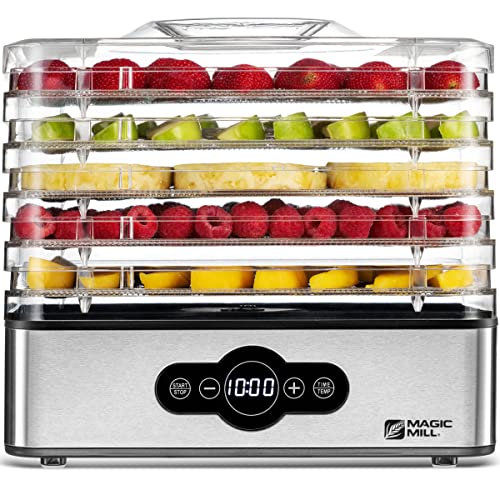
The Magic Mill uses five stainless steel trays that stack. You can raise the trays for thick pieces of food. It has a digital timer up to 48 hours and adjustable heat up to 167 degrees. That makes it a solid pick for jerky and fruit.
The FOHERE has five BPA-free trays and a 400 watt motor. Its digital display lets you set the temperature from 95 to 158 degrees and the timer up to 48 hours. It also runs quietly, which is nice for overnight batches.

Pick the machine that fits how much you dry and how much space you have. Bigger trays help with large harvests. Adjustable heat and a timer make the work easier.
Freezing: The Simplest Method for Most Households
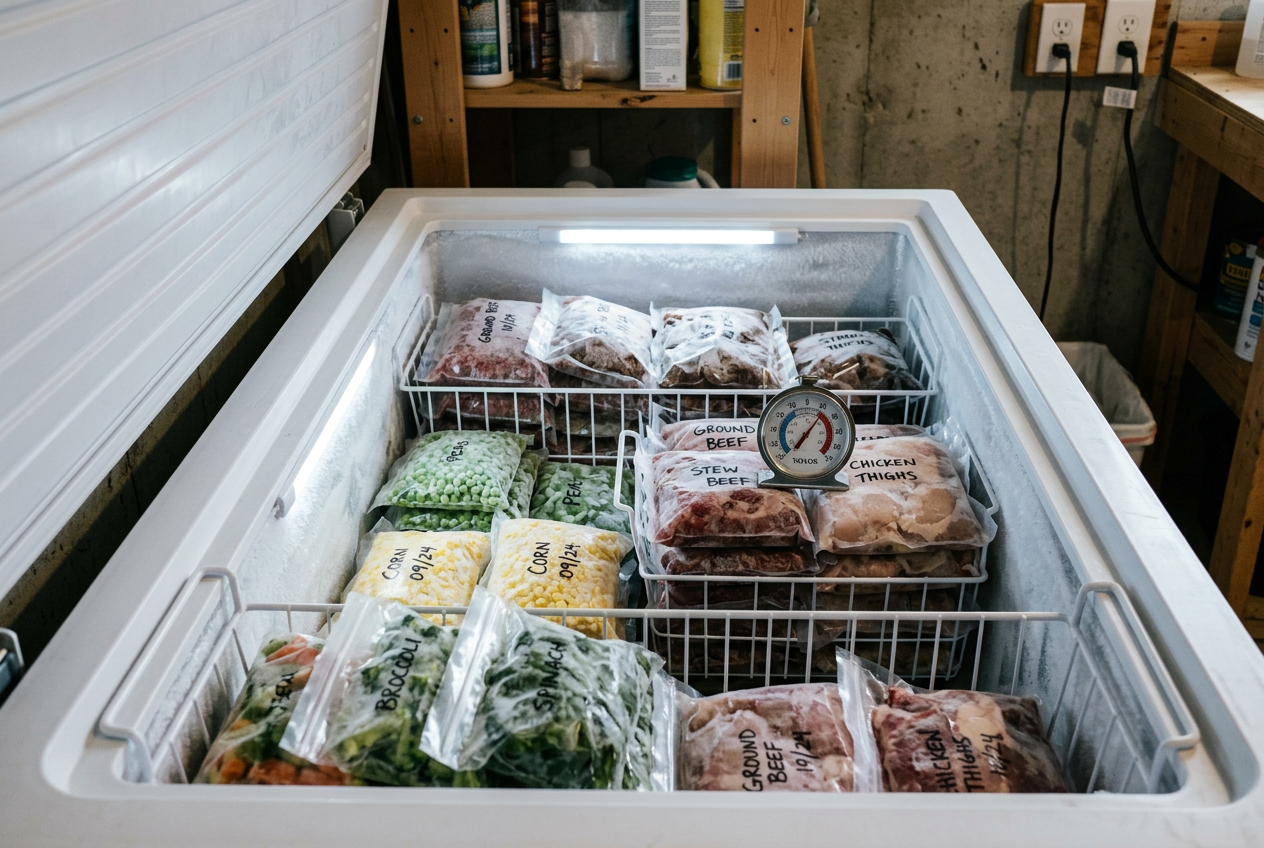
Freezing is the easiest way to save food. You do not need special skills. You do not need to cook anything first for most foods. You just pack the food, seal it, and put it in the freezer. That makes freezing a good first step if you are new to food preservation.
Keep Your Freezer at 0°F
The most important rule is temperature. Keep your freezer at 0°F, which is -18°C. At this temperature, the bacteria that cause food poisoning stop growing. Food stays safe as long as it stays frozen solid.
Check your freezer temperature now and then. Many freezers let you set the level, but the real temperature can drift. A simple freezer thermometer helps you make sure you are at 0°F. Cold storage is a key part of safe food handling, so this small check is worth the effort.
Fight Freezer Burn With Vacuum Sealing
Frozen food can still lose quality over time. The main problem is freezer burn. This happens when air touches the food and dries it out. You see gray or white spots, and the taste suffers. The food is still safe to eat, but it does not taste as good.
The best way to stop freezer burn is to remove the air. A vacuum sealer sucks the air out of a bag and seals it shut. Less air means less freezer burn. Vacuum sealing can keep food fresh much longer than a plain bag.
Comparing Vacuum Sealer Features
Vacuum sealers are not all the same. Two features matter most. The first is suction power, measured in kPa. Higher suction pulls out more air and gives a tighter seal. The second is having separate modes for dry and moist foods. Wet foods like marinated meat or soup can lose liquid during sealing, so a moist mode helps.
For strong suction, look at a high-power model. One option uses a 230W motor and claims 95kPa suction. It also has a double heat seal, which is useful for liquids and bulky cuts of meat.
If you want both dry and moist modes in a compact machine, another choice offers 80kPa suction with a DC motor. It has a moist mode that removes some liquid and a pulse mode so you can control the vacuum. A built-in cutter and starter bags make it easy to begin.

For meal prep and big batches, a model with four modes gives you flexibility. It has a vac and seal mode, a pulse mode for soft foods, a plain seal mode for chip bags, and an accessory mode for jars. Its compact size stores easily in a drawer.
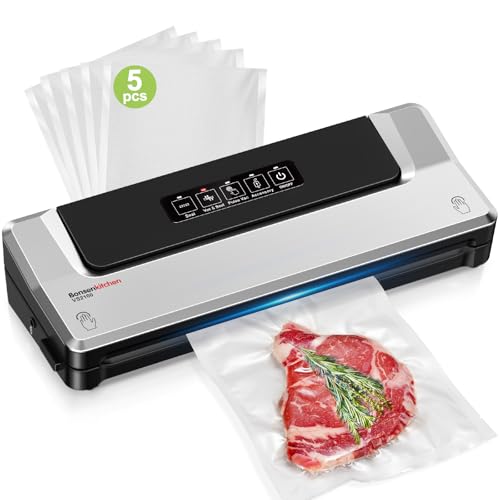
Pick the machine that fits the foods you freeze most.
Fermenting: Preserving With Beneficial Microbes
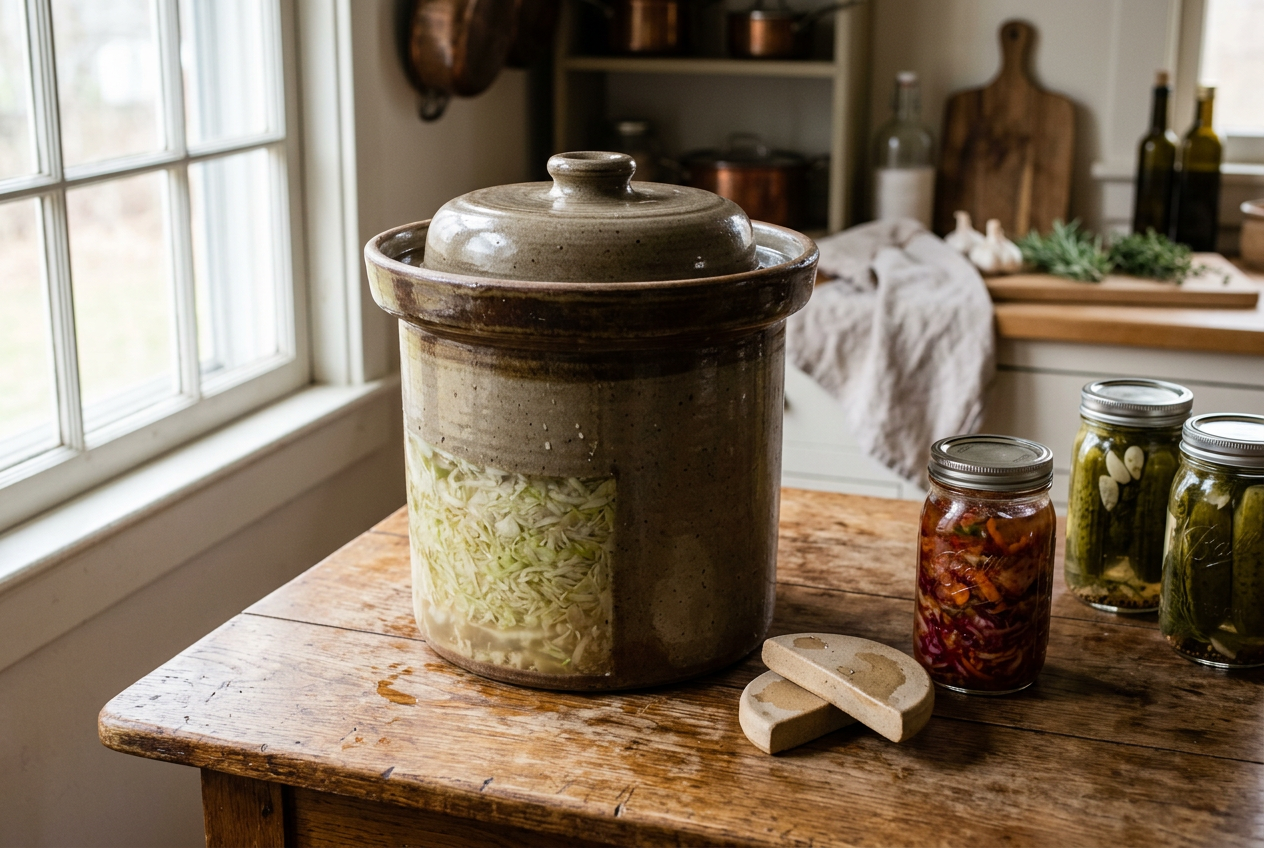
Fermenting is one of the oldest ways to keep food. It uses salt and the good bacteria that already live on vegetables. These bacteria eat sugars in the food and make acid. The acid keeps bad microbes from growing. It also gives foods like sauerkraut and kimchi their tangy taste.
The basic idea is simple. You chop vegetables and mix them with salt. The salt pulls water out of the veggies. This makes a salty brine. You pack the vegetables down under that brine. As long as the food stays under the liquid and away from air, the good bacteria do the work. Sauerkraut, kimchi, and many pickles all start this way.
How Fermenting Works
Keeping air out is the key. When vegetables touch air, mold and other spoilage can start. That is why weights and a good seal matter so much. Weights hold the vegetables down under the brine. A water seal lets gas bubble out while keeping fresh air from getting in.
You do not need heat or power to ferment. That makes it easy on your energy use. But you do need to watch your batch and keep things clean. Fermented foods are usually stored cold once they are done to slow things down.
Choosing a Fermentation Crock
A fermentation crock is a heavy pot made for this job. Look at three things. First, check the capacity for the batch size you want. Second, look for weights to hold the food down. Third, check for a water seal that keeps air out.
The Kenley crock is a smaller option. It holds one gallon. That fits about 5 to 6 pounds of vegetables. It comes with a lid, weights, and a pounder to press the food down. It has a water seal lid that lets gas escape while keeping air out. This is a good pick for small batches or a first try.
If you want to make more at once, a bigger crock helps. This 2 gallon kit is made in Ohio from stoneware. It is lead free and food safe. The larger size lets you ferment bigger batches of sauerkraut or pickles in one go.
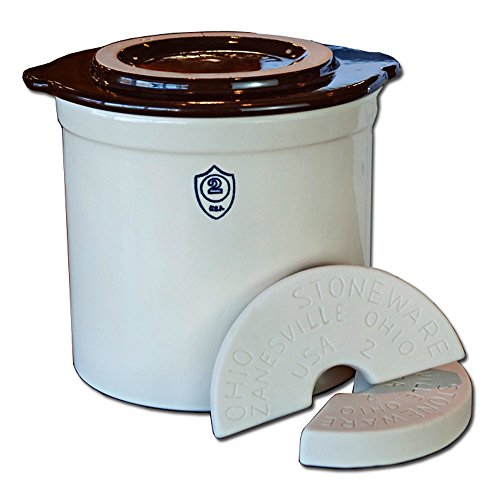
Here is a quick look at how these two crocks compare.
Start small if you are new. A one gallon crock lets you learn the steps without wasting a lot of food. Move up to a larger crock once you know you like the results. Either way, keep your tools clean and your vegetables under the brine.
Side-by-Side Comparison: Which Method Fits Your Needs
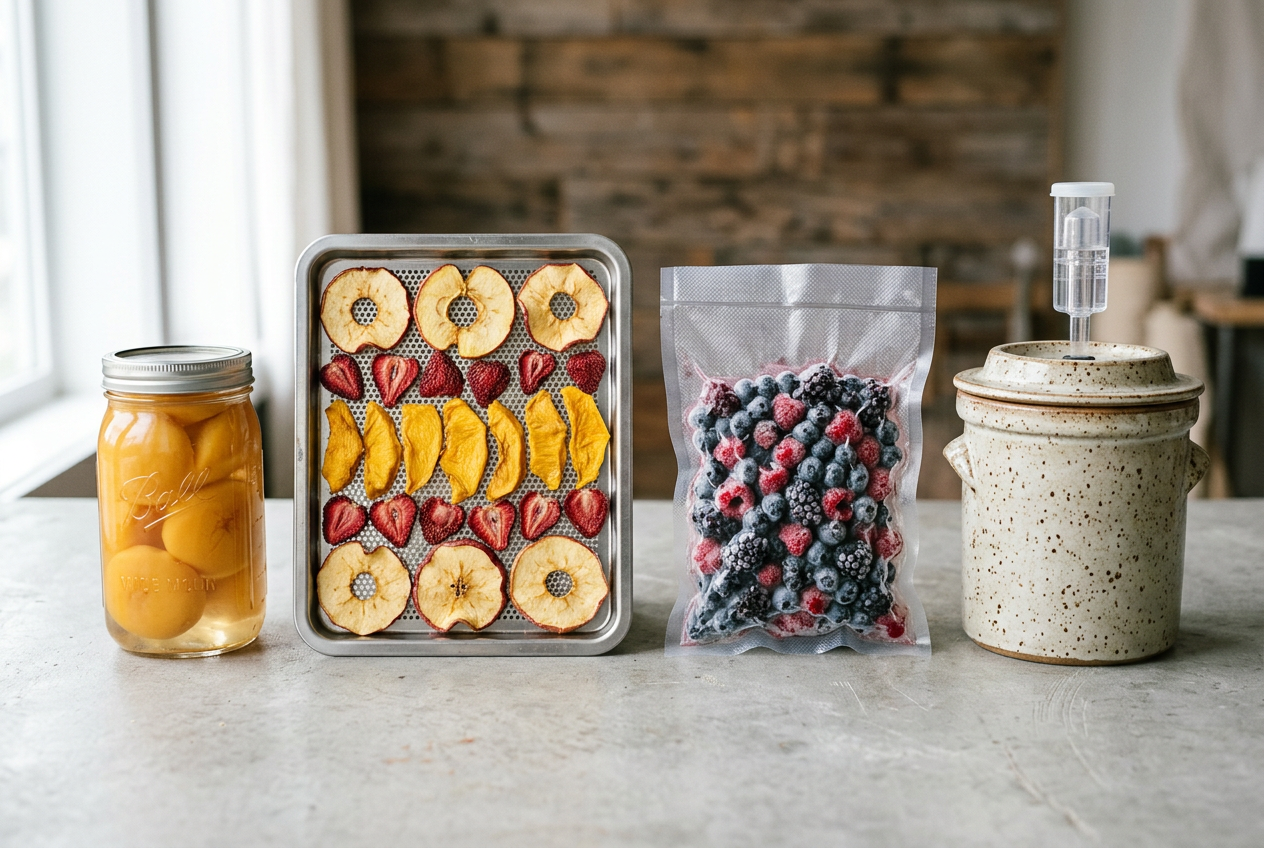
Each method has its own strengths. The best choice depends on your space, your budget, and the foods you want to keep. Some people use just one method. Many people mix several. Use the table below to match a method to your needs at a glance.
How to Read the Table
Canning gives you food that sits on a shelf without power. It needs a bit of gear upfront. It works well for high-acid foods like tomatoes and jams. Low-acid foods need a pressure canner. Once jars are sealed, they need no electricity.
Drying removes water so food lasts a long time. Dried food is light and takes up little space. A dehydrator makes the job faster and more even. Look at options like the Cosori dehydrator with stainless steel trays, or the Magic Mill with a digital timer. Once food is dry, store it in airtight jars in a dry spot.
Freezing is the simplest method for most homes. You just need freezer space. The catch is power. If the power goes out for too long, your food is at risk. A vacuum sealer helps stop freezer burn and keeps food fresh longer. The MEGAWISE sealer has dry and moist modes for different foods.
Fermenting uses helpful microbes to preserve food. It needs little gear and almost no power. A crock like the Kenley fermentation crock makes small batches easy with its water seal. Fermented food often moves to the fridge once it is ready.
Matching a Method to You
If you have little freezer space, canning or drying may fit better. If you want the least work, freezing is hard to beat. If you worry about power outages, canning and drying do not need electricity to keep food safe. If you like tangy flavors and small batches, try fermenting.
Think about the foods you eat most. Berries and meat freeze well. Herbs and fruit dry well. Cabbage and cucumbers ferment well. Tomatoes and jams can well.
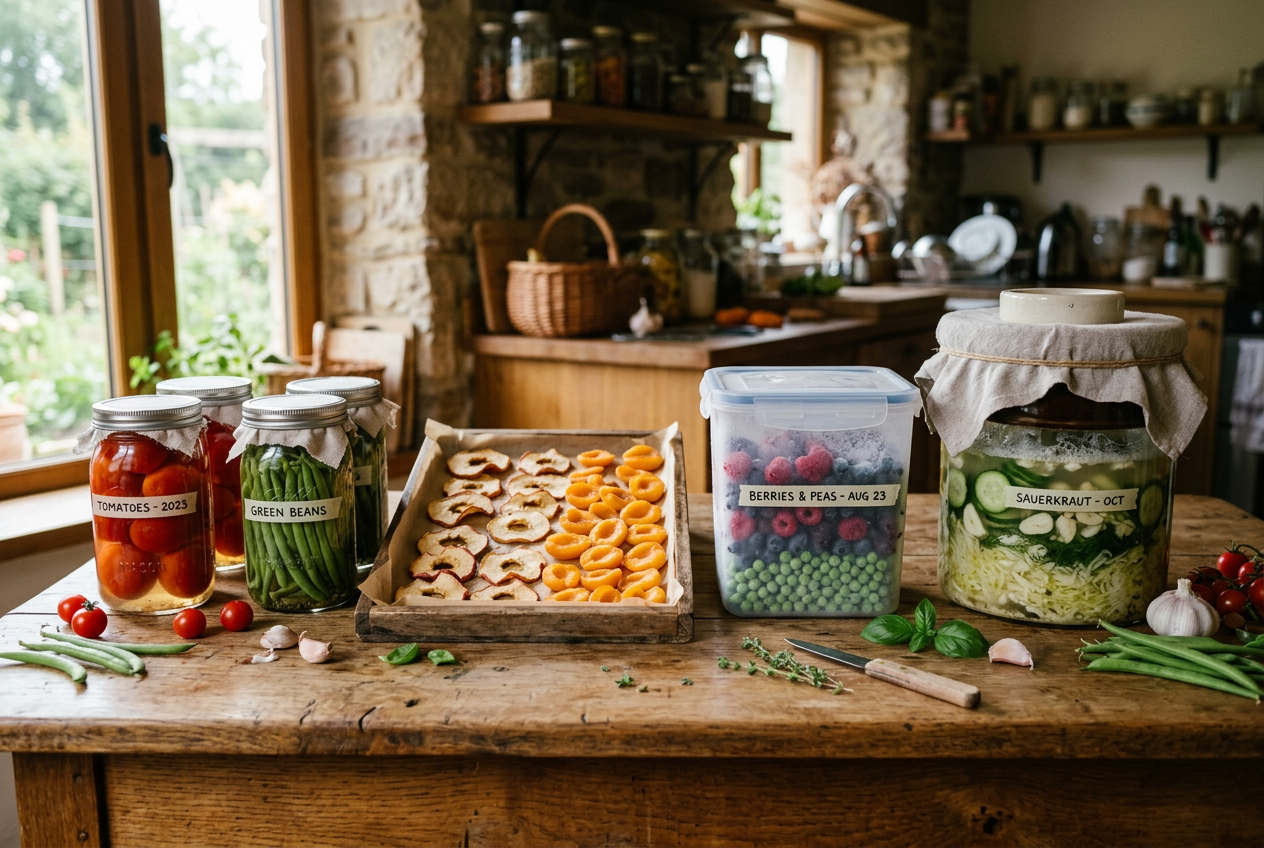
You do not have to pick just one. Many people freeze in summer, can the fall harvest, dry herbs year round, and ferment a jar of kraut on the side. Start with one method that fits your space and budget. Add more as you learn.
No matter which method you choose, follow safe food handling steps. The next section covers the food safety basics that apply to every method.
Food Safety Fundamentals for Every Method
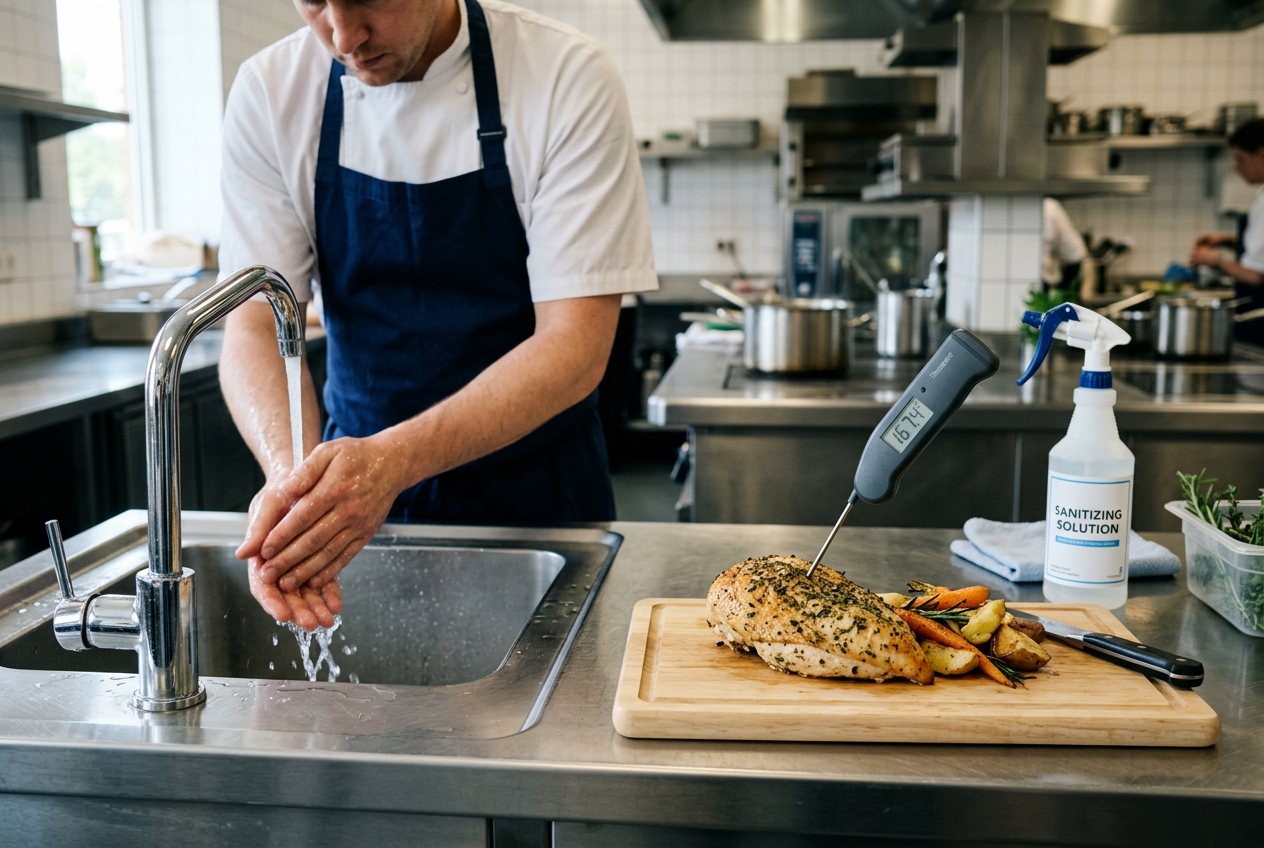
No matter which method you pick, safe food starts with clean habits and the right temperatures. These basics apply to canning, drying, freezing, and fermenting. They keep harmful germs from growing in your food.
Start Clean
The CDC lists four steps to safe food. They are clean, separate, cook, and chill. The first step is to keep your hands and surfaces clean. Wash your hands before you handle food. Wash them again after you touch raw meat. Clean your counters, cutting boards, and tools too.
The “separate” step means you keep raw foods away from ready to eat foods. Do not let juices from raw meat touch fresh produce. Use different cutting boards when you can. This helps stop germs from spreading.
Use a Thermometer
Guessing is not safe. Always use a food thermometer to check that foods are cooked to a safe temperature. A thermometer takes out the guesswork. This matters most for meat, poultry, and fish.
Your fridge and freezer need the right settings too. The FDA says to keep your refrigerator at or below 40 degrees Fahrenheit. That is 4 degrees Celsius. Keep your freezer at 0 degrees Fahrenheit. That is minus 18 degrees Celsius. Check these temperatures now and then. Many appliances drift over time.
Chill Promptly
Bacteria that cause food poisoning grow fastest at warm temperatures. So do not let food sit out. Refrigerate or freeze it right away. The faster you chill food, the safer it stays.
This step matters for freezing especially. Get your food into the freezer quickly while it is still fresh. It also matters after you cook or prepare food for any method. Do not leave prepared food on the counter for a long time.
Follow Research-Based Recipes
This is the most important rule for home preservation. Use recipes and steps that come from trusted, research-based sources. The National Center for Home Food Preservation is a strong place to start. It gives current recommendations for most home methods.
Do not use untested recipes for canning or fermenting. These methods depend on exact steps to be safe. A recipe from an old family note or a random website may skip a key safety detail. Small changes to timing, acid levels, or salt can make food unsafe. When you follow a tested recipe, you follow steps that experts have checked.
Quick Safety Recap
Keep these habits in mind for every batch you make:
- Wash your hands and clean your surfaces first.
- Keep raw foods away from ready to eat foods.
- Use a food thermometer to check cooked foods.
- Keep your fridge at or below 40 degrees Fahrenheit.
- Keep your freezer at 0 degrees Fahrenheit.
- Chill food fast. Do not let it sit out.
- Stick to research-based recipes and skip untested ones.
These steps take only a little extra time. They protect you and your family with every method you choose.
Food Preservation FAQ
Which method keeps the most nutrients?
Every method holds onto some nutrients and loses others. Freezing tends to keep food close to fresh. That is because food goes in raw and stays cold. Drying uses gentle heat, which can protect many vitamins. Some dehydrators are built to keep nutrients well. For example, the Magic Mill dehydrator is described as removing water without wrecking natural taste and nutrients. Canning uses higher heat, so some heat sensitive vitamins drop. Fermenting can add helpful microbes to your food. No single method wins for every nutrient. Pick the one that fits the food and how you plan to eat it.
How long does preserved food last?
There is no one answer. Shelf life depends on the food, the method, and how you store it. Cold matters a lot. The FDA says to keep your refrigerator at or below 40°F and your freezer at 0°F. Check the temperatures now and then. Vacuum sealing can stretch how long food stays good. The Bonsenkitchen sealer is described as keeping food fresh for up to 25 days longer and helping prevent freezer burn. For canning and other methods, follow trusted, research based guides instead of guessing. Do not assume a fixed number for every food.
Do you need special equipment to start?
Not always. Freezing needs only a freezer, though a vacuum sealer helps. Fermenting can start with simple tools, but a crock makes it easier. A crock like the Kenley fermentation crock has a water seal that lets gases out and keeps air away. Drying needs a dehydrator for steady, even heat. Canning needs the right gear and careful steps. Start with the method that matches what you already own. Add tools as you grow.
How do you choose a method for a big harvest?
Think about space, time, and how you eat. Freezing is fast and simple if you have freezer room. Drying shrinks food down small, which saves space. A large dehydrator helps with big batches. The Cosori dehydrator gives 6.5 square feet of drying space across six trays. Canning lets you store food without refrigeration, which frees up your freezer. Fermenting works well for vegetables and adds new flavors. Many people use more than one method. You might freeze berries, dry herbs, and ferment cabbage from the same harvest.
Is any method safer than the others?
Each method is safe when you follow the steps. The CDC lists four steps to food safety: clean, separate, cook, and chill. Keep your hands and surfaces clean. Keep risky foods apart. Chill food quickly so germs do not grow. Use a food thermometer when you cook. For canning and drying, use current, research based directions. Safety comes from doing the steps right, not from picking one method over another.
Your Food Preservation Action Checklist
Ready to start? Use this checklist to move from idea to full pantry. You can print it or save it. Go step by step. Do not rush.
Step 1: Look at What You Have
Start with your food. What do you need to preserve? Think about your garden, a bulk sale, or a big harvest. Write down the amount and the type.
Next, look at your space. Do you have room in a freezer? Do you have pantry shelves? Do you have a cool, dark spot for jars? Your space helps you pick a method.
Step 2: Choose a Method
Match the food and your space to the right method. Freezing is the simplest for most homes. Canning gives you long shelf life without a fridge. Drying makes food light and small. Fermenting uses good microbes to preserve.
Pick one method to start. You do not need to try all four at once. Learn one method well first.
Step 3: Gather Your Equipment
Get the right tools for your method. Buy quality gear that will last.
For drying, a good dehydrator makes even batches. The Cosori dehydrator has six stainless steel trays and runs quietly. The Magic Mill dehydrator has a timer and temperature control.
For freezing, a vacuum sealer helps stop freezer burn. The Bonsenkitchen vacuum sealer has modes for dry and moist food. The MEGAWISE vacuum sealer comes with a starter kit of bags.
For fermenting, a crock keeps air out while gases escape. The Kenley fermentation crock holds one gallon and comes with weights and a pounder.
Step 4: Check Your Recipes
Do not guess. Use trusted, research-based sources for your recipes and times. The National Center for Home Food Preservation gives current recommendations for most home methods. Follow their steps closely.
For safe storage, follow food safety basics. Keep your freezer at 0 degrees F. Keep your fridge at or below 40 degrees F. Check the temperature now and then.
Step 5: Label and Rotate Your Stock
Label every jar, bag, or container. Write the name of the food and the date you preserved it. This makes it easy to track what you have.
Use the oldest food first. This is called rotating your stock. Put new items in the back and older items in the front. That way, nothing sits too long.
Quick Recap
- Check your harvest and your storage space.
- Pick one method to start.
- Gather quality equipment.
- Verify recipes against trusted sources.
- Label with the date and rotate your stock.
Work through these steps in order. Start small. Build your skills with one method, then add another when you feel ready.
Getting Started: Your Next Steps
You do not need to master all four methods at once. That is the fastest way to feel overwhelmed. Pick one method that fits your life right now. Get comfortable with it. Then add another when you are ready.
Start With What You Already Have
Look at your kitchen first. If you own a freezer with space, freezing is the easiest place to begin. You can freeze berries, bread, or leftovers today with no special gear. Keep your freezer at 0 F (-18 C) so food stays safe and fresh longer.
If you want food that lasts on a shelf without power, drying is a gentle first step. A basic dehydrator lets you make fruit chips, herbs, and jerky with little fuss. Both the Cosori dehydrator with stainless steel trays and the Magic Mill dehydrator with digital timer controls are good starting machines for home batches.
Match The Method To Your Goal
Think about what you want most.
- Want to save space and weight? Try drying.
- Want to keep food without a fridge for a long time? Learn canning, but follow trusted, research-based steps.
- Want the simplest option? Freezing wins for most homes.
- Want flavor and beneficial microbes? Try fermenting a small batch of sauerkraut or pickles.
For fermenting, a water-seal crock makes the process easier. The Kenley 1 gallon crock comes with weights and a pounder, which helps a first batch go smoothly. A larger 2 gallon stoneware crock gives you more room as you grow.
If you plan to freeze in bulk, a vacuum sealer helps prevent freezer burn and keeps food fresh longer. The MEGAWISE vacuum sealer with dry and moist modes is a flexible pick for meat, fish, and vegetables.
Grow One Skill At A Time
Once your first method feels easy, add a second. Maybe you start with freezing, then learn to dry extra garden produce in the fall. Later you might try a small ferment. Each new skill builds on the last. You waste less food and stretch your grocery budget over time.
Keep safety first with every method. Clean your hands and surfaces. Keep raw and ready-to-eat foods apart. Chill food quickly and store it at safe temperatures. These simple habits protect every batch you make.
Keep Reading
When you are ready to go deeper, check our related guides on this site. Our canning guide walks through the process step by step. Our prepper pantry guide helps you plan a stocked kitchen. Our long-term food storage guide covers how to keep food safe for the long haul.
Start small. Pick one method this week. Learn it well. Then build from there. Steady progress beats trying to do everything at once.
Sources and Further Reading
- National Center for Home Food Preservation: Home Page
- Safe Food Storage
- FoodSafety.gov
- Are You Storing Food Safely?
- Preventing Food Poisoning | Food Safety