Ready
Ready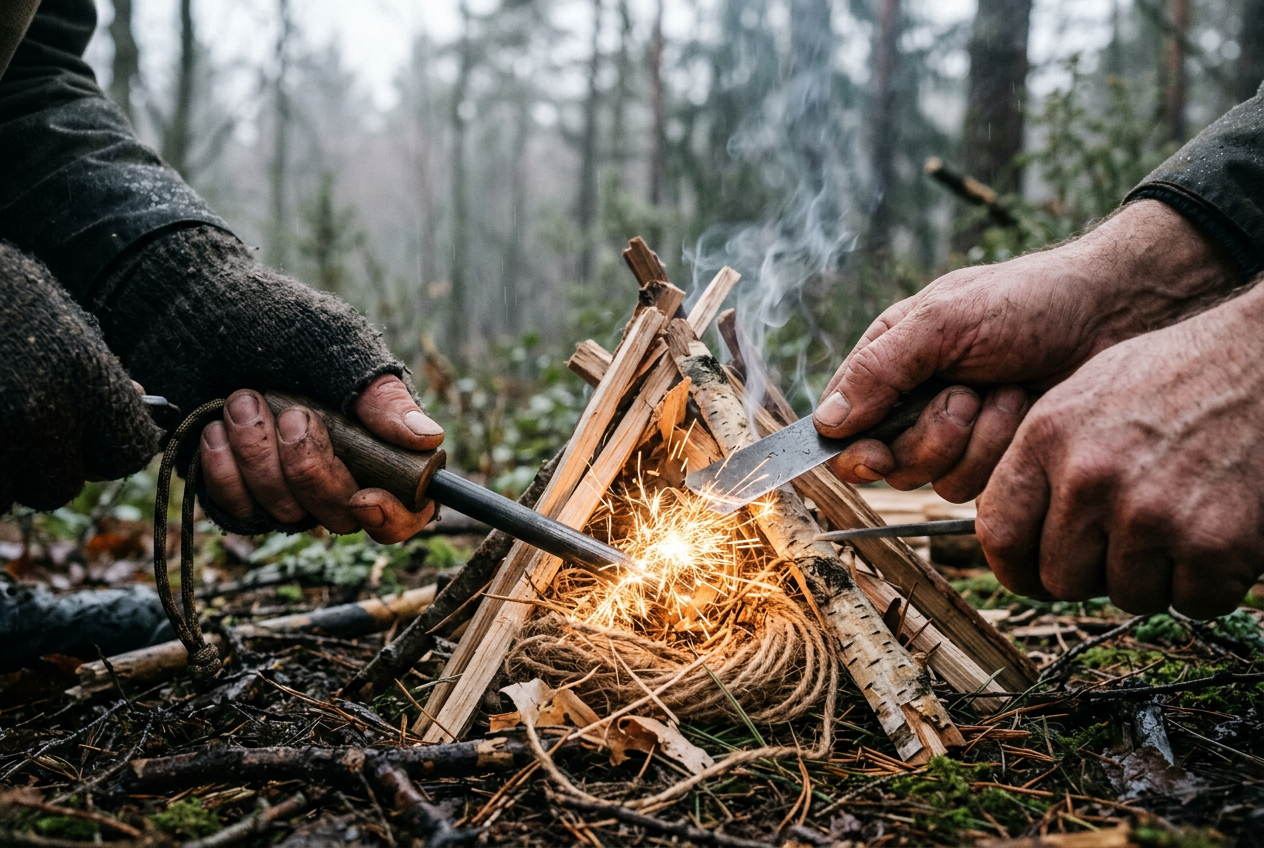
How to Start a Fire in Any Conditions: A Complete Guide (2026)
Picture this. The sun is going down. The air is getting cold. Your hands are shaking a little. You need a fire, and you need it now. Maybe you are camping deep in the woods. Maybe the power went out at home and the heat is gone. Or maybe you are just stuck somewhere you did not plan to be.
Fire is one of the oldest tools people use. It keeps you warm. It cooks your food. It boils water so you can drink it safely. It gives you light when the sun is gone. And it can lift your mood when things feel hard. That is why knowing how to start a fire is a core survival skill. It matters for camping, power outages, and real emergencies.
Here is the good news. Starting a fire is not magic. It is a skill you can learn. With the right steps and the right tools, almost anyone can do it.
This guide walks you through it all. You will learn how fire works. You will learn how to gather tinder, kindling, and fuel. You will compare tools like ferro rods, lighters, and matches. You will build fire lays that catch fast. And you will learn how to make fire even in rain, wind, and snow.
We start with easy conditions and work up to the hard ones. Let’s get you making fire with confidence.
- Carry at least two ignition sources, like a ferro rod and matches, so you always have a backup.
- A quality ferro rod throws sparks near 5,500 degrees F and works even when wet or windy.
- Build your fire in stages: tinder first, then small kindling, then larger fuel wood.
- Prep a dry tinder bundle in advance and keep it in a waterproof bag for bad weather.
- Practice starting a fire before you need to, so the skill is second nature in an emergency.



Reviewed by Ryan C., Priya K. & Marcus T. — contributors with hands-on preparedness experience. How we test
Getting ready for any fire starting situation starts with the right gear in your pack. Grab these tools now, then read on to see why each one earns its place.

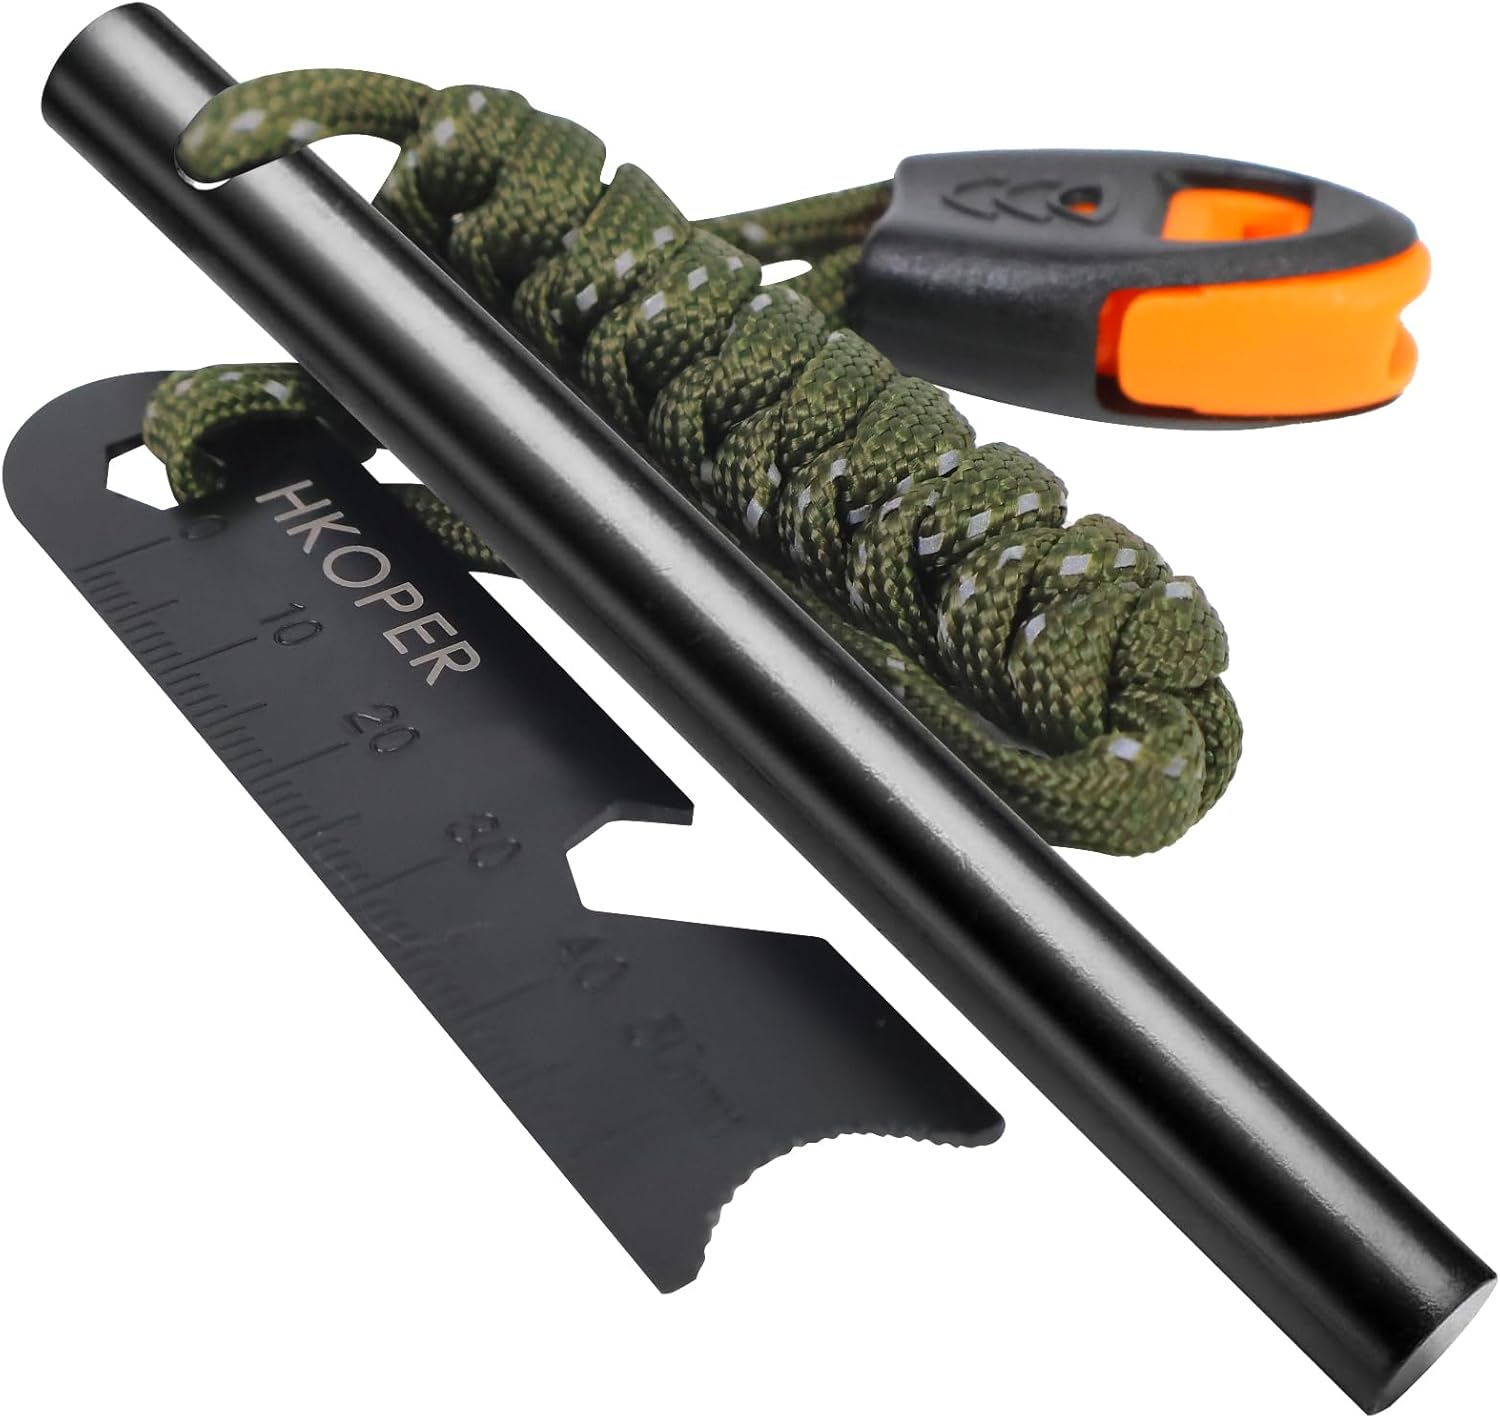
HKOPER Ferro Rod Kit
This all in one kit packs a 4 inch ferro rod, a multi tool scraper, paracord, and a whistle. It covers your fire and signaling needs in one small package.
Check Price on Amazon
Clwryviduu Ferro Rod Starter
A 4 inch magnesium ferro rod that lights in any weather and keeps making strong sparks over time. It gives you dependable ignition when conditions turn rough.
Check Price on Amazon
FERROFIRE Mini Ferro Rod
A small, lightweight rod that is great for teaching kids and scouts or slipping into a compact kit. It makes a solid backup starter you can carry anywhere.
Check Price on AmazonIn this guide
Why Trust This Guide?
This article was researched and reviewed by contributors with hands-on experience in emergency preparedness. They have tested gear, built real systems, and lived through situations where these skills actually mattered.
Understanding the Fire Triangle: Heat, Fuel, and Oxygen
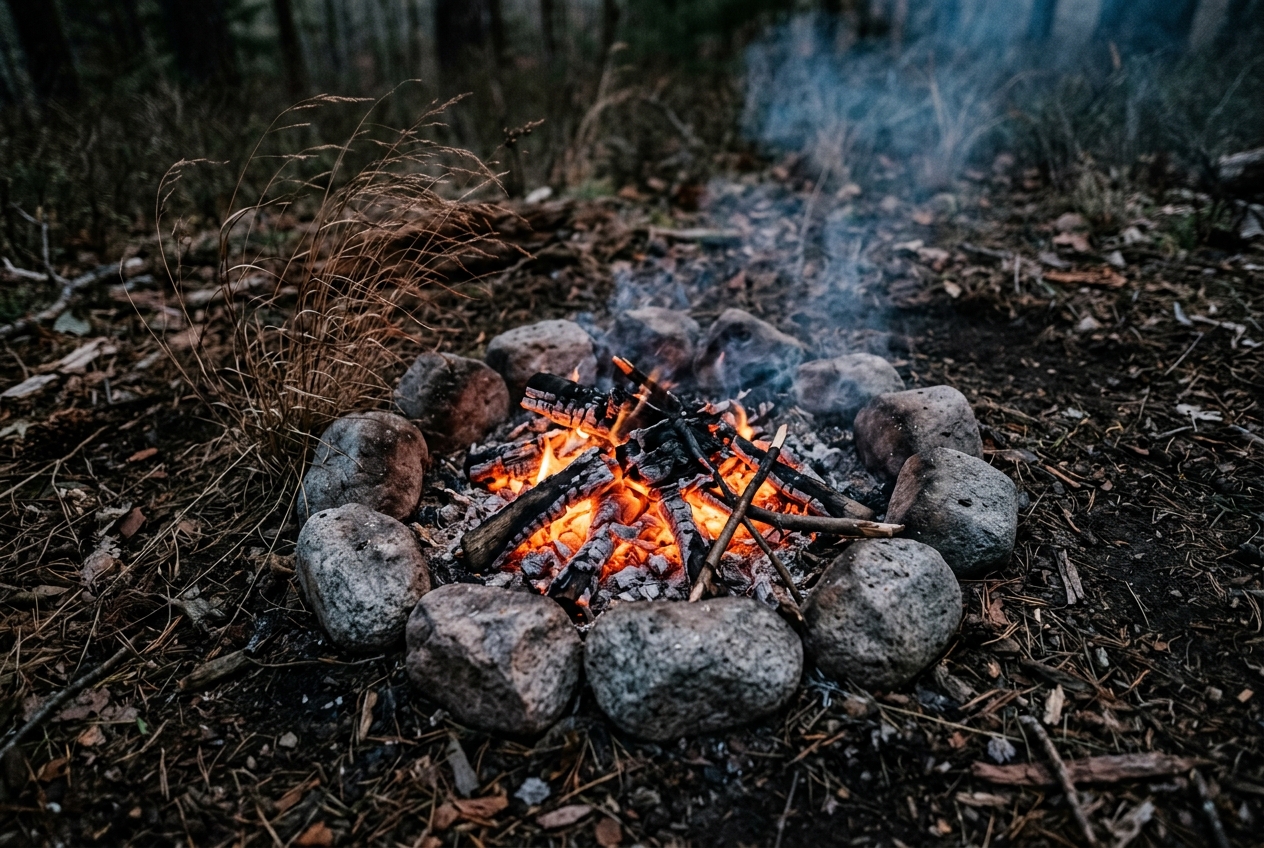
Every fire needs three things to burn. These are heat, fuel, and oxygen. Together they make what people call the fire triangle. If you take away any one of them, the fire dies. Learn this simple idea and you can fix almost any fire problem.
Heat
Heat is the spark or flame that gets things going. It also keeps the fire alive once it starts. A match, a lighter, or a spark from a ferro rod all give you heat. But that first bit of heat is not enough by itself. You need to grow it. Small flames need dry, fine material to catch. Then the fire makes its own heat and can burn bigger sticks.
Cold and wet steal heat fast. In rain or snow, your fire loses heat before it can grow. That is why a fire that lights easily at home can fail in bad weather.
Fuel
Fuel is the stuff that burns. But you cannot just toss a big log on a spark and hope. Fuel comes in three sizes. Tinder is the smallest. It catches a spark or flame right away. Kindling is a bit bigger. It burns from the tinder. Fuel wood is the largest. It gives you a long, hot fire.
You must go small to big. Skip a size and the fire goes out. Dry fuel is key. Wet wood is hard to light because water soaks up heat. You will learn how to find and prep good fuel later in this guide.
Oxygen
Oxygen is the air your fire breathes. Fire needs a steady flow of it. Pack your sticks too tight and air cannot move through. The fire chokes and dies. Leave too much space and the flames cannot jump from stick to stick.
A little airflow helps a lot. You can blow gently on the coals to feed them oxygen. This is why the way you stack your wood matters. Good fire lays leave gaps for air. You will see the teepee, log cabin, and lean-to builds later on.
How the Triangle Helps You Troubleshoot
Here is why this matters. When a fire will not start or keeps dying, one leg of the triangle is missing. Ask yourself three quick questions.
Is there enough heat? Maybe your tinder is too wet or your spark is too weak. Add dry tinder or use a stronger tool.
Is there enough fuel? Maybe you jumped from tinder to big logs. Add more kindling in the middle.
Is there enough oxygen? Maybe your wood is packed too tight. Open it up and let air flow.
In rain, wind, and snow, you will lean on this framework a lot. Weather attacks all three legs at once. It cools your heat, wets your fuel, and can blow out your flame. Once you know the triangle, you know exactly what to fix. Every technique in this guide builds on these three simple parts.
Gathering and Preparing Tinder, Kindling, and Fuel
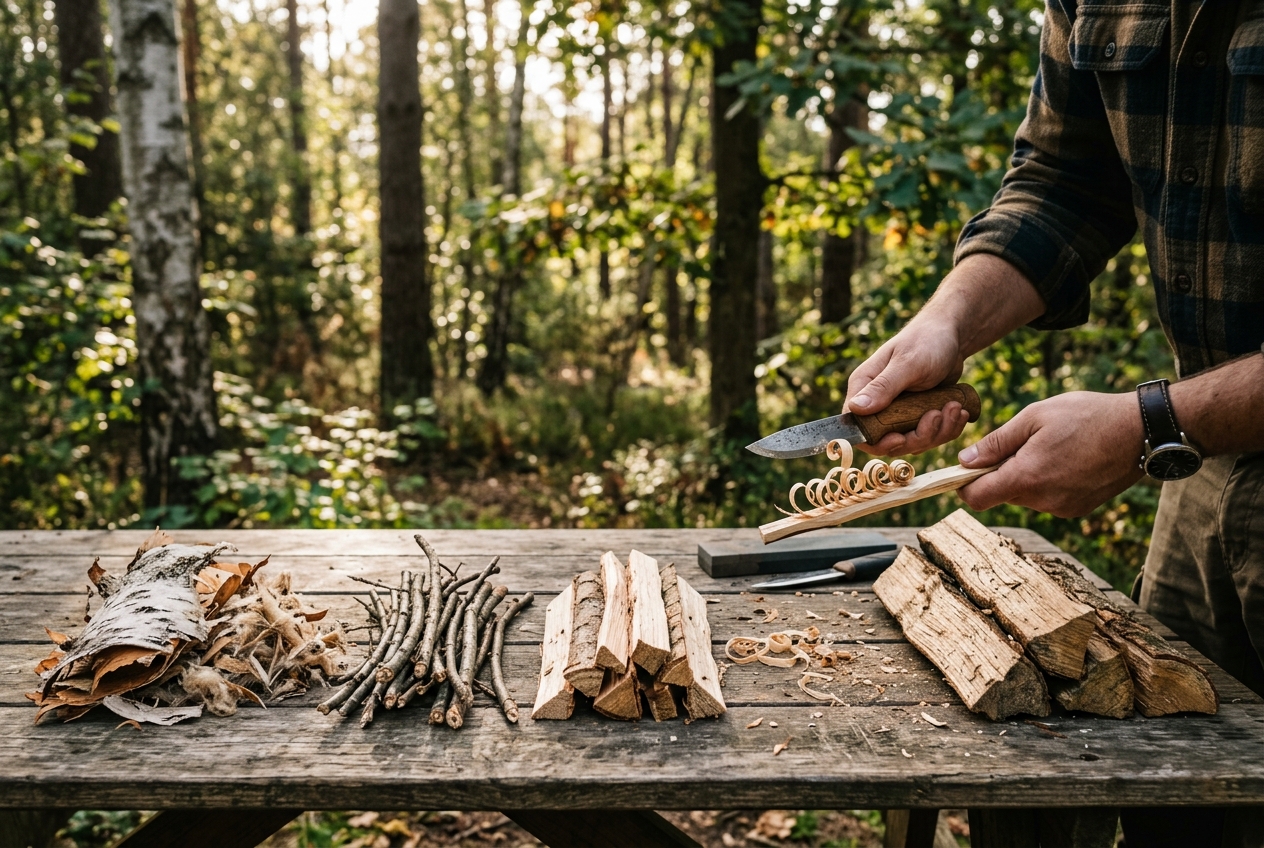
A good fire needs the right materials in the right order. You start small and work your way up. Trying to light a big log with a spark will not work. You need three kinds of material: tinder, kindling, and fuel. Gather all of them before you strike a spark.
Tinder: The First Thing to Catch
Tinder is the smallest and driest material. It catches fire fast from a spark or a small flame. Good tinder is thin, dry, and fluffy. It has lots of surface area for the flame to grab.
Here are common tinder options:
- Dry grass and dead leaves
- Birch bark, which burns even when damp
- Small twigs no thicker than a match
- Cotton balls, best when rubbed with petroleum jelly
- Dryer lint from home
- Wood shavings and feather sticks
Gather a handful about the size of a baseball. You want more than you think you need.
Kindling: The Bridge to Bigger Wood
Kindling is the next size up. These are sticks from the width of a pencil to the width of your thumb. Kindling catches from the burning tinder and makes a stronger flame. Dead branches still attached to trees are often the driest. Break a stick to test it. Dry wood snaps with a clean crack. Wet wood bends and does not break.
Collect two big handfuls of kindling in a few sizes. Start with pencil-thin pieces and move up to thumb-thick pieces.
Fuel: The Wood That Keeps It Going
Fuel wood is your main burning material. These are pieces from the width of your wrist up to a split log. Fuel wood makes the long-lasting heat you want. Add it only after your kindling is burning well. Adding big wood too soon will smother the flame.
Finding Dry Material in Wet Conditions
Wet weather makes fire harder, but not impossible. The trick is to look for dry material in hidden spots.
- Look under logs, rocks, and thick trees where rain does not reach.
- Snap dead branches off standing trees. These stay drier than wood on the ground.
- Split larger wood open. The inside is almost always dry even when the outside is wet.
- Peel bark off to reach the dry core.
A ferro rod scraper or a knife helps you get to dry inner wood. Some kits, like the Hkoper 6-in-1 fire starter kit, include a scraper tool for this job.
Making Feather Sticks
A feather stick is a great trick when everything is damp. Take a dry stick and shave thin curls along one end with your knife. Do not cut all the way off. Leave the curls attached so they fan out. These thin curls catch a spark fast and burn long enough to light your kindling. Make two or three feather sticks for a reliable start.
Fire-Starting Tools: Ferro Rods, Lighters, and Matches
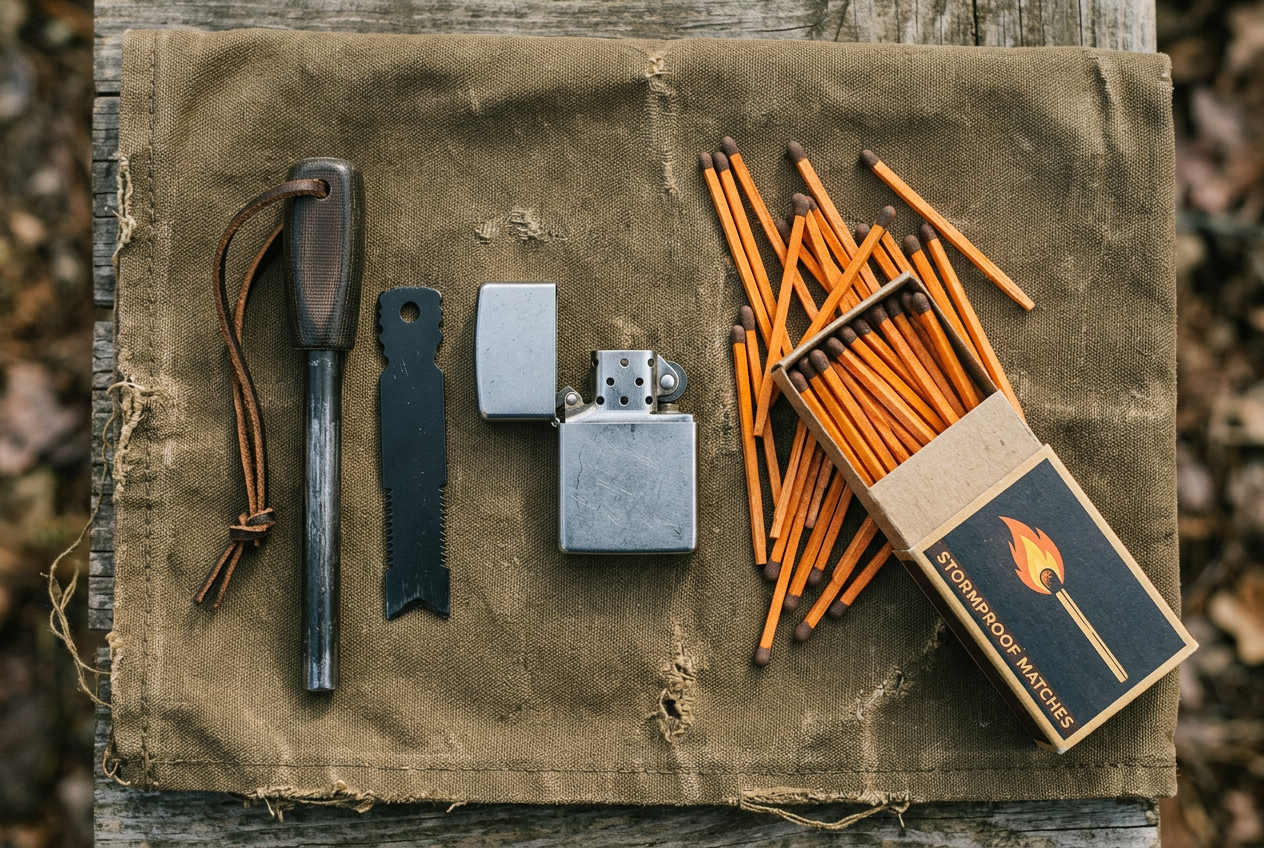
Your fire starts with a spark or a flame. The tool you pick matters. Some tools work great in dry weather but fail when wet. Others keep working in rain, wind, and snow. Let’s look at the main types and how each one performs.
Ferro Rods
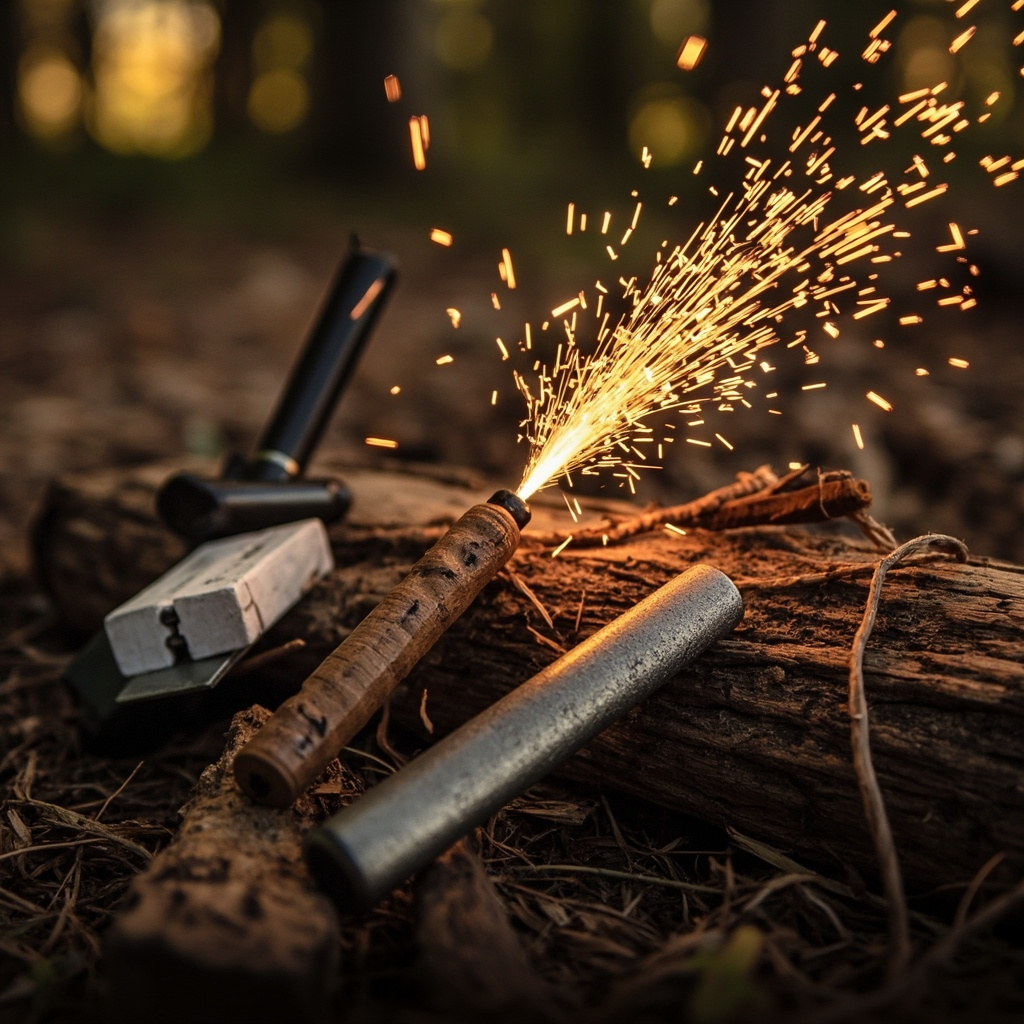
A ferro rod is a metal rod that throws hot sparks when you scrape it. Those sparks reach about 5,500°F. That is hot enough to light good tinder even in bad weather. Ferro rods do not run out of fuel like lighters. A single rod can give you thousands of strikes. They also work when wet, which is why many people trust them for backup.
The downside is skill. Ferro rods take practice. You need good tinder and steady hands. If you are new, start slow and learn the motion before you rely on one.
A solid all-weather choice is a 4-inch rod with a striker and paracord. This one throws strong sparks and holds up in rough conditions.

If you want more built-in tools, look for a kit with a multi-tool scraper. The scraper doubles as a striker, a ruler, and a bottle opener. It also comes with a whistle and paracord, so you get more use from one small package.
Kids and beginners do better with a smaller rod. A 3-inch rod fits smaller hands and makes learning easier. This mini rod scrapes into tinder curls that light fast, so young scouts can practice under adult watch.

Lighters
A lighter gives you an instant flame. That makes it the easiest tool to use. A butane lighter works in seconds. The problem is wind and cold. A plain lighter blows out easily. Look for a windproof or torch-style lighter if you want one that fights the wind. Also, lighters run out of fuel and can fail when soaked. Keep one dry as a fast option, but do not make it your only tool.
Matches
Matches are simple and light. Regular matches fail in rain and wind. Stormproof matches solve that. They burn for 5 to 10 seconds and stay lit in wind. Store them in a waterproof tube to keep them dry. Some kits pair matches with magnesium shavings and a ferro rod. The shavings help light damp wood, which is a big help after rain.

Why Carry More Than One
Never trust a single tool. Lighters run dry. Matches get used up. Ferro rods take skill. Carry at least two ways to make fire. Pick one easy tool, like a lighter or matches, and one rugged backup, like a ferro rod. That mix keeps you covered in almost any condition.
How to Use a Ferro Rod Step by Step
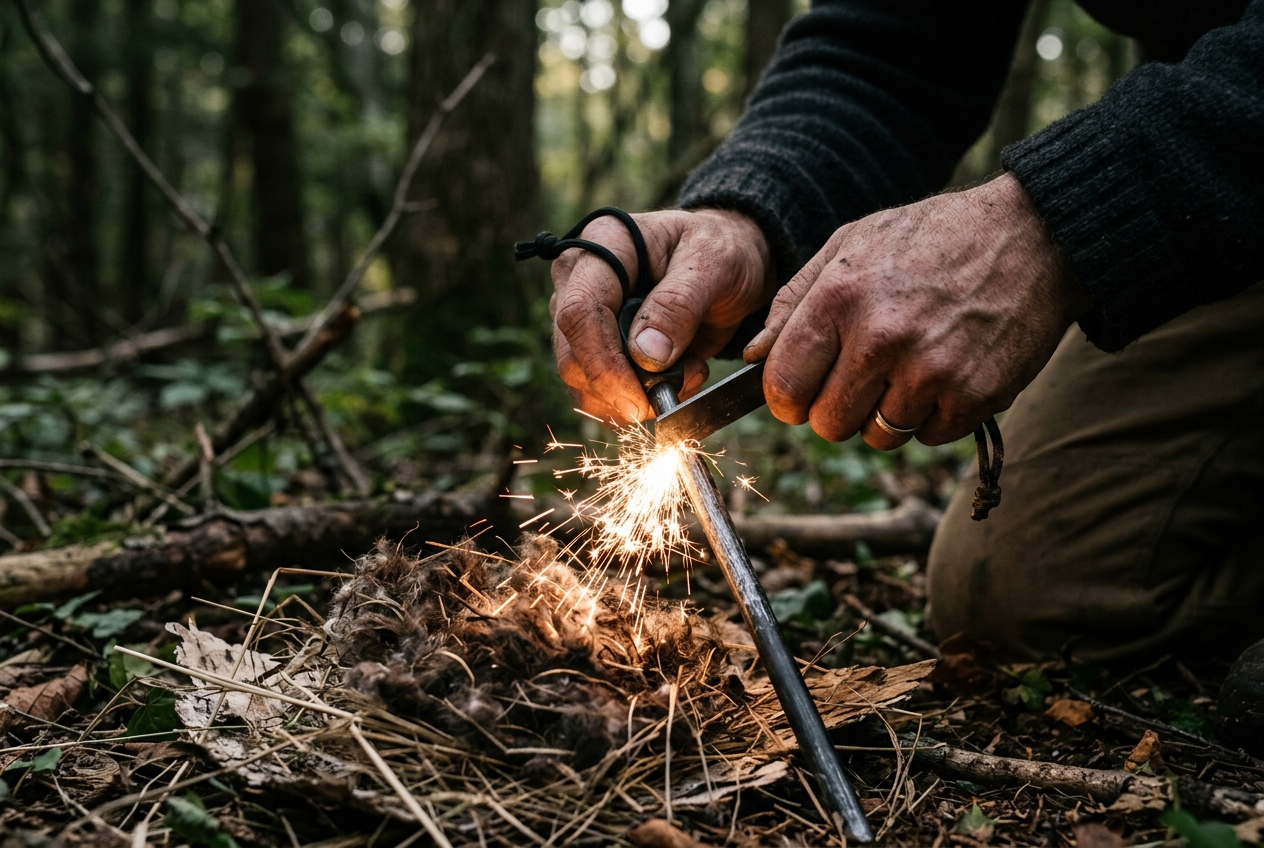
A ferro rod throws hot sparks when you scrape it with a hard edge. Those sparks can reach 3,000 degrees. That is more than enough to light good tinder. But the trick is in the technique. Many beginners scrape and scrape and never get a flame. Let’s fix that.
Set Up Your Tinder First
Never grab your ferro rod until your tinder is ready. Sparks die fast. You want them to land on dry, fluffy tinder right away. Place your tinder in the middle of your fire lay. Get down close to it so your sparks have a short trip.
Hold the Rod and Striker the Right Way
Hold the ferro rod in one hand. Point the tip right at your tinder, just an inch or two away. Hold the striker in your other hand.
Now here is the part that trips people up. Set the striker against the rod at about a 45 degree angle. Do not lay it flat. Do not stand it straight up. A 45 degree edge digs off the most metal, and more metal means more sparks.
Scrape With Pressure, Not Speed
Press the striker down hard into the rod. Firm pressure matters more than fast motion. Push the striker down the length of the rod in one strong, steady stroke. You should see a big shower of sparks fly right onto your tinder.
A common mistake is a light, quick flick. That gives you weak sparks that fizzle out. Slow down. Press harder. One good scrape beats ten weak ones.
Another trick works even better. Hold the striker still and pull the rod back instead. This keeps your striker in place over the tinder so you do not knock the tinder pile apart.
Pick a Rod and Striker That Work Together
Your striker must be harder than the rod. A soft blade or a cheap striker will not bite into the metal. That is why so many beginners fail. They use a dull knife spine and get almost no sparks.
A matched kit takes the guesswork out. This ferro rod comes with a hard steel striker made for the job. The paracord handle gives you a solid grip in wet or cold hands.
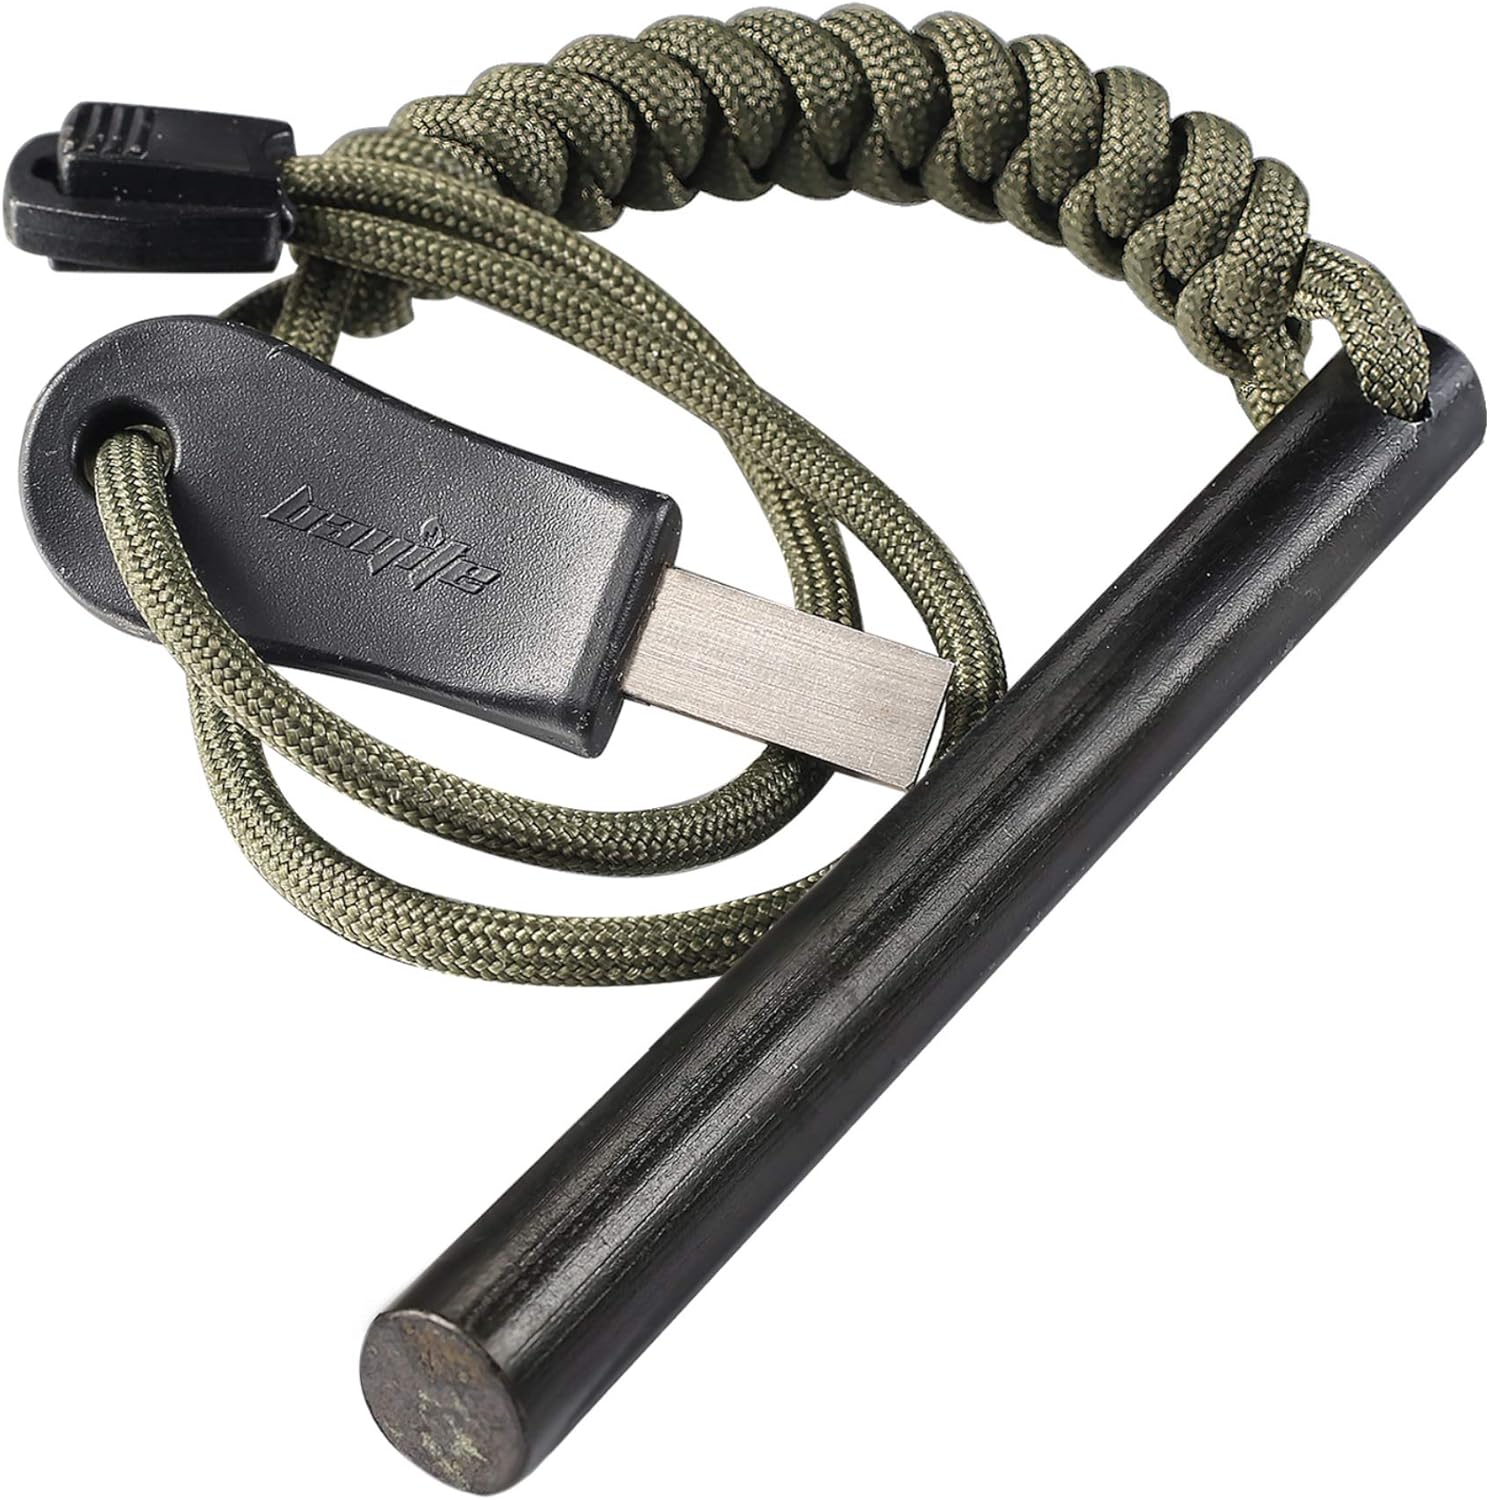
If you want backups, a multi pack is smart. You can stash one in your pack, one in your car, and one in your kitchen drawer.

Common Mistakes to Avoid
- Scraping too fast with no pressure.
- Holding the rod too far from your tinder.
- Using wet or coarse tinder that will not catch.
- Using a soft or dull striker.
Practice a few times before you need it. Once you feel a strong shower of sparks hit your tinder, you will know you have it right.
Building a Fire Lay: Teepee, Log Cabin, and Lean-To
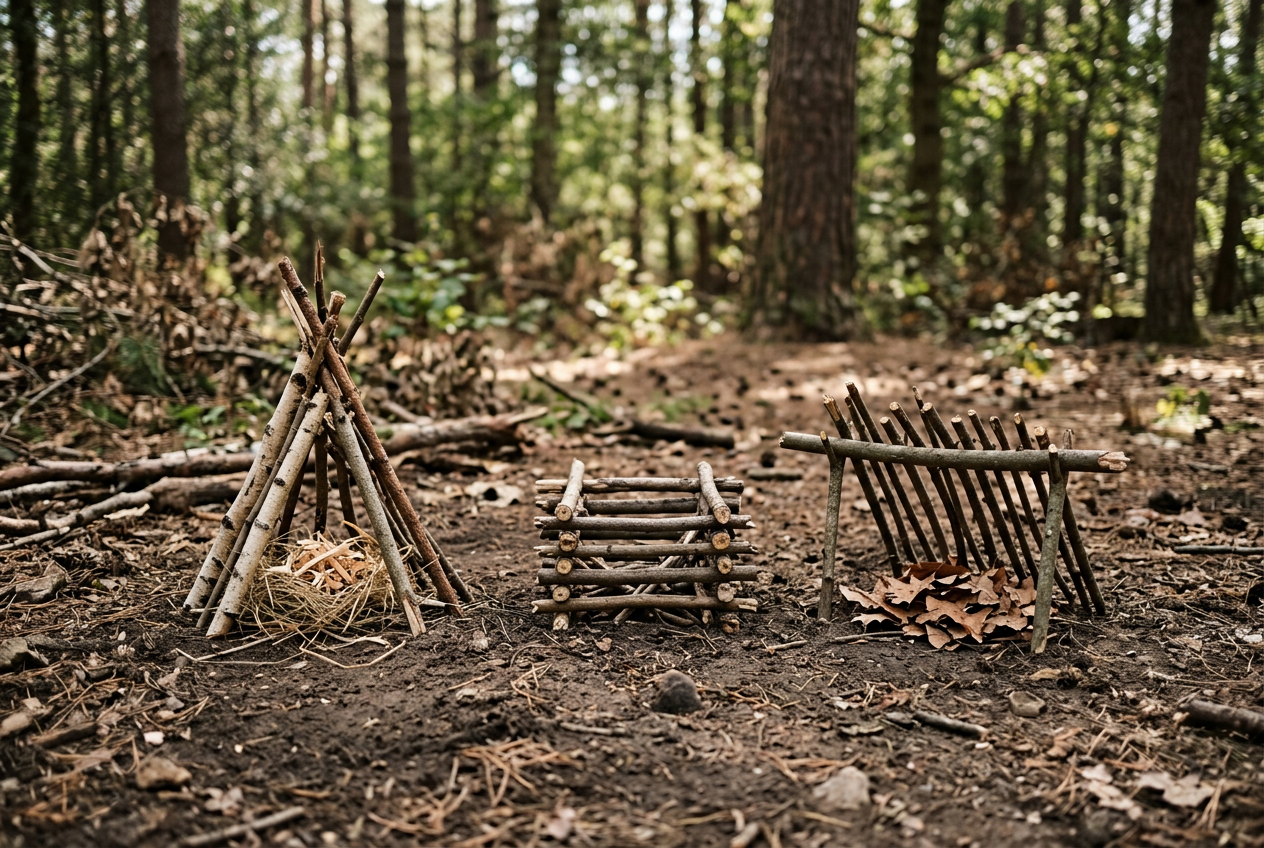
A fire lay is the way you stack your fuel before you light it. The right lay helps a small flame grow into a big, steady fire. It also controls airflow, which matters a lot in wind or rain. Below are three lays that work well. Each one has a best use.
Before you build any lay, gather your tinder, kindling, and small fuel wood. Have it all within reach. Once the flame catches, you will not have time to search for more wood.
The Teepee
The teepee is the classic starter lay. It burns hot and fast. This makes it great for getting a fire going quickly.
Start with a small pile of tinder in the center. Then lean kindling sticks around the tinder like a cone or tent. Leave a small gap on one side so you can reach in and light the tinder. Keep adding bigger sticks in the same cone shape.
As the teepee burns, the sticks fall inward and feed the flame. The tall shape pulls air up through the middle. This gives you a strong, hot fire. The teepee is a good choice when your wood is a bit damp, since the heat rises fast and dries the fuel above.
The Log Cabin
The log cabin burns slower and lasts longer. It is a good choice for cooking or for a fire you want to sit by.
Start by making a small teepee of tinder and kindling in the center. Then place two thicker sticks on opposite sides, like the base of a square. Lay two more sticks on top, crossing the first two. Keep stacking sticks in this square pattern, like a log cabin wall.
The open sides let in plenty of air. The square shape holds heat well and gives you a flat bed of coals. This lay is stable, so it will not tip over easily.
The Lean-To
The lean-to is your best friend in wind. It uses one big piece of wood as a shield.
Place a thick log or a large branch on the ground. Put your tinder bundle right against the downwind side of the log. Then lean kindling sticks against the log, over the tinder, like a slanted roof. The big log blocks the wind and protects the young flame.
This lay works great when the wind keeps blowing out your fire. It also helps in light rain, since the leaning sticks give the tinder some cover.
Managing Airflow
Fire needs air to grow. No matter which lay you pick, do not pack the wood too tight. Leave small gaps so oxygen can flow in.
If your fire is weak, blow gently at the base. This adds more air and feeds the coals. In wet conditions, keep your fuel off the damp ground. Lay down a base of dry sticks or bark first.
Starting a Fire in Rain, Wind, and Snow
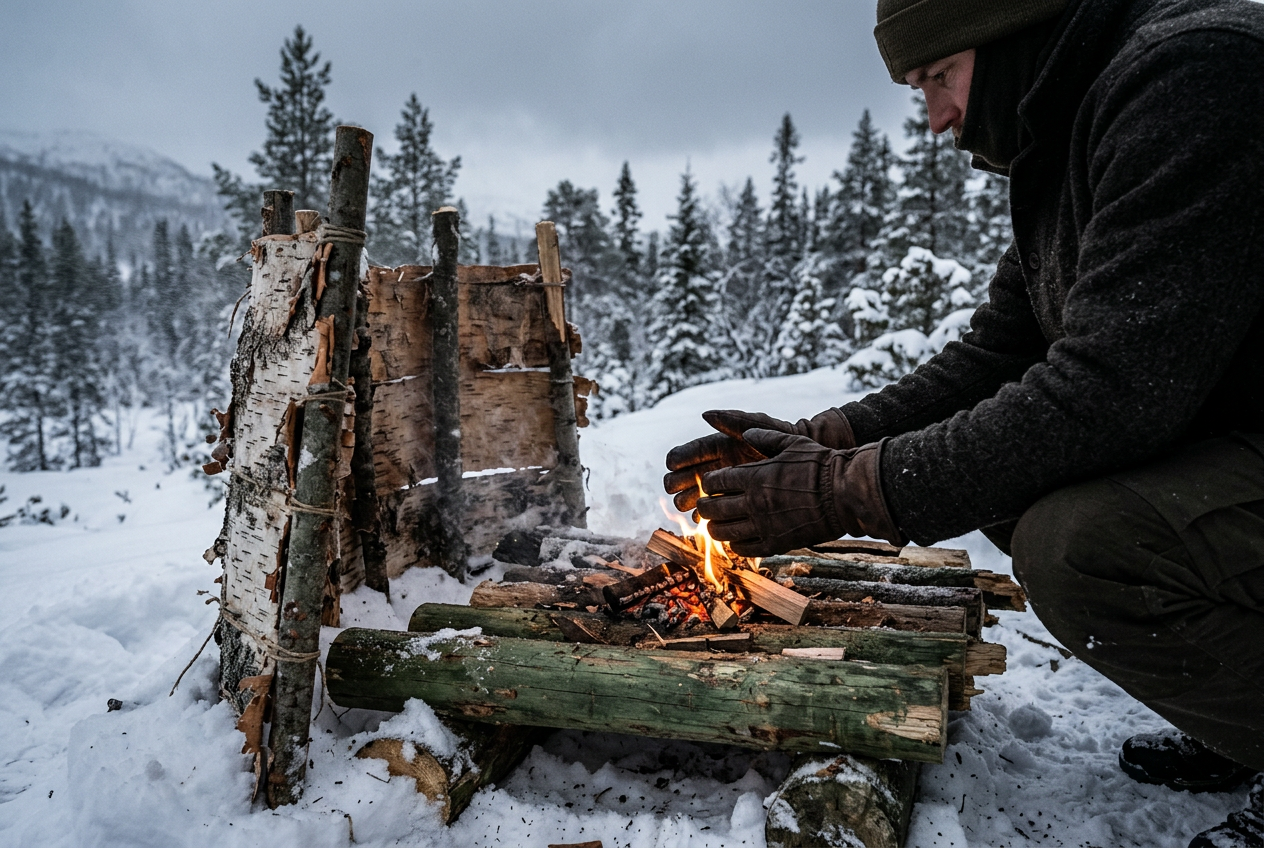
Bad weather makes fire harder, but not impossible. You just need the right steps. The key is to keep your fire dry, block the wind, and protect that first small flame until it grows.
Build a Dry Platform
Never build a fire straight on wet ground or snow. The cold and water will kill it fast. Lay down a base first. Use dry bark, green logs side by side, or flat rocks. This platform keeps your tinder off the wet surface. On deep snow, a thick layer of logs stops your fire from sinking as the snow melts.
Block the Wind
Wind can be your friend or your enemy. A little wind feeds oxygen to your fire. Too much wind blows out your flame and scatters your heat. Build a windbreak on the side the wind is coming from. You can use a log, a rock pile, a snow wall, or your own body. Face the open side of your fire lay away from the wind. A lean-to fire lay works well here because it shields the flame.
Protect Your Tinder and Flame
Wet tinder will not catch. Keep a supply of dry tinder in a sealed bag or a pocket close to your body. Cotton balls with petroleum jelly are cheap and work in rain. When you light the fire, cup your hands around the flame. Add small kindling slowly. Do not dump big wood on a young flame or you will smother it.
Look for dry fuel even in a storm. The inside of dead branches is often dry. Split larger pieces to reach the dry core. Standing dead wood stays drier than wood on the ground.
Use Waterproof and Windproof Tools
Wet matches and cheap lighters fail in bad weather. This is where the right tool gives you a real edge. A waterproof, windproof lighter keeps working when rain and wind knock out everything else.

The LcFun set gives you two lighters. The dual arc plasma lighter has no open flame, so wind will not blow it out. The butane torch lighter puts out a strong jet flame for thicker kindling. Both have an IP56 waterproof rating and a sealed cover, so they handle rain and snow. The arc lighter charges by USB and lasts up to 300 uses per charge.

This two pack works the same way. You get one USB arc lighter and one butane torch lighter, both sealed against water and wind. Carry one on your body and pack a backup. Having two tools means you are not stuck if one runs low.
Cold Weather Tips
Cold drains batteries and stiffens your hands. Keep your lighter and fuel in an inside pocket so body heat keeps them warm. Warm your hands before you work with small tinder. Cold fingers drop things and move slowly. Set up all your fuel before you strike a spark, since fumbling in the cold wastes time and heat.
Fire Starter Comparison Table
You have read about ferro rods, lighters, and matches. Now let’s put them side by side. This table helps you pick the right tool fast. Look at the type, how well it handles bad weather, how easy it is to use, and what job it does best.
How to Read This Table
No single tool wins every time. Smart people carry more than one. A lighter for speed. A ferro rod for backup. That way you always have a way to make fire.
Best Picks for Beginners
If you are new, start with a lighter. It is fast and simple. The LcFun dual arc lighter gives you two tools in one pack. You get an electric arc lighter and a butane torch lighter. The arc works with no fuel. The torch burns thicker sticks. Both resist wind and water. The similar 2-pack torch and arc set works the same way and holds a charge for about a week.
Stormproof matches are also great for beginners. They light even in rain and wind. The eGreen fire starter kit adds magnesium shavings. Those shavings help you light damp wood. That is a big help on wet days.
Teaching a child? A small rod fits little hands. The mini ferro rod is made for scouts and young learners.
Best Picks for Experienced Users
A ferro rod is the top choice for skilled people. It works soaking wet. It lasts for thousands of strikes. It never runs out of fuel or battery. The bayite 4-inch ferro rod comes with a tool-grade steel striker and paracord grip. That striker throws a strong shower of sparks.
Want a full kit? The Hkoper 6-in-1 fire steel adds a multi-tool scraper, whistle, and paracord. The Clwryviduu magnesium fire starter pairs a ferro rod with magnesium for wet fuel. And the FOSTAR 6-pack of ferro rods lets you stash spares in every bag.
Match your tool to your trip. Easy trips call for a lighter. Rough trips call for a ferro rod. Pack both and you are ready for anything.
Fire-Starting FAQ
What is the easiest fire-starting method for beginners?
A lighter is the easiest tool to start with. A windproof lighter works well because it keeps burning in a breeze. A dual arc plasma lighter is a good pick. It has no open flame, so wind does not blow it out. Once you feel ready, practice with a ferro rod at home. That way you learn a backup skill before you need it.
How do you keep a fire going in the rain?
Start by picking dry fuel. Look under logs, inside dead standing trees, and under thick tree cover. Split larger wood open. The inside is often dry even when the outside is wet. Build your fire on a raised base of dry sticks or bark. This keeps it off the wet ground. Keep a supply of dry fuel close by and add it slowly. A big pile of wet wood dumped on a small flame will smother it.
How do you start a fire without matches?
A ferro rod is the top choice. It throws sparks at 5,500°F even when wet. Scrape it fast onto fine, dry tinder. A kit like the Hkoper ferro rod comes with a scraper and paracord. A lighter also works with no matches. In a pinch, you can use a magnifying lens and strong sun, but that only works in dry, bright weather.
Can you really start a fire in wet weather?
Yes. This is a common myth to clear up. Wet conditions make fire harder, not impossible. The trick is dry tinder. Carry your own tinder in a waterproof bag. Cotton balls with petroleum jelly work well. Magnesium shavings light fast and burn hot. A kit like the eGreen kit has stormproof matches and magnesium shavings for damp wood. With the right prep, wet weather is just a slower job.
Are there fire bans I need to know about?
Yes. Many parks and forests set fire bans during dry seasons. Check local rules before you go. Look at the land agency website or call the ranger station. Fines can be steep. During a ban, a small camp stove is often still allowed even when open fires are not. Always know the rule for the exact spot you visit.
What safety steps should I follow?
Clear a wide space around your fire. Remove leaves, grass, and low branches. Keep water or dirt close by to put it out. Never leave a fire alone. Before you leave or sleep, douse it, stir the ashes, and douse it again. The ashes should feel cool to the touch. Keep your fire small. A small fire is easier to control and easier to put out.
How big should my first fire be?
Start small. A fire the size of your hand is enough to warm up and to grow bigger. Add fuel slowly. It is much easier to grow a small fire than to shrink a large one.
Fire-Starting Action Checklist
This checklist pulls together the whole guide into simple steps. Use it as a quick reference before your next trip. Print it out or save it to your phone.
Before You Build
- Pick a safe spot. Clear the ground down to bare dirt or use an existing fire ring.
- Keep the fire away from tents, low branches, and dry grass.
- Have water or dirt nearby to put the fire out.
- Check the weather. In rain, wind, or snow, plan for a shelter over your fire spot.
- Gather more fuel than you think you need. Cold or wet nights burn through wood fast.
Prep Your Materials
- Collect tinder first. Dry grass, birch bark, cotton balls, or fine wood shavings all work.
- Gather kindling. These are small sticks about the size of a pencil.
- Gather fuel wood. These are larger sticks and split logs.
- Keep the three piles separate so you can grab each one fast.
- Make a small feather stick or scrape shavings if your wood is damp.
Build and Light
- Lay down a dry base. Use bark or dry sticks so your tinder stays off wet ground.
- Place your tinder in the middle.
- Build your fire lay around it. A teepee lights fast. A log cabin burns steady. A lean-to blocks wind.
- Light the tinder. Use a lighter, match, or ferro rod.
- With a ferro rod, hold it close to the tinder. Pull the striker back or push the rod forward to shower sparks down.
- Feed small kindling once the tinder catches. Add bigger fuel as the flames grow.
- Leave space between the wood so air can move through.
Gear to Keep in Your Pack
Carry more than one fire tool. If one fails, you have a backup.
- A ferro rod for all weather sparks. The Hkoper 6-in-1 ferro rod kit adds a scraper and whistle.
- A waterproof lighter for fast, easy fires. The LcFun dual arc and butane lighter set works in rain and wind.
- Stormproof matches as a third option. The eGreen match and ferro rod kit also packs magnesium shavings.
- Dry tinder in a small bag. Cotton balls or a fire starter cube work well.
Put It Out and Pack It Up
- Let the wood burn down to ash if you can.
- Pour water on the fire. Stir the ashes with a stick.
- Pour more water. Feel for heat with your hand near the ashes, not touching.
- Repeat until nothing is warm. A fire is not out until it is cold.
- Scatter cold ashes and hide your fire spot if you built one.
- Pack out any trash. Leave the site clean for the next person.
Follow these steps every time and you will build safe, reliable fires.
Conclusion and Next Steps
You now know how to start a fire in almost any condition. Let’s go over the main points one more time. A fire needs three things to burn. It needs heat, fuel, and oxygen. This is the fire triangle. If you take away any one of those three, the fire goes out. Keep this in mind every time you build a fire.
You also learned how to gather good tinder, kindling, and fuel. Small stuff first, then bigger pieces. Dry material catches fast. Damp wood needs more help. You saw how a ferro rod throws hot sparks, even when it is wet. You learned how to build a teepee, a log cabin, and a lean-to. And you learned how to protect a flame from rain, wind, and snow.
Now here is the most important step. Practice before you need it.
Practice Now, Not Later
Do not wait for a real emergency to try these skills. A cold, wet night in the woods is a bad time to learn. Practice in your backyard first. Try lighting a fire with a ferro rod on a dry day. Then try it when the wood is damp. Time yourself. See what works and what does not. Skills get rusty. So practice a few times each season.
A ferro rod takes some getting used to. Beginners often struggle at first. A smaller rod can help you learn the motion. The mini ferro rod is made for kids and new users. It fits smaller hands and still throws hot sparks. It is a good tool for teaching or for your own practice.
Build a Kit With Backups
Never rely on just one way to start a fire. Tools break. Lighters run out of fuel. Matches get wet. Smart people carry more than one ignition source. This is called redundancy.
A good kit has a ferro rod, a lighter, and waterproof matches. That way, if one fails, you have two more. A solid ferro rod like the Hkoper 6-in-1 kit gives you a spark source that works in any weather. Add a waterproof lighter for quick, easy fires on good days.
Keep your kit in your pack at all times. Do not take it out and forget to put it back. A fire kit only helps if it is with you.
Keep Learning
Fire is just one part of being ready. Once you feel good about fire-starting, learn more skills. Good next topics include water purification, shelter building, and first aid. Each skill makes you more able to handle a tough spot.
Start small. Master one skill at a time. Fire is a great place to begin. It keeps you warm, cooks your food, and lifts your spirits. Practice it often, build a kit with backups, and you will be ready when it counts.